Stampin Up Masculine Card – Stacks-of-Millions

Do you need a Stampin Up Masculine Card for the special male in your life?  I have one for you today that features the Stampin Up Stacks-of-Millions Digital Collection Disc (130675) for My Digital Studio (130646).  This Digital Collection Disc is on page 39 of the Stampin Up 2013 Spring Catalog.

Stampin Up Masculine Card - Stacks-of-Millions

If you like the Stampin Up Sunshine and Sprinkles Designer Series Paper (126922), you’ll like the Stampin Up Stacks-of-Millions Digital Collection Disc (130675).  This disc is available as Hostess Dollars for only $9.00 (after meeting purchasing requirements to qualify for Hostess Dollars).  The umbrella design on the disc is slightly different from that in the Sunshine and Sprinkles DSP.  Regardless, it provides an umbrella design, which was very enticing to me.

Stampin Up Masculine Cards

 SUPPLIES USED FOR THIS STAMPIN UP MASCULINE CARD:

Paper:  Whisper White Card Stock, More Mustard Card Stock, and Basic Gray Card Stock

Accessories:  My Digital Studio (130646), Stampin Up Stacks-of-Millions Digital Collection Disc (130675), and Bitty Banners Framelits (129267)

 Stampin Up Masculine Cards

Stampin Up Masculine Cards


Here are the latest digital downloads for My Digital Studio:

Hello There Kit -- Digital Download
Hello There Kit – Digital Download

Price: $9.95
Label This Garage Designer Template -- Digital Download
Label This Garage Designer Template – Digital Download

Price: $4.95
Label This Playroom Designer Template  -- Digital Download
Label This Playroom Designer Template – Digital Download

Price: $3.95
Serene Silhouettes  -- Digital Download
Serene Silhouettes – Digital Download

Price: $3.95
Think Back Photobook Templates -- Digital Download
Think Back Photobook Templates – Digital Download

Price: $19.95

 Stamping With Guneaux Designs

 God’s Blessings!
Stamping With Guneaux Designs
by
Beverly Polen

  Stampin Up Masculine Card

STAMPIN UP MASCULINE CARD

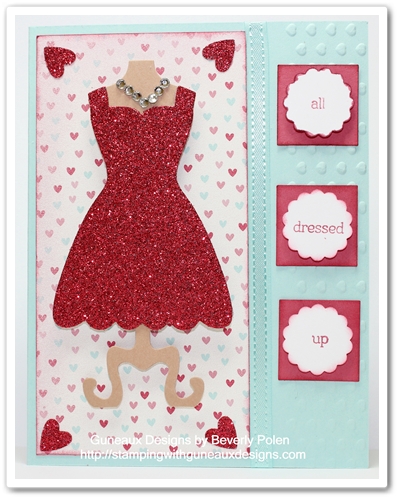
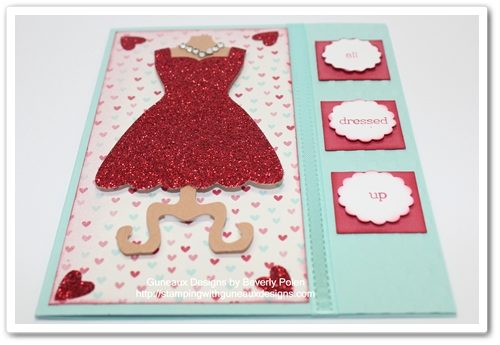
Stampin Up All Dressed Up & Dress Up Framelits

The Stampin Up All Dressed Up stamp set and the Dress Up Framelits take me back to my childhood when I played with paper dolls.  It was such fun to dress and re-dress the dolls with their paper dresses.  That fun feeling comes back when using this stamp set and framelits.

The dress on my card share today reminds me of times when I would get all dressed up for Valentine’s Day and a special dinner with a special someone.  Those were the days (lol).

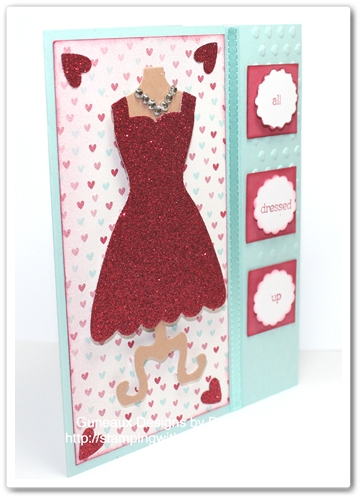
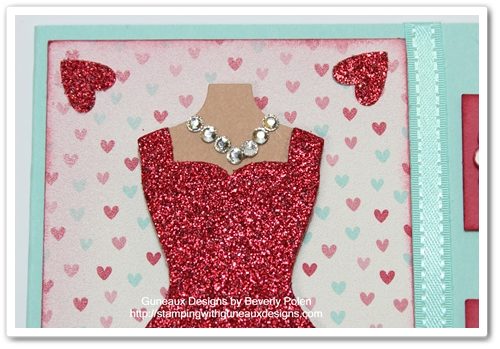
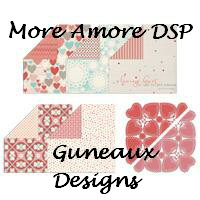
The beautiful Stampin Up More Amore Designer Series Paper was used for the first layer beneath the Red Glimmer Paper dress that drapes the dress form cutout.  A sparkling diamond necklace (just kidding – it’s a rhinestone necklace) rests upon the neck of the dress form.  Can you imagine how gorgeous you would look wearing this dress while sporting a fabulous diamond necklace?  (Imagination running wild!)

Here’s a picture of a closeup of the gorgeous necklace:

The Sale-a-bration Pool Party Sycamore Street 1/4″ Ribbon separates the dress from the “All” “Dressed” “Up” sentiment.  The tiny 7/8″ Scallop Circle Punch was used to cut out scallop circles on which to stamp the sentiment, and the circles rest upon 1″ squares that were cut out with the 1″ Square Punch.


SUPPLIES USED FOR THE STAMPIN UP ALL DRESSED UP CARD:

Stamps:  Stampin Up All Dressed Up (129174 – c )

Paper:  Stampin Up More Amore DSP (129309), Red Glimmer Paper, Pool Party Card Stock, Primrose Petals Card Stock, and Whisper White Card Stock

Ink:  Primrose Petals Classic Ink

Accessories:  Dress Up Framelits (130101), 7/8″ Scallop Circle Punch (129404), 1″ Square Punch (124094), and Pool Party Sycamore Street Ribbon & Button Pack (130812 – Sale-a-bration item)

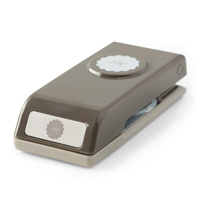
7/8" Scallop Circle PunchStampin' Up! Punch_1


 God’s Blessings!

Stamping With Guneaux Designs
by
Beverly Polen

STAMPIN UP ALL DRESSED UP

Stampin Up Secret Garden & Sycamore Street DSP

The largest flower in the Stampin Up Secret Garden Stamp Set is beautiful!  I’m not sure what type of flower it is so I made it whatever I wanted it to be (lol).  It is the feature on today’s card share, as well and the Stampin Up Sycamore Sycamore Street DSP.

Stampin Up Secret Garden

I really like the colors Pool Party and Calypso Coral together.  I know that the design colors from the Stampin Up Sycamore Street DSP that I used are actually Pool Party and Tangerine Tango.  However, the Tangerine Tango in the design is not dominate, so I used Calypso Coral. This DSP is part of Stampin Up’s Sale-a-bration, and you know what that means!  When you purchase $50 in Stampin Up products, you can receive the DSP for FREE.  We all like FREE, don’t we?

Here is a closeup of the flower from the Stampin Up Secret Garden that I colored with various alcohol-based orange inks.

Stampin Up Secret GardenThe following picture is a closeup of the new Stampin Up Designer Builder Brads that I used.  I punched out two butterflies with the Spring Catalog’s Bitty Butterfly Punch  and adhered them to the center of the brads and placed epoxy bubbles on top (the epoxy bubbles come with the brads).

 Stampin Up Secret Garden

I used the Stampin Up Ovals Collection Framelits to cut ovals from Pool Party and Calypso Coral Card Stock and attached the flower and brads.  The sentiment, “Just Because”, is from the Sale-a-bration Vintage Verses Stamp Set (another FREE product when purchasing $50 in products).Stampin Up Secret Garden

Stampin Up Secret Garden

SUPPLIES USED FOR THE CARD:

Stamps:  Stampin Up Secret Garden (129144 – c) and Vintage Verses (129633 – c -Sale-a-bration item)

Paper:  Stampin Up Sycamore Street DSP (127540 – Sale-a-bration item), Pool Party Card Stock, Calypso Coral Card Stock, and Whisper White Card Stock

Ink:  Island Indigo Classic Ink and Alcohol-Based Orange Inks (not SU)

Accessories:  Designer Builder Brads (129329), Bitty Butterfly Punch (129406), Ovals Collection Framelits

Remember that you can get FREE products when you purchase $50 in Stampin Up products!

God’s Blessings!
Stamping With Guneaux Designs
by
Beverly Polen


Stampin Up Secret Garden Stampin Up Secret Garden

Stampin Up Tea for Two DSP

Loving the  Stampin Up Tea for Two DSP, I made another card that is just like the one I shared yesterday, except I used another design from the Designer Series Paper and other embellishments.  Today’s card focuses on the following design from the Stampin Up Tea for Two DSP.


Stampin Up Tea For Two DSP

Stampin Up Tea For Two DSP

Here is the card.  I used the same sentiment that I used on yesterday’s card and I created it again with My Digital Studio (MDS).  Among many other things, MDS is great for producing sentiments that you don’t have on a stamp.

Stampin Up Tea For Two DSP

I’m not sure which of the two cards (yesterday’s and today’s) I like the best.  Which one do you like best? 

Here is a closeup of the sentiment on today’s card.  Guess what I used around the bottom layer of the sentiment?  I won’t list the item in my “Supplies Used” section so you don’t need to look there for the answer. (LOL)

 Stampin Up Tea for Two


Tea For Two DSP

 SUPPLIES USED FOR THIS STAMPIN UP TEA FOR TWO DSP CARD:

Stamps:  None

Paper:  Stampin Up Tea For Two DSP (129311), Island Indigo Card Stock (122923), and Calypso Coral Card Stock (122925)

Ink:  Insland Indigo (My Digital Studio – for sentiment)

Accessories:  Stampin Up 1-3/4″ Circle Punch (119850), 1-3/8″ Circle Punch (119860), Decorative Label Punch (120907 – for two of the corner pieces), 1″ Square Punch (124094 – for two of the corner pieces), Designer Printer Brads (122940) , and Crystal Effects (101055)

ENJOY! Stamping With Guneaux Designs

 Stamping With Guneaux Designs
by
Beverly Polen

Stampin Up Tea For Two

stampin up tea for two dsp

Water Coloring Technique Tutorial – Ombre’ Watercolor Resist

Would you like a new water coloring technique tutorial?  In this post, Guneaux Designs is providing you with a water coloring technique tutorial that teaches you about  how to use the Ombre’ Watercolor Resist Technique.

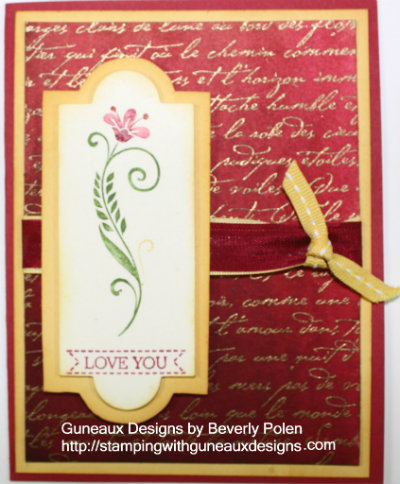
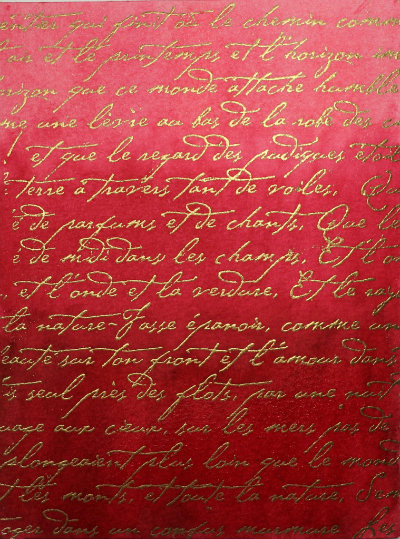
I love watercoloring techniques, especially when using the Stampin’ Up! Watercolor Paper.   I think it is the best around.  I used it when developing my card with the Ombre’ Watercolor Resist Technique.  Below is a picture of the watercolor paper after applying the Ombre’ Watercolor Resist Technique, and a picture of the card I made using the paper.
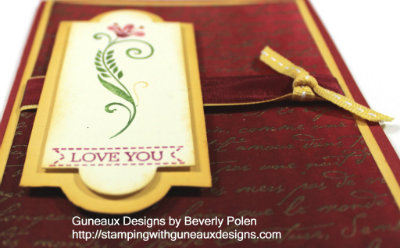
Here are additional pictures of the card (sorry – a little dark):
Stampin’ Up! Supplies Used (includes catalog numbers):

Stamp Sets:  Flowering Flourishes (126367), Itty Bitty Banners (126257), and En Francais (109521 – or a background stamp of your choice)

Paper:  Watercolor Paper (122959), Daffodil Delight Card Stock (119683), Primrose Petals Card Stock (129841), and Whisper White Card Stock

Ink: Stampin’ Write Markers – Gumball Green, Primrose Petals, Raspberry Ripple (126856 – the 2013-2014 In Colors come in one package) , Daffodil Delight (119677), Reinkers – Pretty in Pink (102295), Rose Red (102109), Primrose Petals (126851), and Raspberry Ripple (126852) {or colors of your choice}

Accessories:  Aqua Painter (103954), Cherry Cobbler Seam Binding Ribbon (120992), Daffodil Delight 1/8″ Taffeta Ribbon (119254), Embossing Buddy® (103083), VersaMark® Stamp Pad (102283), Gold Stampin’ Emboss® Powder (109129), and Heat Gun (129053)

Instructions:

1.  Swipe the Watercolor Paper with the Embossing Buddy®.

2.  Cover a background stamp with VersaMark® and stamp it onto the Watercolor Paper.

3.  Cover the Watercolor Paper with the Gold Stampin’ Emboss® Powder and use the Heat Gun to heat and melt the powder.  Allow to cool.

4.  With the Aqua Painter filled with water, completely cover the Watercolor Paper with water only.

5.  Beginning with the lightest color of ink (colors other than those I used may be used; just be certain to incorporate the same range of color intensity from light to dark), brush it onto the Watercolor Paper, starting at the bottom edge and moving upward.  The color will become lighter as you move up the paper.  If you have to add more ink to the Aqua Painter brush, begin applying the ink at the bottom edge and moving upward.

6.  Apply the next lightest color of ink onto the bottom ½ of the paper.

7.  Apply the medium color of ink onto the bottom 1/3 of the paper.

8.  Apply the dark color of ink onto the bottom ¼ of the paper.

9.  Allow the Watercolor Paper to dry and use on a card as desired.
ENJOY!

God’s Blessings!

Stamping with Guneaux Designs by Beverly Polen

ONE MORE DAY UNTIL THE DEBUT OF THE STAMPIN’ UP! HOLIDAY CATALOG!

Enjoy creating with this water coloring technique tutorial!

New Stampin’ Up! Products – Love You Card

Today’s share features new Stampin’ Up! products on a Love You card such as the International Bazaar Designer Series Paper (DSP), Elegant Butterfly Punch, Delicate Designs Embossing Folder, Delicate Doilies L Sizzlits, Bitty Banner Framelits, and Itty Bitty Banners Stamp Set. Whee! That is a lot of new Stampin’ Up! products on one card! 

These two pictures give you a 3-D view of the card featuring new Stampin’ Up! products: 


 This picture gives you a closeup of the Elegant Butterfly Punch (love this punch): 

This picture gives you a closeup of the Delicate Doily L Sizzlet (made with the International Bazaar DSP): 

This picture provides you with a closeup of the Delicate Designs Embossing Folder:


 STAMPIN’ UP! PRODUCTS:

Stamp Set: Itty Bitty Banners (126257)

Paper: International Bazaar DSP (126920), Gumball Green Card Stock (126840), Midnight Muse Card Stock (126843), Daffodil Delight Card Stock (119683), and Whisper White Card Stock (100730)

Ink: Gumball Green Classic Stamp Pad (126861) and Midnight Muse Classic Stamp Pad (around the edge of the scallop – 126860)

Accessories: Elegant Butterfly Punch (127526), Delicate Designs Embossing Folder (127023), Delicate Doilies L Sizzlits (126999), Bitty Banners Framelits (129267), 2-3/8″ Scallop Circle Punch (118874), Heat and Stick Powder (100625), Paper Snips (103579), VersaMark Pad (1202283), Heat Tool (129053), Dazzling Diamonds Stampin’ Glitter (102023), and Basic Pearls (119247)

 HOW TO MAKE THIS HANDMADE CARD:

  • Cut an 8-1/2″ x 5-1/2″ piece of Daffodil Delight Card Stock,
  • Fold it in half to form the card base,
  • Slip the right side of the card front into the Delicate Designs Embossing Folder, carefully lining it up so the pattern is even on the top and bottom,
  • Create a sandwich to run through the Big Shot Die-Cutting Machine (113439) in the following order, bottom up:
    • Multipurpose Platform on TAB 1
    • One Standard Cutting Pad
    • Card front that is inside of the Delicate Designs Embossing Folder
    • One Standard Cutting Pad
  • Run the sandwich through the Big Shot Die-Cutting Machine,
  • Close the card and cut along the scallop edge on the right side using Paper Snips (cutting both the front and back together),
  • Cut a strip of Midnight Muse Card Stock to fit inside the Delicate Designs Embossing Folder,
  • Run this through the Big Shot in the same manner as described above, and cut around the scallops,
  • Rub the VersaMark Pad over the Midnight Muse Card Stock piece and the front, right-side of the card base,
  • Apply the Heat and Stick Powder and heat with a Heat Tool
  • Quickly apply the Dazzling Diamonds Stampin’ Glitter and lightly apply heat,
  • Adhere the Midnight Muse Card Stock just to the right of the design in the card base (see pic)
  • Cut 6 Elegant Butterflies, 3 from the International Bazaar DSP, 2 from Gumball Green Card Stock, and 1 from Midnight Muse Card Stock,
  • Adhere one of the DSP Butterflies onto the Gumball Green and Midnight Muse Card Stock
  • Using a permanent marker, color Basic Pearls yellow and add three to each butterfly,
  • Cut the largest Delicate Doily from the DSP using the Delicate Doilies Sizzlits,
  • Cut one Gumball Green and one Midnight Muse Scallop Circles using the Scallop Circle Punch,
  • Adhere the Delicate Doily and the two Scallop Circles together as shown in the pictures,
  • Stamp the sentiment, “Love You”, from the Bitty Banners Stamp Set onto Whisper White Card Stock,
  • Align the appropriate Itty Bitty Framelit over the sentiment and run through the Big Shot Die-Cutting Machine
  • Adhere these elements onto the card base as shown in the pictures.

ENJOY! 

  God’s Blessings!


Stamping With Gunneaux Designs

Enjoy making this card with several new Stampin’ Up! products!