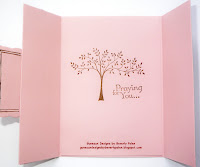
Gate Fold Card Tutorial Using Window Frames Framelits

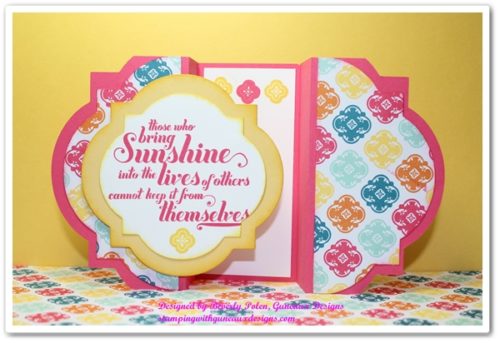
I have for you today a Gate Fold Card Tutorial that uses the Stampin’ Up! Window Frames Collection Framelits, Feel Goods Stamp Set, Mosaic Madness Stamp Set, and Quatrefancy Specialty Designer Series Paper.  This is a gate fold card that I created and I have not seen this type of card before.  It is a card cut and folded in the shape of a framelit or die.
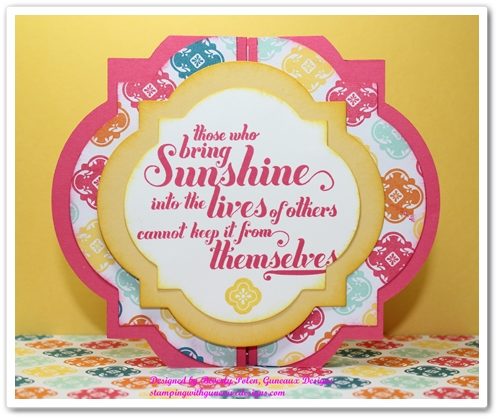
GATE FOLD CARD TUTORIAL USING WINDOW FRAMES FRAMELITS:

Step 1:  Cut an 11″ x 4-1/4″ piece of card stock (the size of card stock can vary, depending on the framelit used).  I used the new Strawberry Slush Card Stock (131295).

Step 2:  Score on the 11″ side at 3 1/2″, 4 1/2″, 6 1/2″, and 7 1/2″.
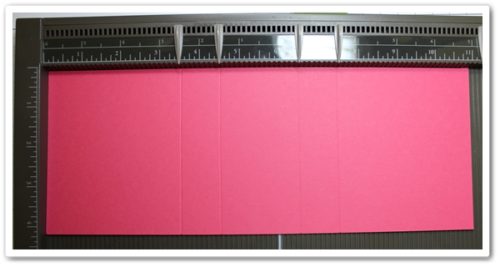
Step 3:  Starting from the left side, fold the score lines in this order: valley fold, mountain fold, mountain fold, and valley fold.
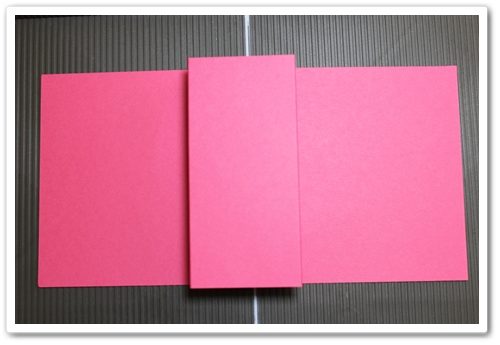
Step 4:  Crease the score lines well so the card stock will lay flat for the next step.

Step 5:  Lay the largest framelit from the  Window Frames Collection Framelits  (129021) onto the folded card, making sure to center it top to bottom and exactly around the mountain folds. Use a temporary tape to hold the die in place. Cut using Big Shot Die Cutting Machine (113439).
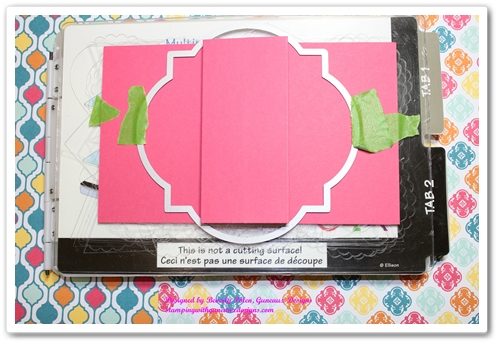
 RESULTS:
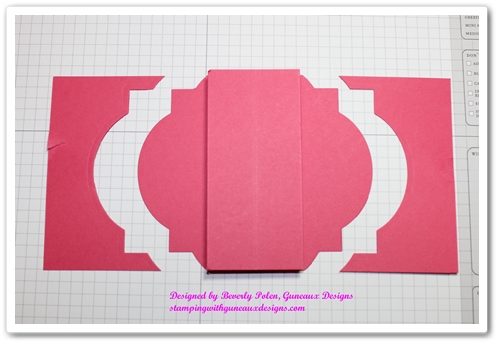
Step 6:  Cut a 6″ x 5-1/4″ piece of designer series paper.  I used Stampin’ Up! Quatrefancy Specialty Designer Series Paper.

Step 7:  Lay the second to the largest framelit from the Window Frames Collection onto the piece of designer series paper.  Cut using the Big Shot Die Cutting Machine, and then cut the piece in half.
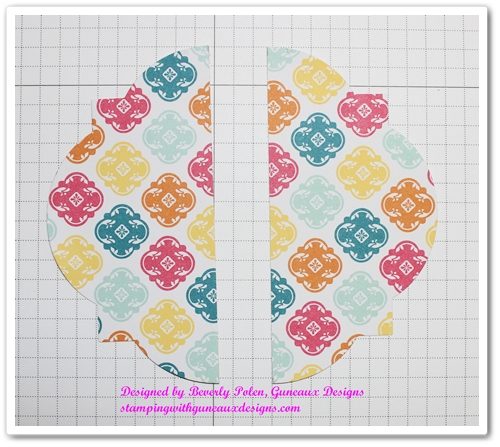
Step 8:  Adhere one piece of the designer series paper to the left side of the Gate Folded Card and the other to the right side.
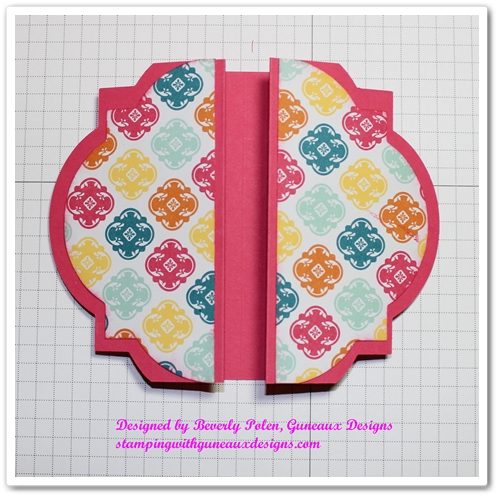
Step 9:  You may need to cut off a very small portion of the top and bottom ends of the designer series paper if they overlap the card base.

Step 10:  Lay the third largest framelit onto a piece of card stock and cut using the Big Shot Die Cutting Machine.  I used Stampin’ Up!’s Daffodil Delight Card Stock.

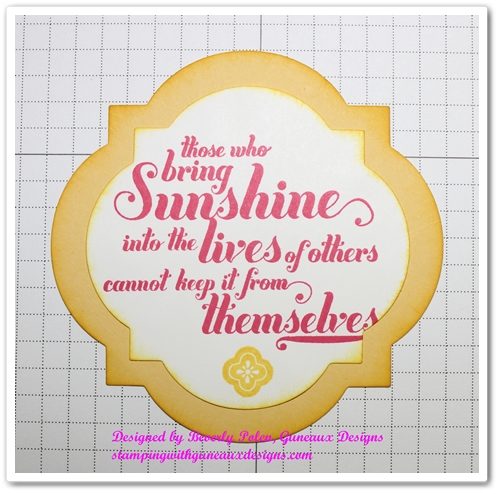
Step 11.  Stamp a sentiment onto a piece of Whisper White Card Stock and cut it out using the fourth largest framelit. I used a sentiment from the Stampin’ Up! Feel Goods Stamp Set.

Step 12:  Adhere the Whisper White Card Stock with the sentiment onto the piece of card stock cut out in step 10 above.
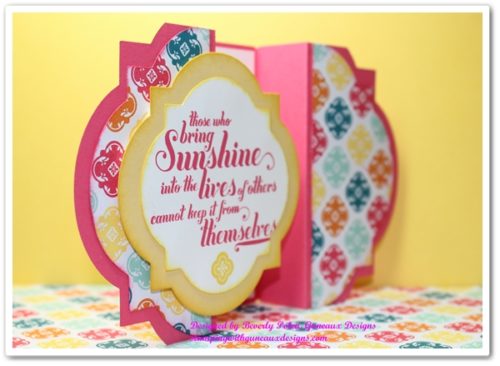
Step 13.  To achieve dimension, adhere the sentiment piece onto the left side of the card base with foam adhesive.
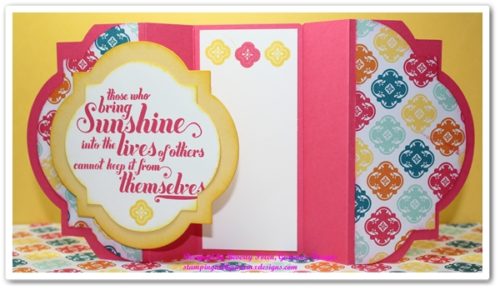
Step 14.  Cut and adhere a small piece of Whisper White Card Stock into the inside of the card for your personal note.  (I used a stamp image from the Mosaic Madness Stamp Set at the top of the Whisper White Card Stock.)
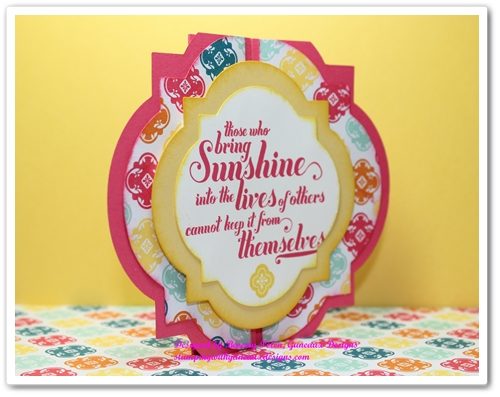
If you followed along with the Gate Fold Card Tutorial, you’ll now have a beautiful and unique card.  I think you’ll love the outcome!

 God’s Blessings!

Stamping With Guneaux Designs
by
Beverly Polen
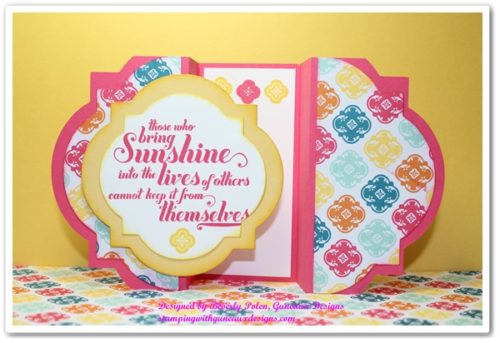
 GATE FOLD CARD TUTORIAL USING WINDOW FRAMES FRAMELITS

Holly Berry DSP – Stampin Up Box Card

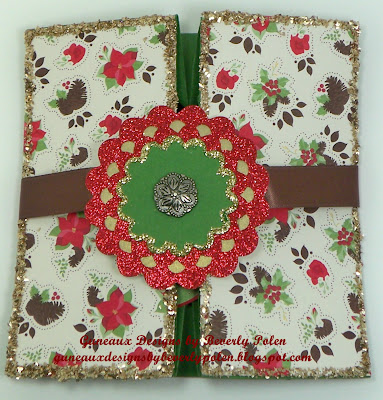
I am excited to share with you my box card that is made with the Stampin’ Up! Holly Berry DSP  and Pines & Poinsettias stamp set.

Stampin Up Holly Berry DSP Box CardStampin Up Holly Berry DSP Box Card

Inside the box card are several gifts tags to use when wrapping presents. The tags were made with several of Stampin’ Up! stamp sets.

The sentiment in the bottom of the box is from the Stampin’ Up! God’s Blessings stamp set.

Other Stampin’ Up! products used in making the box card are:

Card Stock: Garden Green, Brushed Gold, and Red Glimmer Paper
Ink: Real Red, Chocolate Chip, and Garden Green
Accessories: Chocolate Chip 5/8″ Satin Ribbon, Perfect Pennants Bigz L Die, 1-3/4″ Scallop Circle Punch, Antique Brads , and Champagne Glitter Glass

Purchase the project products by clicking on the links above.
God’s Blessings!
Stamping With Guneaux Designs by Beverly Polen
Stampin’ Up! Demonstrator in FL
FIRM RELIANCE ON DIVINE PROVIDENCE!
Enjoy your Stampin Up Holly Berry DSP!

Betsy’s Blossoms Stamp Set, Comfort Cafe DSP, Diamond Fold Card

The Betsy’s Blossoms Stamp Set is so awesome!  But before I talk about the Betsy’s Blossoms Stamp Set, let me share that I hope you had a nice 4th of July celebrating the birth of our country.  Did you seize the opportunity to make something crafty to display during your festivities?

So it’s time to get back to work (ugh!).  Today I am sharing a diamond fold card that features the Betsy’s Blossoms Stamp Set and Comfort Cafe DSP.  I really like the way it turned out, and I hope you like it.

Don’t you just love the Stampin’ Up! Comfort Cafe Designer Series Paper (DSP) (126898)?  This card features the DSP as well as the Betsy’s Blossoms Stamp Set (126006), Kindness Matters Stamp Set (122902), and Bitty Banners Framelits.

 
I am very appreciative of your comments!!
 
God’s Blessings!
 
Stamping with Guneaux Designs by Beverly Polen
 
Enjoy creating paper crafts with the Betsy’s Blossoms Stamp Set!

How to Make a Waterfall Card

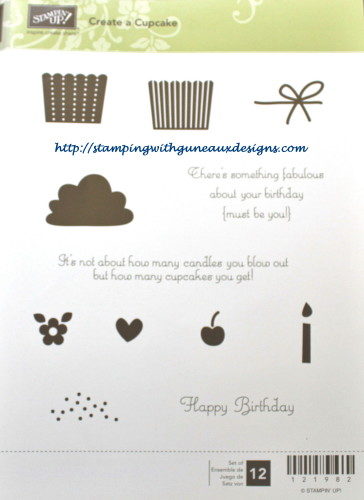
Have you wanted to learn how to make a waterfall card?  I hope so, as today I have for you a How to Make a Waterfall Card Tutorial!  The waterfall card shown here is a Happy Birthday card that features the Stampin’ Up! Create a Cupcake Stamp Set (121982).

HOW TO MAKE A WATERFALL CARD TUTORIAL

1. Select your card stock, designer series papers (DSP), brads, stamp sets, jewels, etc., that you want to use to create your waterfall card.

2. Cut and fold in the middle a 5-1/2″ x 8-1/2″ piece of card stock to form a 4-1/4″ x 5-1/2″ card base on which the waterfall construction will be attached.  Set to the side.

3. Using card stock and DSP, create the first and second layers for the card. Do not adhere them to the card base until the last step as you’ll need to attach the waterfall construction to these layers BEFORE adhering them to the card base.

4. Cut a 3/4″ x 4″ piece of card stock.

5. Cut a 2-1/4″ x 8-1/2″ piece of card stock of a different color.

6. Cut four 2-3/4″ square pieces of card stock, four 2-1/2″ square pieces of a different color of card stock, and four 2-1/4″ square pieces of Whisper White card stock. The pieces from the two colored card stock will form the mat for the Whisper White card stock that will contain your desired stamp images, punched items, etc.

7. Score the 8-1/2″ piece of card stock at the 1-1/2″, 2″, 2-1/2″, 3″, and 3-1/2″ measurements.

8. To adhere the piece of card stock cut in Step 4, turn the scored piece of card stock (henceforth called template) vertically so the score lines are below the top.  Attach Sticky Strip to the very top of the card stock (I added two pieces just to ensure good adhesion as the constructed waterfall will be heavy).

9. Remove the red tape and horizontally attach the 3/4″ x 4″ piece of card stock from Step 4 to the very edge of the template. Ensure it is centered.

10. Punch a hole at both ends of the 3/4″ x 4″ piece of card stock to add brads. The brads need to be substantial as they will attach the waterfall construction to the card base (you could actually wait until you’re ready to attach the waterfall construction to the card base before you insert the brads).

11. Using the square pieces of card stock from Step 6 and stamps, punches etc., create the waterfall pieces (i.e., the matted pieces of card stock  and stamped image(s) that will be added to the template – see example).


12. (a) Begin constructing the waterfall. The waterfall for this card will flow vertically; therefore turn the template so it is vertical and add the squares in a vertical fashion. If you want the waterfall to flow horizontally, turn the template horizontally and add the squares to the template in a horizontal fashion. (The following picture is turned horizontally just to identify the “areas” of the template.)


(b) Place adhesive in Area 1 (see the two pictures). Beginning with the matted square that you want to be LAST in the waterfall, adhere it to the template.

13. Place adhesive in Area 2 and add the matted square that you want to be the NEXT TO THE LAST waterfall piece. Continue until you’ve attached all four waterfall pieces, with the front piece added to area 4.

14. Fold the template at the top score line at area 4 so it falls behind the constructed waterfall and the tab falls at the bottom (see picture). Decorate the tab if so desired.

14. If you already attached the brads, you may need to remove them so you can line up the waterfall construction piece onto the card layers (created in step 3). Based on the punched holes on the horizontal 3/4″ x 4″ piece of card stock, identify and mark where to punch holes into the card layers, and punch them. Insert the brads through the waterfall construction piece and the card layers, turning down the brads’ extensions. Do NOT add adhesive any where on the completed waterfall piece or it will not work.

15. Adhere the card layers and waterfall piece to the front of the card base.

16. Pull the tab vertically and watch your waterfall in action.  ENJOY!


God’s Blessings!
Guneaux Designs by Beverly Polen

Breast Cancer Awareness Month Card – Blue Chateau DSP

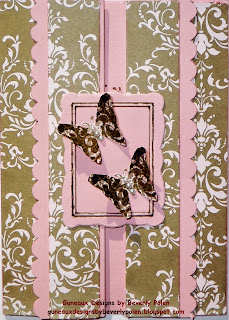
Because October is Breast Cancer Awareness Month, I made this card that you may CASE as it would meet a need for a card to give to someone who currently is struggling with breast cancer.

Have you tried the Stampin’ Up! Beau Chateau Designer Series Paper (DSP) yet? If you have, you’ll agree with me that the designs are so pretty, especially the Soft Suede and Pink Pirouette design that I used on this card. The design in person looks like a shimmery gold.

Breast Cancer Awareness MonthBreast Cancer Awareness Month

The card was made from a 11″ x 6-1/4″ piece of Pink Pirouette Cardstock, and the fold of the card is called “Gatefold”. After folding the card, I cut the Beau Chateau Designer Series Paper into sections to match the card panels and attached them with Sticky Strip. For decorations, I used the butterfly stamp from the Creative Elements Stamp Set (love, love this stamp set) to stamp twice the butterfly image onto a piece of the DSP. Then I cut out the butterflies, decorated them with Basic Pearls, and adhered them to a frame made with the Designer Frames Embossing Folder. To create the scallop border on the two front pieces, I used the Scallop Edge Border Punch. The card inside includes images from the Thoughts and Prayers Stamp Set.
Purchase the Stampin’ Up! products used for this card by clicking on the links above.
Leave a comment; I’m sure other visitors would like to read your feedback about this card.
God’s Blessings!
Guneaux Designs by Beverly Polen
Stampin’ Up! Demonstrator in FL

ENJOY MAKING YOUR CARDS FOR BREAST CANCER AWARENESS MONTH!