Paisley Petals DSP Purse

I’m excited to share with you today my personally-designed Stampin’ Up! Paisley Petals DSP Purse.  As I said yesterday, I’m so in love with the Stampin’ Up! Paisley Petals Designer Series Paper that becomes available April 1-30, and then again with the rollout of the big summer catalog.
I personally designed the pattern for this purse, and I am very happy with the design.  I hope you like it too.

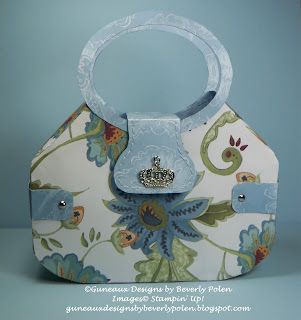
Front of the Paisley Petals DSP Purse

Paisley Petals DSP Purse
SEE ALL THE WONDERFUL COMMENTS REGARDING THIS PAPER PURSE BY RIGHT CLICKING ON THE TITLE OF THIS POST.  THE COMMENTS ARE AT THE BOTTOM OF THE PAGE.

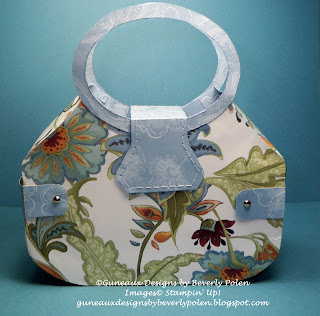
 Back of Paisley Petals DSP Purse

Paisley Petals DSP Purse

Side of Paisley Petals DSP Purse

Paisley Petals Purse

Close Up of Paisley Petals DSP Purse Front

Paisley Petals DSP Purse

I decorated the purse’s closure with one of the elegant Trinket Crowns (love the crowns). I hand stitched around the closure piece and added Velcro for the fastener. I would love to know what you think of it, so please leave a comment. Thanks!

Come back tomorrow for more Paisley Petals paper crafts!
God’s Blessings!
Guneaux Designs by Beverly Polen
Stampin Up Demonstrator in Florida
FIRM RELIANCE ON DIVINE PROVIDENCE!

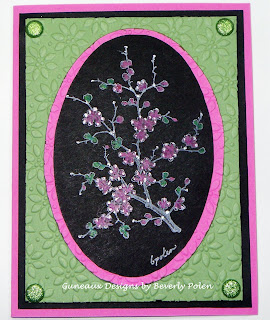
Black Magic Technique – Easter Blossoms

Workshop hostesses are very special people to me, and I greatly appreciate them. I wanted to let my last workshop hostess know how much I appreciate her preparation efforts; therefore, I created this card for her using the black magic technique.
Easter Blossoms
The black magic technique involves Black Card Stock (couldn’t there be a better name?). I had not used this technique before but plan to use it again. The card stock was cut using the Oval Scallop Frame Bigz Die.

The card features Stampin’ Up! Easter Blossoms Stamp Set in the 2011 Occasions Mini Catalog. I stamped the blossoms onto the card stock with Whisper White Craft Ink. After allowing the ink to dry, I used the Stampin’ Up! Watercolor Pencils to color the blossoms. The blossoms are matted with a Petals-A-Plenty embossed piece of Pixie Pink Card Stock (retired). The Wild Wasabi Card Stock is also enbossed with the same Textured Impressions Embossing Folder.

The card front is embellished with the wonderful Subtles Glimmer Brads. If you haven’t purchased any of the Glimmer Brads, you should. You won’t regret having such beautiful embellishments.

Interesting in purchasing these products? Click on the product names to be taken directly to the product.

God’s Blessings!
Guneaux Designs by Beverly Polen
Stampin’ Up! Demonstrator in Florida
 
FIRM RELIANCE ON DEVINE PROVIDENCE!

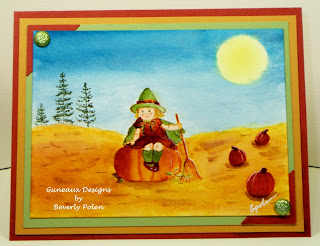
Greeting Card Kids Stamp Set

GREETING CARD KIDS STAMP SET

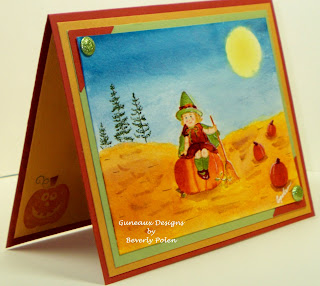
 Living in FL does not allow me to enjoy the beautiful Fall season that I was so use to when I lived in N.VA.  Every year at this time, I have my friend, Sandy, send me pictures of her beautiful surroundings in PA so I can enjoy the Fall colors.  Missing the Fall colors prompted me to produce the following card made with the Stampin’ Up! Greeting Card Kids Stamp Set.  Also, I decided to take a stab at water coloring.  Please let me know what you think!
Greeting Card Kids Stamp Set
All products used to develop this card are from Stampin’ Up!, and are found HERE.
Stamp Sets:  Greeting Card Kids (item 120633); Got Treats (120627); and Plant Hope (120540)
Classic Ink (Ink Refills):  Pear Pizzazz (119674); Blushing Bride (119676); Pumpkin Pie (119672); Daffodil Delight (121604); Bashful Blue (105146); Marina Mist (121605); More Mustard (101990); Cajun Craze (121603); Always Artichoke 105177); and retired Blush Blossom
Paper:  Watercolor (105019); Cajun Craze (119684); More Mustard (100946); and Pear Pizzazz (119795)
Accessories:  In Color Glimmer Brads (121005; Pear Pizzazz); Photo Corner Punch (119878); and Aqua Painter (103954); 1/16″ Handheld Punch (101227); Sticky Strip (104294); and 2-Way Glue Pen (100425)
God’s Blessings to You!
Guneaux Designs by Beverly Polen
Stampin’ Up! Demonstrator in Parrish, FL
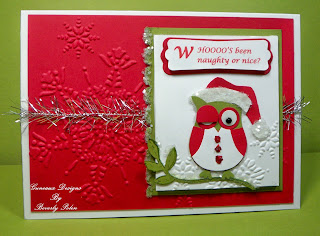
Winking Owl Santa

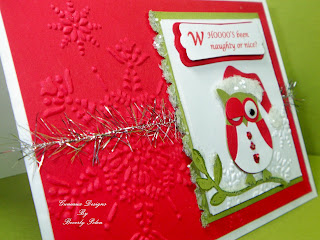
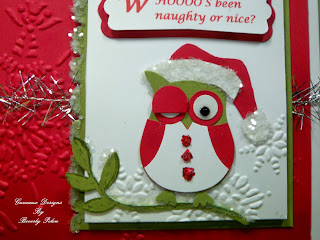
Winking Owl Santa!  Got to love that owl punch!! It has to be the most popular of Stampin’ Up!’s punches. It is so fun creating with the owl, as I have done here. My owl is a Santa who is winking (thus, Winking Own Santa), as we all know that whether we are naughty or nice, he always brings us goodies! I hope you enjoy viewing the card as much as I did making it!

Winking Owl SantaWinking Owl Santa
The red background for the Winking Owl Santa features the Big Shot Northern Flurry textured impressions. Love that Stampin’ Up! product too! (I hope Stampin’ Up! carries this product over in its next catalog.) And the silver trim tinsel is lovely. It adds a nice touch to the card.

The side view of the card makes more visible the use of Stampin’ Up!’s Chunky Essentials Glitter. Love that glitter! I’ll probably need more before December rolls around.

The close up of Mr. Winking Owl Santa provides a better view of him. He was fun to create. I made my own hat for Winking Owl Santa from Stampin’ Up! card stock, and I think it turned out well. This would be a great Christmas card for my grandson, Drew, and granddaughter, Erika. However, they will see it here so I’ll have to think of something else for them.Winking Owl Santa

STAMPIN UP PRODUCTS:
Paper:  Real Red, Old Olive, and Whisper White Card Stock
Accessories: Stampin’ Up! Owl Punch and Scallop Trim Border, Modern Label, and Two-Step Bird Punches, Modern Label Punch Window of Stampin’ Up!’s Magnetic Movers and Shapers, Textured Impressions Embossing Folder (Holiday Mini Catalog), Silver Tinsel Trim, One Black Jewel from Stampin’ Up!’s Designer Jewels Black Flourish, Crystal Effects, Tombo Multi Liquid Glue, Stampin’ Up!’s Sticky Strip, White and Red Stampin’ Glitter Chunky Essentials
God’s Blessings!
Stamping With Guneaux Designs
by
Beverly Polen

 Winking Owl Santa!

Ribbon Weaving Technique – Stamping With Guneaux Designs

RIBBON WEAVING TECHNIQUE

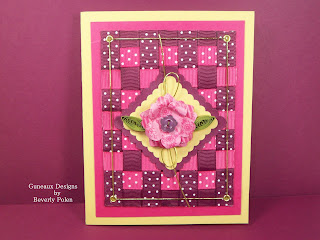
It feels good to be back home with my SU products! I’ve been gone for several weeks, and couldn’t wait to get back to crafting. Today, I sat down at my craft table, knowing that I wanted to develop something with ribbon. What would that be? I didn’t know at first. But as creativity goes, one must go with the flow. So I did, and here is my finished product…a “ribbon weaving technique” card. Hope you like it!  Feel free to share your comments.

FRONT VIEW OF THE RIBBON WEAVING TECHNIQUE:

 –
Ribbon Weaving Technique

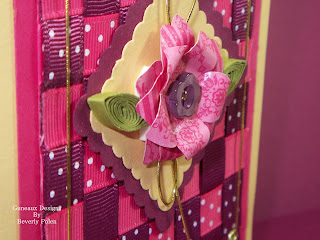
SIDE VIEW OF THE RIBBON WEAVING TECHNIQUE:

Ribbon Weaving Technique

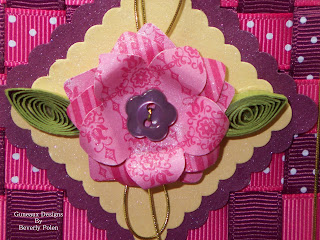
CLOSE UP OF THE CENTER FLOWER WITH QUILLED LEAVES:

Ribbon Weaving Technique

SUPPLIES USED FOR THE RIBBON WEAVING TECHNIQUE:

Paper:  Rich Razzleberry, Melon Mambo, So Saffron, and Old Olive
Accessories:  Rich Razzleberry Polka Dot Grosgrain Ribbon, Melon Mambo Polka Dot Grosgrain Ribbon, and Gold Elastic Cord; Island Floral Bigz Die; Gold Eyelets; Perfect Plum Designer Button; and Scallop Square Punches
ENJOY…I SURE DID ENJOY MAKING THE RIBBON WEAVED CARD!
GOD’S  BLESSINGS!
STAMPING WITH GUNEAUX DESIGNS
BY
BEVERLY POLEN