
Valentine’s Day is coming quickly and I have for you today a Valentine Card featuring the Stampin Up You Are Loved stamp set and Hearts Collection Framelits Dies. Hopefully you will enjoy the card and the instructions for how I made this NEW easel card base design. I have not seen it anywhere on the internet.


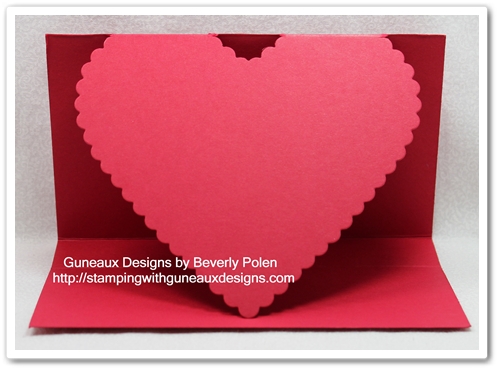
This view shows the inside of the card.

 SUPPLIES USED FOR THIS STAMPIN UP YOU ARE LOVED VALENTINE CARD:
Stamp Set: Stampin Up You Are Loved (123779 -c), Trust God (126702), Valentine Defined (retired)
Paper: Real Red Card Stock (124290 – 12″ x 12″), More Amore Designer Series Paper (129309)
Accessories: Big Shot, Multipurpose Platform, and Cutting Plates (113439); Hearts Collection Framelits Dies (125599), Sycamore Street Pool Party Ribbon (130812), Hearts Adorning Accents Embossing Folder (125601), Perfect Polka Dot Embossing Folder (117335), Scallop Oval Punch (119856), Extra-Large Oval Punch (119859), and Dazzling Diamonds Stampin’ Glitter (102023)

INSTRUCTIONS FOR MAKING THE STAMPIN UP YOU ARE LOVED CARD BASE:
- Cut a 6-1/4″ x 12″ piece of Real Red Card Stock and score it along the 12″ side at the 3-5/8″ and 7-1/4″ marks.

- Align the card stock vertically with the 6-1/4″ side at the top. Using the Big Shot, its multipurpose platform, and one cutting plate, place the card stock onto the cutting plate, and place the largest heart framelit onto the card stock slightly above the 7-1/4″ score line.
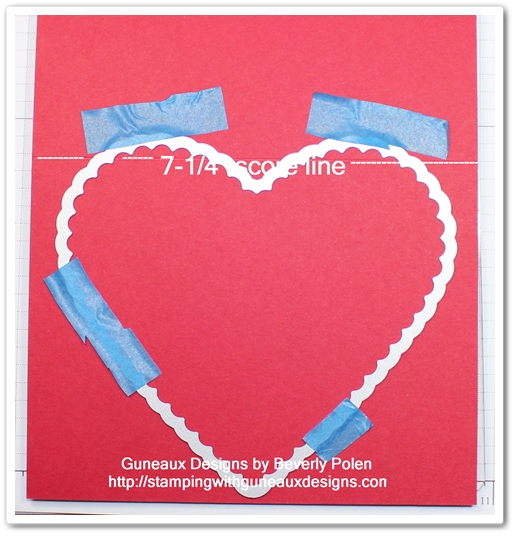
-
Place the second cutting plate onto the framelit and card stock, but place it about 1/16″ below the 7-1/4″ score line. This creates your Big Shot sandwich.
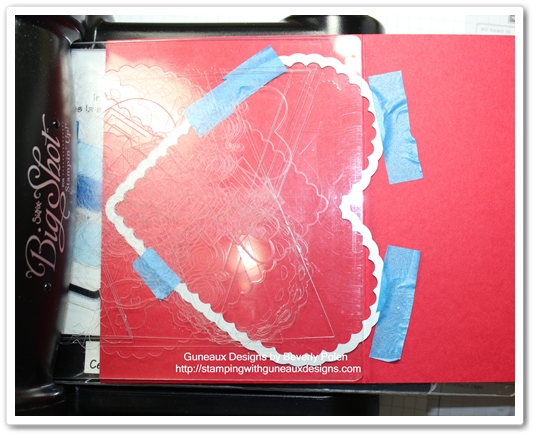
- Slowly push the sandwich into the Big Shot to the point that the cutting plates will catch under the roller. Being careful to not move the cutting plates, roll the sandwich into and through the big shot with the point of the heart framelit entering first.
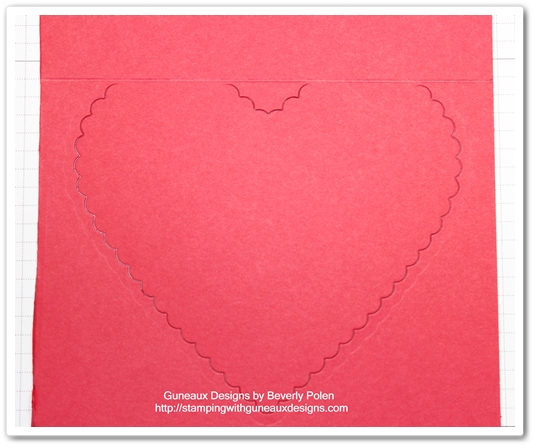
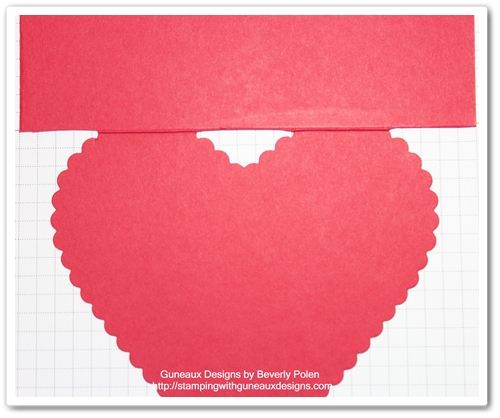
- Remove the heart framelit from the card stock and the card stock will look like the picture below.
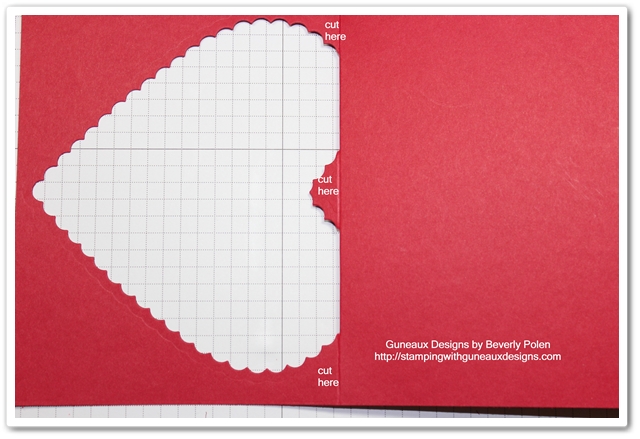
- Turn the card stock heart underneath and cut along the 7-1/4″ fold line on the left and right sides and in the center. Make sure you leave the heart connected to the rest of the card stock.
- The front of the card base will look like this after cutting off the pieces.
- Crease the card stock at the 3-5/8″ score line.
- Set the card stock up and it will look like this:
-
Decorate your card as desired!
God’s Blessings!
Stamping With Guneaux Designs
by
Beverly Polen
