Partial Die-Cutting Technique TLC566

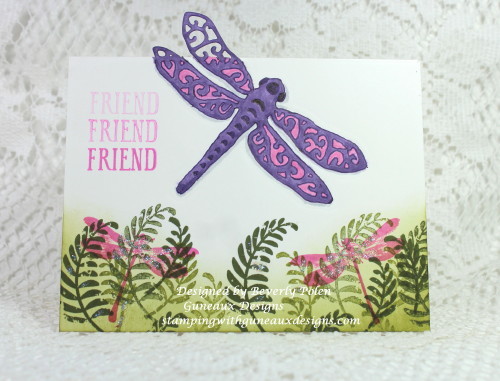
Yesterday, the Splitcoaststampers Website had a challenge to create a card using the Partial Die-Cutting Technique (TLC566). The Partial Die-Cutting Technique is somewhat self-explanatory as it is using a die, card stock, and die-cutting machine of your choice to partially cut a shape.  It can be done in different ways. My card shows one way and that is to have the partially cut portion of the die above the fold of a card base. (You will find a link to the Splitcoaststampers’ tutorial video on this technique below.)

Partial Die-Cutting Technique TLC566

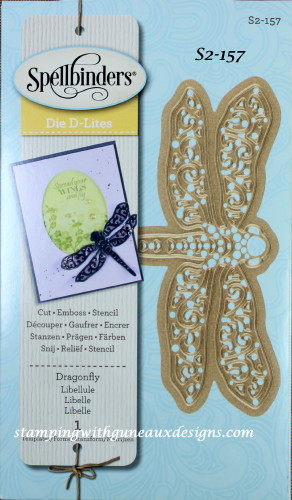
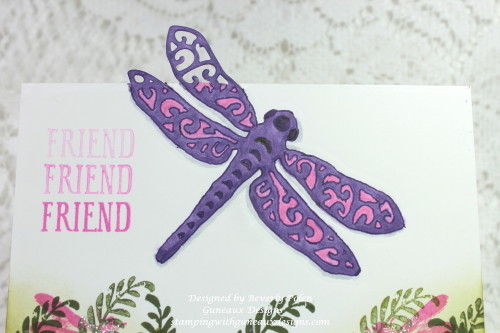
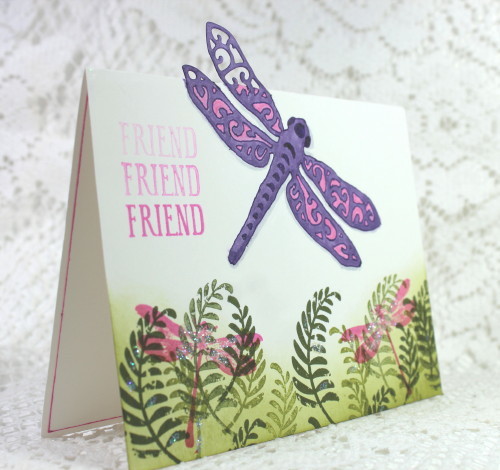
This is the first time I have used this technique, and I really enjoyed it.  The shape that I chose to partially cut is a dragonfly (Spellbinders Die).  As you can see, my dragonfly’s wings on the left side of its body were cut but not the rest of the dragonfly’s body.  After achieving the partial cut and leaving the die and card stock in the same position, I ran them back through my die-cutting machine with embossing pads to emboss the dragonfly onto my card front.

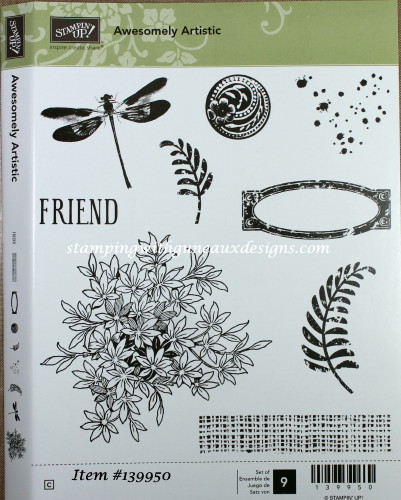
I used copic markers to color the embossed dragonfly so the rest of the body would show. To finish the card front, I used the Stampin’ Up! Awesomely Artistic Stamp Set (clear mount) to add other elements to the card.

Partial Die-Cutting Technique & Spellbinders Dragon Fly DiePartial Die-Cutting Technique & Spellbinders Dragon Fly Die


Partial Die-Cutting Technique TLC566

The above photo provides a close up of the dragonfly.  I hope you will try this technique if you have not tried it before.


SUPPLIES USED:

Spellbinders Dragonfly Die D-Lites (S2-157)
 Stampin’ Up! Sizzix Big Shot Die-Cutting Machine
Stampin’ Up! Whisper White Card Stock (item #100730)
 Stampin’ Up! Awesomely Artistic Stamp Set (item #139950) (clear mount)
Stampin’ Up! Ink Pads – Mossy Meadow (item #133645), Old Olive (item #126953), and Pink Passion (retired)
Copic Markers N2 (Neutral Gray), RV55 (Hollyhock), and V17 (Amethyst)


A video tutorial from Splitcoaststampers can be found HERE.  Once you have viewed the video, you will have a better understanding of the Partial Die-Cutting Technique.  If not, please feel free to leave a comment or ask a question about the technique by clicking on the conversation bubble to the right of this post title and leave a comment or question. Or, if viewing this post on the exact post URL, the comment section will be at the bottom of the post for comments and/or questions.

Now it’s your turn to use the Partial Die-Cutting Technique.


Swallowtail Butterfly

God’s Blessings!

Stamping With Guneaux Designs by Beverly Polen

Partial Die-Cutting Technique TLC5666PARTIAL DIE-CUTTING-TECHNIQUE

ODBD Christmas Candles

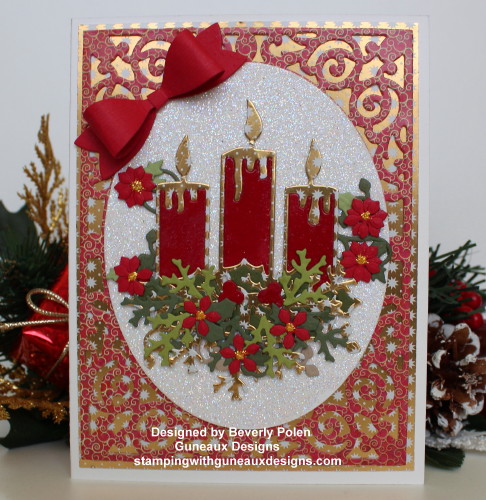
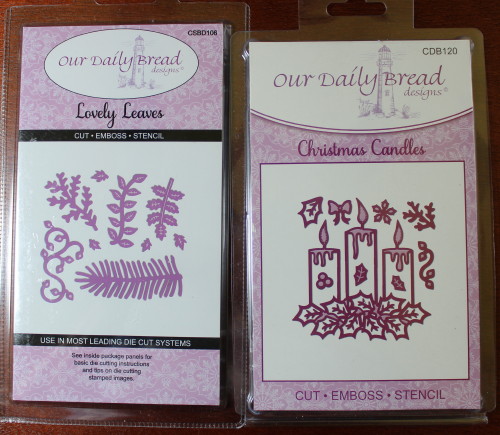
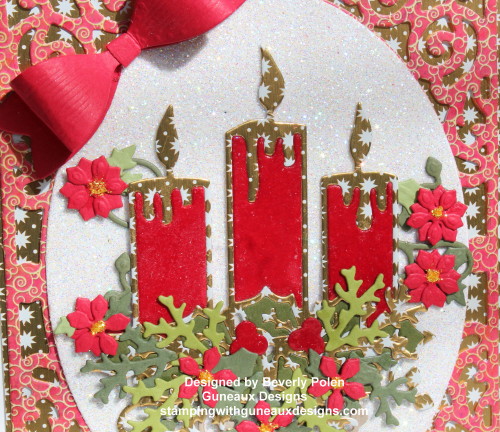
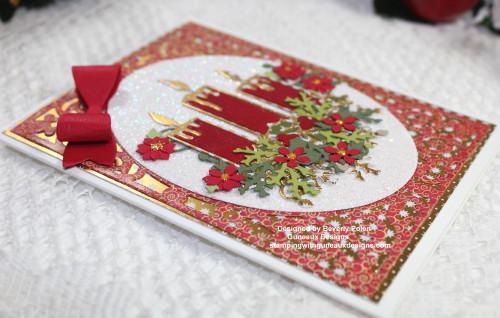
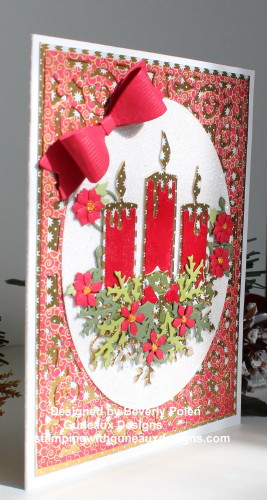
Our Daily Bread Designs (ODBD) has several beautiful Christmas dies this year.  The ODBD Christmas Candles (CDB120) is one set of beautiful dies.  Another set is the ODBD Lovely Leaves die set (CSBD106).  Both die set were used to create this Christmas card.

ODBD Christmas Candles

(Update:  This card was picked by ODBD as Customer Card of the Day)

CCOD Button (1)

This is a photo of the ODBD Christmas Candles and Lovely Leaves Die Sets.

ODBD Christmas CandlesI placed the ODBD Christmas Candles, foliage, and flowers onto an oval piece of white card stock that I embossed with Stampin’ Up!’s Iridescent Ice Embossing Powder.  I topped that off with a red bow made with the ODBD Small Bow Dies.

ODBD Christmas Candles

The layer behind the candles is a red piece of ODBD Christmas Collection 2015 Card Stock that I cut with the Spellbinders A2 Filigree Delight Die (S5-177).  The shiny gold, snowflake piece of designer paper behind the red card stock is from the Craft Smith Gold Gift Pad. Notice that the gold snowflake paper is also featured around the candles.

ODBD Christmas Candles

Share your thoughts about the card in the comment section and have a wonderful week.


Swallowtail Butterfly

God’s Blessings!

Stamping With Guneaux Designs by Beverly Polen

ODBD Christmas Candles

ODBD CHRISTMAS CANDLES

How to Make a Center Step Card – Happy Birthday

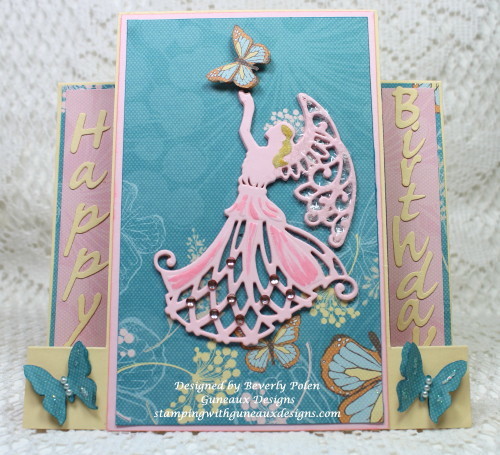
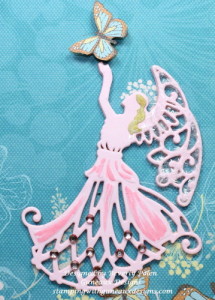
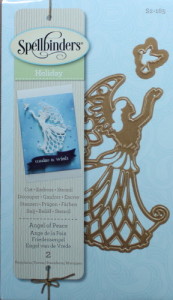
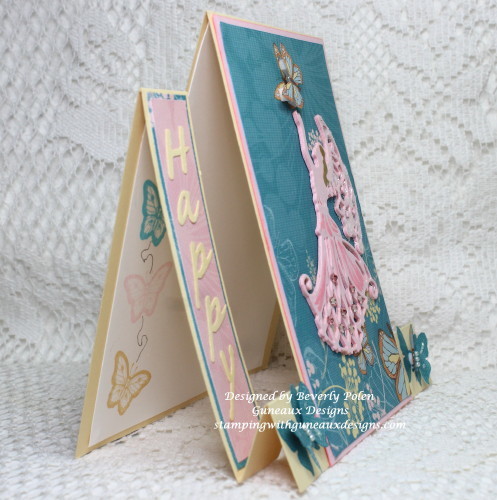
The purpose of this post is to provide a tutorial on how to make a center step card. The card shown in the post is a Happy Birthday card that I made for my little angel granddaughter.  I refer to her as my angel, thus I thought the Spellbinders Holiday Angel of Peace Dies would work perfectly for my center step card.

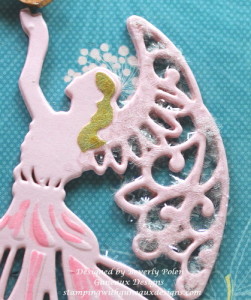
How to make a Center Step CardThe following pictures are closeups of card sections.  You will note that the angel’s wings are covered with a tinsel glitter, which is Martha Stewart’s Crystal Tinsel Glitter (discontinued).
How to make a Center Step CardHow to make a Center Step Card

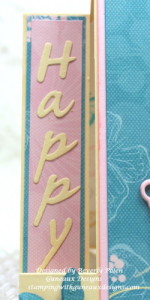
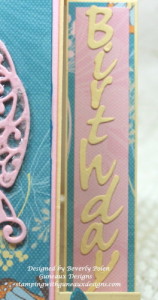
These pictures are closeups of the Happy Birthday sentiment on the left and right sides of the card and the Spellbinders Angel of Peace Dies.

How to make a Center Step CardHow to make a Center Step CardSpellbinders Holiday Angel of Peace


TUTORIAL ON HOW TO MAKE A CENTER STEP CARD

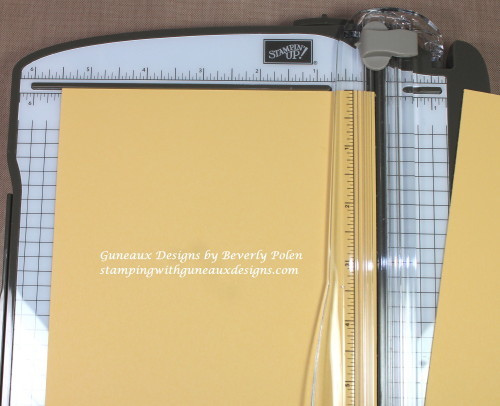
STEP 1: Using a paper trimmer/cutter, cut an 11″ x 5-1/2″ piece of card stock.

How to Make a Center Step Card

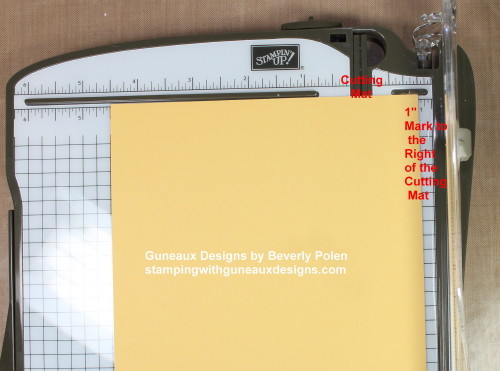
STEP 2:  Leave the 11″ x 5-1/2″ cut piece of card stock on the trimmer, moving the right side to the 1″ mark on the right side of the cutting mat (i.e., the rubber channel that the blade slides through when cutting).

NOTE:  The terms used for a trimmer depends on the type of trimmer used (e.g., Guillotine cutter, Bypass trimmer, etc.).  Thus, in this tutorial,  I have used terms that are applicable to my paper trimmer. Follow the directions for use of your type of trimmer.

How to Make a Center Cut Card

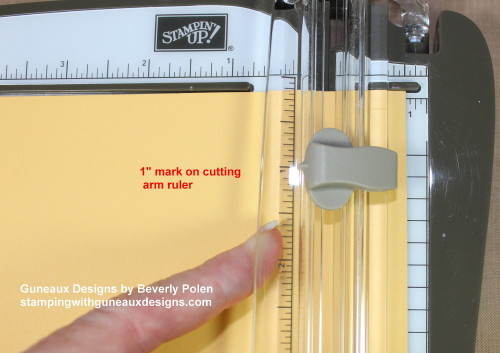
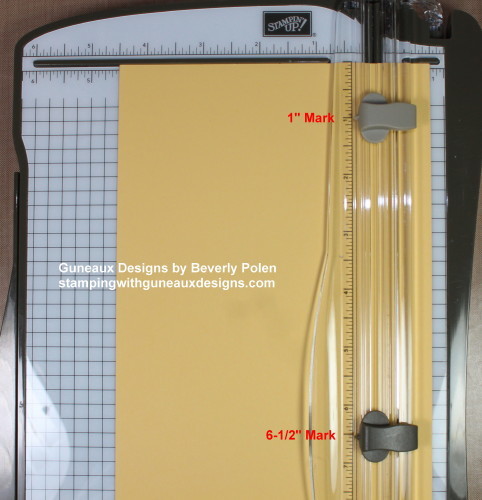
STEP 3:  Using the ruler on the cutting arm, move the cutting blade down to the 1″ mark. Lay the cutting arm down on the paper.

How to Make a Center Step Card Happy Birthday

STEP 4:  Cut from the 1″ mark on the cutting arm ruler down to the 6-1/2″ mark.  This provides a 5-1/2″ slit on the card stock.

how-to-make-a-center-step-card-happy-birthday/

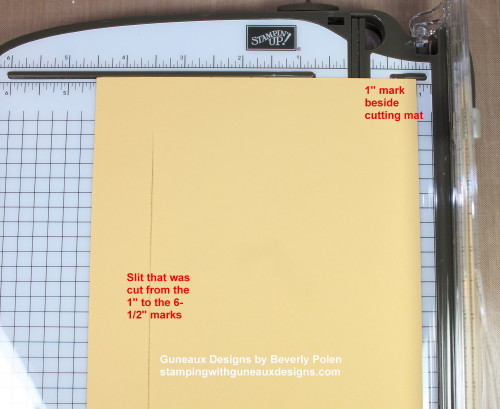
STEP 5:  Turn the card stock over with the 5-1/2″ slit on the left side.  Place the card stock at the 1″ mark that is to the right of the cutting mat.

http://stampingwithguneauxdesigns.com/how-to-make-a-center-step-card-happy-birthday/

STEP 6:  Before cutting, move the cutting blade on the cutting arm down to the 1″ mark (same as STEP 3).

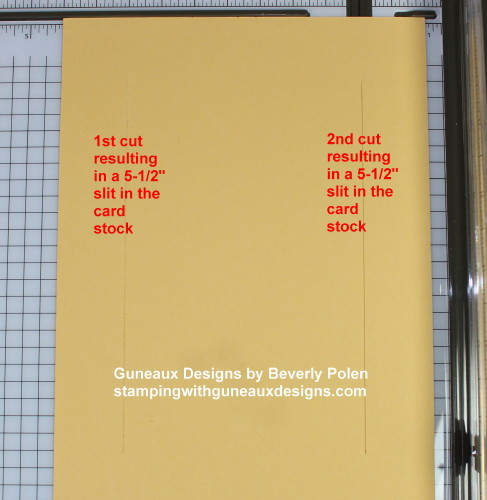
STEP 7:  Cut from the 1″ mark down to the 6-1/2″ mark.  This provides a second 5-1/2″ slit on the card stock.

http://stampingwithguneauxdesigns.com/how-to-make-a-center-step-card-happy-birthday/

STEP 8:  Put the trimmer away and get out your paper scoring tool to score the piece of card stock.

STEP 9:  Place the card stock onto the scoring tool with the 5-1/2″ side and slits to the far left on the tool.

http://stampingwithguneauxdesigns.com/how-to-make-a-center-step-card-happy-birthday/

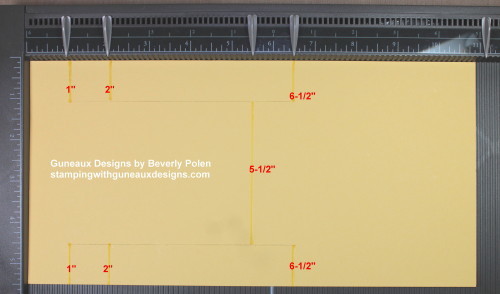
STEP 10:  Score at the 1″, 2″, and 6-1/2″ marks, but ONLY from the top of the card stock down to the slit at the top, and from the slit at the bottom to the edge of the card stock. Your score lines will be 1″ long at the top and bottom, avoiding the area where the two slits are located (see picture below STEP 11).

STEP 11.  Score at the 5-1/2″ mark beginning at the first slit down to the second slit.

http://stampingwithguneauxdesigns.com/how-to-make-a-center-step-card-happy-birthday/

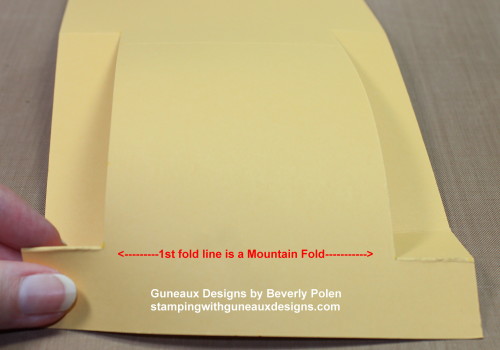
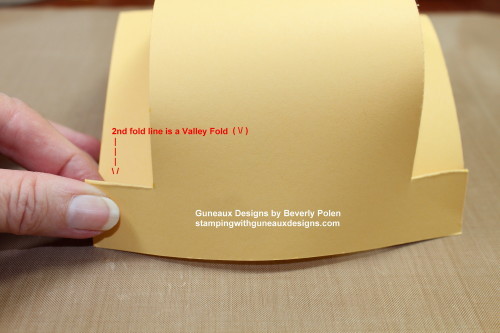
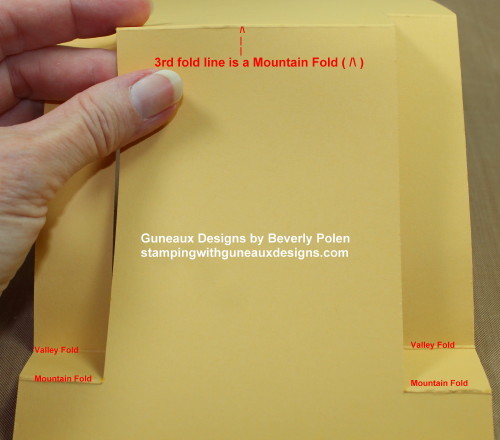
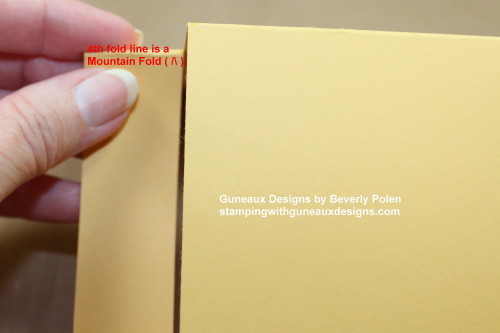
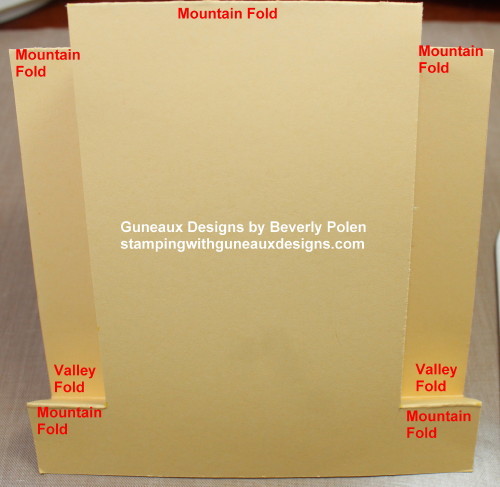
STEP 13:  Remove your card stock from the scoring tool and fold it according to the following:

  • Fold at the first score marks (i.e., the 1″ score line on both sides) into a mountain fold (i.e. the folded crease is facing up).

How to Make a Center Step Card

  • Fold at the second score line (i.e., the 2″ score line on both sides) into a valley fold (i.e., the folded crease is facing down).

How to Make a Center Step Card

  • Fold  the 5-1/2″ score line into a mountain fold.

How to Make a Center Step Card

  • Fold the 6″ score line into a mountain fold.

How to Make a Center Step Card

How to Make a Center Step Card

STEP 14:  Now you can create a center step card base and decorate it according to your desires.

Hopefully my tutorial is easy to follow.  If you have any questions or comments, please feel free to leave them in the comment area (i.e., either at the end of this post or at the conversation bubble to the right of this post title).


Swallowtail Butterfly

God’s Blessings!

Stamping With Guneaux Designs by Beverly Polen

How to make a Center Step Card

HOW TO MAKE A CENTER STEP CARD

ODBD Delightful Decorations Dies Christmas Card

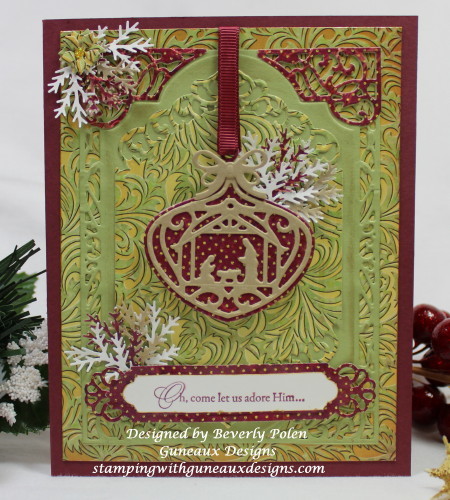
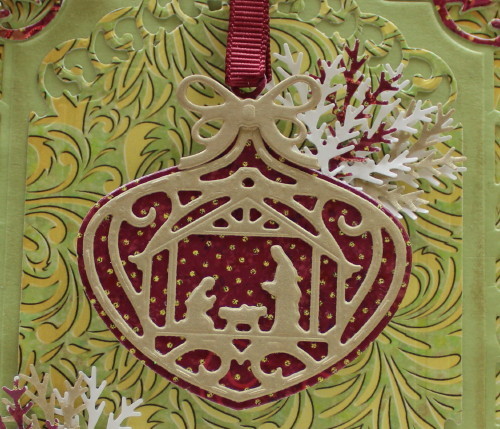
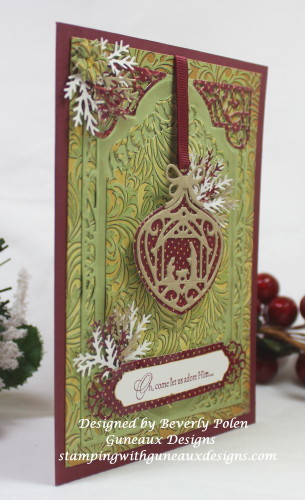
I am in love! 🙂  I love the ODBD Delightful Decorations dies, especially the one that is a nativity scene.  I have never seen a die like this, and I’m so glad I found it on Our Daily Bread Designs.  Here is my card that features the die.
ODBD Delightful Decorations Dies

This is my first card using Our Daily Bread Designs (ODBD) products.  I am so impressed with this business’ focus, which is a religious and spiritual focus for the crafting world.  I am a child of God’s and ODBD’s products certainly will enhance my crafting. Thank you ODBD!
The following is a better picture of the ornament die cut featuring the nativity scene.

ODBD Delightful Decorations Dies Christmas Card

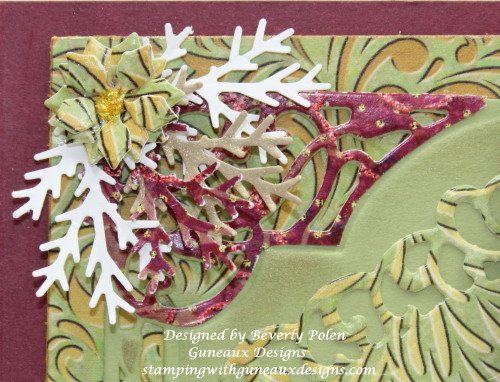
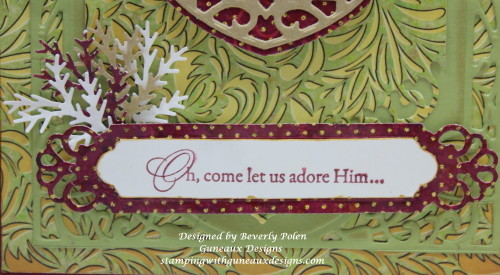
These pictures are closeups of the upper-left corner and sentiment on the card. The sentiment is from the retired Stampin’ Up! Come to Bethlehem stamp set.  I embellished these with “branches” created with the Martha Stewart Medium Branch Punch.

ODBD Delightful Decorations Dies
ODBD Delightful Decorations Dies Christmas Card

Martha Stewart Medium Punch, Branch

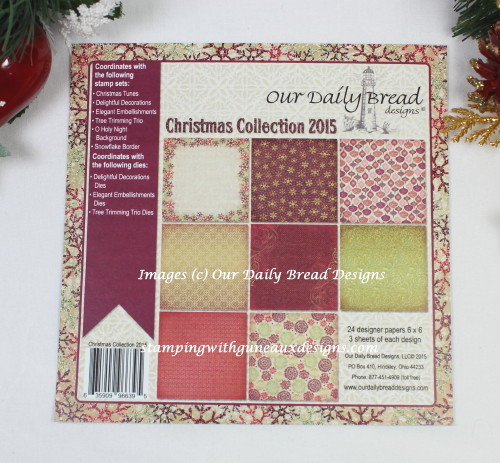
I made this card using ODBD Christmas Collection 2015 paper.  The paper has a shine to it and I really like it with its beautiful designs.  It’s slightly heavier than the Stampin’ Up! Designer Series Papers.  Here’s a picture of the designs.

ODBD Christmas Colection 2015 Paper Pad

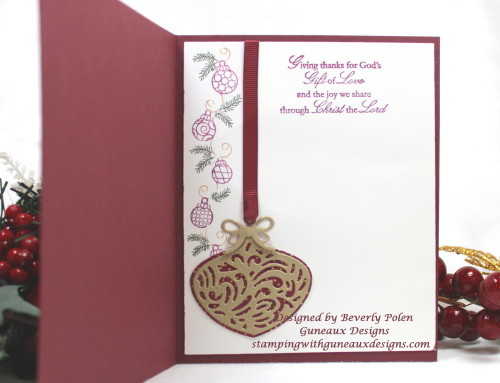
The inside of my card features another ornament die cut from the ODBD Delightful Decorations Dies.

ODBD Delightful Decorations Dies Christmas Card

Thank you for stopping by.  Don’t forget to leave a comment or a question.  Click on the conversation bubble to the right of this post’s title.


ButterflyGod’s Blessings!

Stamping With Guneaux Designs by Beverly Polen

ODBD Delightful Decorations Dies Christmas Card

ODBD DELIGHTFUL DECORATIONS DIES

Stampin Up Venetian Romance DSP – MOJO310

Stampin Up Venetian Romance DSPMy special friend, Melody, from N.VA has left to return home, and I feel sad.  However, I am very pleased that we had a fantastic visit, and I hope to see her again soon.  Because I feel sad about her leaving, I chose to create a card that would provide comfort to anyone who has such feelings when a loved one visits and leaves.  Therefore, I am featuring the Stampin Up Venetian Romance DSP and Verve Stamps on my card share today.  The Verve Stamps “Let It Be” Stamp Set has the perfect sentiment stamp for the card:  “Every Little Thing is Going to be All Right“.  This picture provides a close up of the sentiment. Venetian Romance DSP

I think that the design I used from the Stampin Up Venetian Romance DSP is one of the prettiest designs from the DSP.  Its colors are Island Indigo and Pistachio Pudding.  I used the Stampin’ Up! Pistachio Pudding Card Stock for the card base and the Island Indigo Card Stock for a couple of highlighting elements.

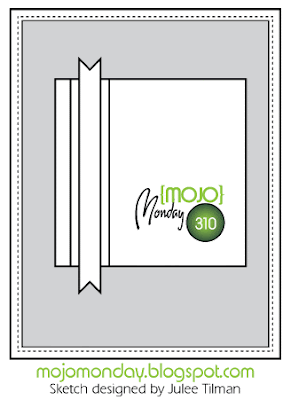
I used this past Monday’s MOJO Monday MOJO310 sketch for the design of my card.  The MOJO310 sketch follows.  

MOJO310 Sketch

It is great to have a sketch to follow when creating a card.  Julee Tilman’s sketches are always beautiful.  She is one of the designers for MOJO Monday.

IN ADDITION TO THE STAMPIN UP VENETIAN ROMANCE DSP, OTHER SUPPLIES USED ARE:  (You can find the Stampin’ Up! supplies here.)

Paper:  Stampin’ Up! Island Indigo Card Stock, Pistachio Pudding Card Stock, and Very Vanilla Card Stock

Stamps:  Verve Stamps – Let It Be Stamp Set

Ink:  Stampin’ Up! Island Indigo Classic Ink

Accessories:  Stampin’ Up! Basic Pearls

 Stampin Up Venetian Romance DSP

 Stamping With Guneaux Designs

 God’s Blessings!
Stamping With Guneaux Designs
By
Beverly Polen
 Stampin Up Venetian Romance DSP

 STAMPIN’ UP! VENETIAN ROMANCE DSP

Afternoon Picnic DSP – MOJO309

I am SO excited (doing the happy dance)!  My best friend from Northern Virginia arrives in a few hours for a visit.  I have not seen her for about three years, so I am so excited and looking forward to her visit here in Florida.  I made this card for her from the Stampin’ Up! Afternoon Picnic DSP to tell her “welcome, best friend”. Afternoon Picnic DSP - MOJO309

Would you agree with me that the color combination of Coastal Cabana and Wisteria Wonder is beautiful?  I think they are striking together.  These are the colors in all of the Afternoon Picnic DSP design patterns that I selected for this card.

Afternoon Picnic DSP - MOJO309

The card’s “best friend” sentiment is from the Stampin’ Up! Fabulous Phrases Stamp Set.  The sentiment was stamped onto a Coastal Cabana Card Stock Spellbinders Splendid Circle.  It rests upon a 1-3/4″ Crushed Curry Card Stock circle.  The flower resting on the sentiment is quite easy to make.  I simply cut a 1-3/4″ circle from Wisteria Wonder Card Stock and “fussy cut” it in a circular fashion.  I then rolled it around a wooden skewer and glued it together.  Then I used the Stampin’ Up! Boho Blossoms Punch to punch out a Crushed Curry Card Stock flower that I glued into the center.  Although you cannot see it too well, there is a tiny Basic Pearl in the center of the flower. 

Afternoon Picnic DSP - MOJO309

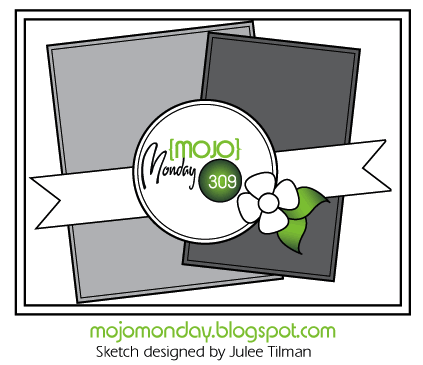
I used the MOJO Monday Sketch Challenge MOJO309 design as my guide to create the card.  This is the MOJO309 design. 

 Afternoon Picnic DSP - MOJO309

IN ADDITION TO THE STAMPIN’ UP! AFTERNOON PICNIC DSP, OTHER SUPPLIES USED:

Stamps:  Stampin’ Up! Fabulous Phrases Stamp Set (120501)

Paper:  Afternoon Picnic DSP (131390), Coastal Cabana Card Stock (131297), Wisteria Wonder Card Stock (122922), and Crushed Curry Card Stock (131199)

Ink:  Wisteria Wonder Classic Ink (126985)

AccessoriesStampin’ Up! 1-3/4″ Circle Punch (119850), Basic Pearls (119247), Boho Blossoms Punch (119858), and Spellbinders Splendid Circle Template Afternoon Picnic DSP - MOJO309


 God’s Blessings!
Stamping With Guneaux Designs
By
Beverly Polen 

Afternoon Picnic DSP - MOJO309

STAMPIN’ UP! AFTERNOON PICNIC DSP – MOJO309