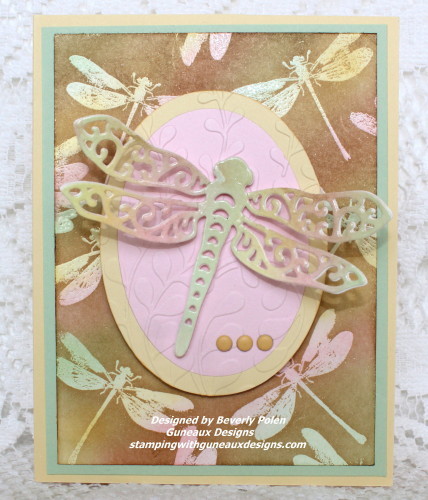
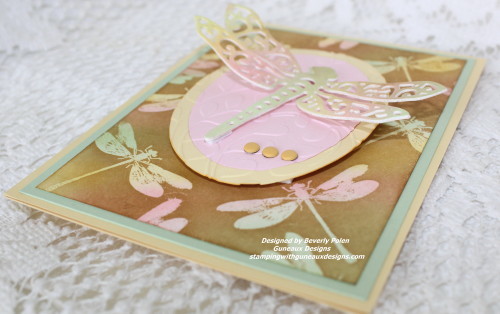
Color on Color Emboss Resist Technique

Sponging and blending inks onto card stock is one of my favorite forms of art.  I have made many cards in this manner; however, I have only used the Color on Color Emboss Resist Technique for very few cards.  This technique requires sponging and blending inks as well.

Color-On-Color-Emboss-Resist-Technique-2

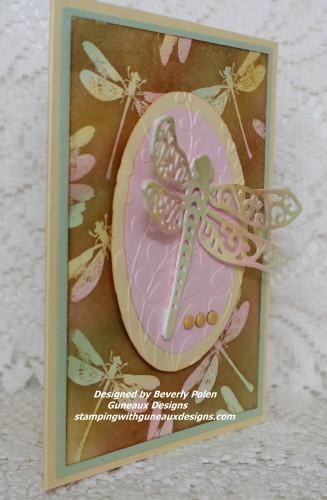
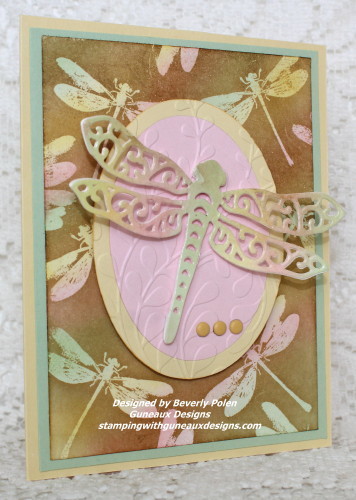
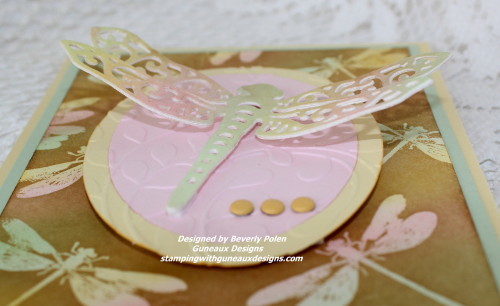
I have been thinking for a while that I wanted to create a card featuring the Color on Color Emboss Resist Technique.  Splitcoaststamper.com gave me the nudge to do so as it posted today a Technique Challenge for using the emboss resist technique.  I have included a tutorial in this post if you should want to try it too.  Here are additional pictures of my card.

Color-on-Color-Emboss-Resist-Technique_8_1Color-on-Color-Emboss-Resist-Technique-2Color-on-Color-Emboss-Resist-TechniqueColor-on-Color-Emboss-Resist-Technique

I did not add a sentiment on the card, but I will when an occasion arises that will dictate the type of sentiment needed. It will most likely be a “Thinking Of You” or “For You” sentiment.

BlogDivider_zpsed339ea1

SUPPLIES USED FOR THIS COLOR ON COLOR RESIST TECHNIQUE CARD:  

Stamps:  Stampin’ Up! Awesomely Artistic Stamp Set

Paper:  Stampin’ Up! Whisper White, Pink Pirouette, Barely Banana (retired), and Pistachio Pudding (retired) Card Stock

Ink: Stampin’ Up! Pistachio Pudding (retired), Barely Banana (retired), Pink Pirouette, and Baked Brown Sugar Classic Inks, and a VersaMark Watermark Stamp Pad

Accessories:  Stampin’ Up! Embossing Buddy, Clear Embossing PowderSponge Daubers, a heat gun, Stampin’ Up! Subtles Candy Dots, and Spellbinders Dragonfly Die – S2-157

Card Size: A2 – 5-1/2″ x 4-1/4″

I hope you enjoyed the card and plan to use the technique.  Now on to the tutorial.


BlogDivider_zpsed339ea1

COLOR ON COLOR RESIST TECHNIQUE TUTORIAL

A.  SUPPLIES NEEDED FOR USING THE COLOR ON COLOR EMBOSS RESIST TECHNIQUE:

Stamp:  Select a solid stamp that you want featured as the primary element.

Paper:  A white piece of card stock for sponging on ink and other card stock of your choice for your card.

Ink: You will need three light colors and one darker color and a watermark stamp pad

Accessories:  Talcum powder for rubbing across card stock before applying embossing powder; clear embossing powder, sponge daubers or sponges, and heat gun

B.  INSTRUCTIONS FOR THE COLOR ON COLOR EMBOSS RESIST TECHNIQUE:

1. Cut card stock accordingly:

  • 8-1/2″ x 5-1/2″ for card base
  • 5-1/4″ x 4″ for 1st layer
  • 5″ x 3-3/4″ for white card stock

2. Select a stamp that you want to be the main feature of the card.

3. Select three colors of ink that are light shades.

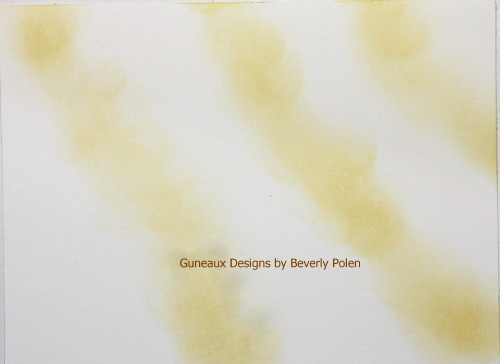
4. Using a sponge dauber, swirl your first light color onto the white card stock.
Color-on-Color-Emboss-Resist-Technique
5. Swirl your second light color onto the Whisper White Card Stock, and don’t worry about overlapping the colors.

Color-on-Color-Emboss-Resist-Technique

6. Swirl your third light color onto the Whisper White Card Stock, and then look for places where you want to blend the colors and do that with the daubers. Don’t worry about the look too much as it will completely change when you add the darker color.

Color-on-Color-Emboss-Resist-Technique

7. AFTER the ink dries (make sure the ink is dry), rub the talcum powder over the complete piece of card stock.

8. Cover your selected stamp with a watermark ink and stamp the image randomly on the card stock.

9. Cover with the clear embossing powder and heat set. Let it cool.Color-on-Color-Emboss-Resist-Technique
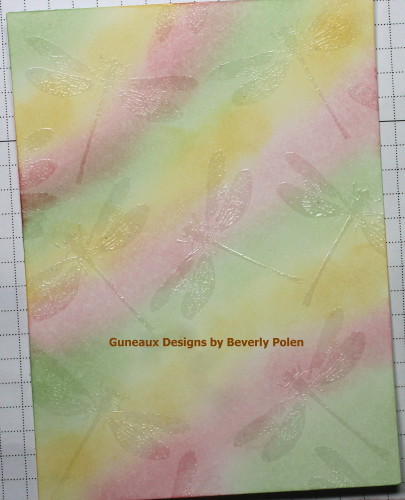
10. Swirl you dark color of ink all over the piece of card stock. You may need to do this a couple times or more.Color-on-Color-Emboss-Resist-Technique

11. Using a paper towel, rub the excess dark ink from the embossed images. Isn’t it cool how the clear embossing takes on the colors?

12. After reaching the desired colors on the colored piece of card stock, use a stamp image (can be the same that was used for the embossing) to create a center piece for the card.

13. Adhere the pieces together and add your desired embellishments.

14. If desired, add a sentiment to the card.

Enjoy!!

BlogDivider_zpsed339ea1Swallowtail Butterfly
God’s Blessings!

Stamping With Guneaux Designs

by

Beverly Polen

Color On Color Emboss Resist Technique – Happy Father’s Day

I love the art of blending inks. However, I had not tried before the Color on Color Emboss Resist Technique. After trying it, I now know that I really, really like it and will be using it in future art. The card share I have for you today features this technique for a Happy Father’s Day card.

Color on Color Emboss Resist Technique

SUPPLIES USED FOR THE COLOR ON COLOR RESIST TECHNIQUE, HAPPY FATHER’S DAY CARD (I am listing the supplies I used; however, the supplies you use do not need to be the same, as it is the technique itself that is the subject of this tutorial).

Stamp Sets: Stampin’ Up! Fine Feathers (126517) and an old hostess stamp set, Something to Celebrate (for sentiment)

Paper: Baked Brown Sugar Card Stock (131296), Bermuda Bay Card Stock (131197), and Whisper White Card Stock (100730)

Ink: You will need three light colors and one darker color – Pistachio Pudding Classic Ink (131177), More Mustard Classic Ink (retired), Coastal Cabana Classic Ink (131175), and Baked Brown Sugar Classic Ink (131174)

Accessories: Embossing Buddy (103083), Ovals Collections Framelits (129381), Bitty Banners Framelits (129267), Sponge Daubers (102892), VersaMark (102283), Clear Embossing Powder (109130), Linen Thread (104199), Stampin’ Dimensionals (104430)

Color on Color Emboss Resist Technique

INSTRUCTIONS FOR THE COLOR ON COLOR EMBOSS RESIST TECHNIQUE:

1. Cut card stock accordingly:

8-1/2″ x 5-1/2″ for card base

5-1/4″ x 4″ for 1st layer

5″ x 3-3/4″ of Whisper White Card Stock

2. Select a stamp that you want to be the main feature of the card. (I used the feather stamp; however, I think it would work best with a solid stamp with few designs within).

3. Select three colors of classic ink that are light shades.

4. Using a sponge dauber, swirl your first light color onto the Whisper White Card Stock.

Color on Color Emboss Resist Technique

5. Swirl your second light color onto the Whisper White Card Stock, and don’t worry about overlapping the colors.

Color on Color Emboss Resist Technique

6. Swirl your third light color onto the Whisper White Card Stock, and then look for places where you want to blend the colors and do that with the daubers. Don’t worry about the look too much as it will completely change when you add the darker color.

Color on Color Emboss Resist Technique

7. AFTER the ink dries, rub the embossing buddy over the complete piece of card stock.

8. Cover your selected stamp with VersaMark and stamp the image randomly on the card stock.

9. Cover with the clear embossing powder and heat set. Let it cool.

10. Swirl you dark color of ink all over the piece of card stock. You may need to do this a couple times or more.

11. Using a paper towel, rub the excess dark ink from the embossed images. Isn’t it cool how the clear embossing takes on the colors?

12. After reaching the desired colors on the colored piece of card stock, use the stamp image to create a center piece for the card.

Color on Color Emboss Resist Technique

13. Adhere the pieces together and add your desired embellishments.

14. Add your sentiment to the card.

Enjoy!!

God’s Blessings!
Stamping With Guneaux Designs
by
Beverly Polen

Color on Color Emboss Resist Technique COLOR ON COLOR EMBOSS RESIST TECHNIQUE – HAPPY FATHER’S DAY