Stampin’ Up! Retiring Products List

 Stampin' Up! Retiring Products List

Oh, what a BIG day it is for those who love Stampin’ Up! products!  Why?  Today you get the first chance to view the Stampin’ Up! Retiring Products List!  Some items are up to 60% off!   How cool is that? 

STAMPIN’ UP! RETIRING PRODUCTS LISTS

Retiring Stamps will be available through June 3Click to View the Stampin’ Up! Retiring Stamps. 

Retiring Accessories are ONLY available while supplies last. SAVE UP TO 60% on  select items!  Be sure to place your order quickly for your favorite products. Click to the View Stampin’ Up! Retiring Accessories.


 Stamping With Guneaux Designs

 God’s Blessings!
Stamping With Guneaux Designs
by
Beverly Polen

STAMPIN’ UP! RETIRING PRODUCTS LIST

Secret Garden and Fabulous Florets – Stampin’ Up!

Secret Garden and Fabulous Florets - Stampin' Up!

I love this card that I made!  It features the Stampin’ Up! Secret Garden and Fabulous Florets Stamp Sets.  This card also features the Masking Technique.  I had to do a lot of masking to get the effect I wanted, especially for the floral stems.

Do you get the correlation between the card’s sentiment and the stamped images?  There are multiple pinkish flowers and one turquoise flower on the card.  Thus, the “There’s Only One You” sentiment is quite fitting.  Don’t you agree?  The sentiment is from the recent Sale-a-bration Vintage Verses Stamp Set. Secret Garden and Fabulous Florets - Stampin' Up!

As it relates to the positioning of the card stock layers, the design for this card is quite similar to the card I shared yesterday. 

The card base is made with Regal Rose Card Stock.  The Basic Black Card Stock and Tempting Turquoise Card Stock are the same size as the Real Red and Basic Black Card Stock on yesterday’s card.

I typically do not show the envelope I make for my cards; however, I have recently.  I think a matching envelope is necessary for a complete package.

 Secret Garden and Fabulous Florets - Stampin' Up!Secret Garden and Fabulous Florets - Stampin' Up!

Can you see the very light gray around the flowers and stems?  The purpose of this is to create shadows that would be cast if the light were coming from the top-right side.  This technique also creates dimension for the objects.  

Stampin’ Up! Supplies Used for the Card:

Stamp Sets:  Secret Garden and Fabulous Florets (129144 and 123027 – c) 

Paper:  Regal Rose Card Stock, Basic Black Card Stock, Tempting Turquoise Card Stock, and Whisper White Card Stock

Ink:  Various Markers

Accessories:  Basics Glimmer Brad (Basic Black – 121003) and Brights Glimmer Brad (Tempting Turquoise – 121006)  

God’s Blessings!
Stamping With Guneaux Designs
by
Beverly Polen 

Secret Garden and Fabulous Florets

 SECRET GARDEN AND FABULOUS FLORETS

Stampin’ Up! Get Well Card

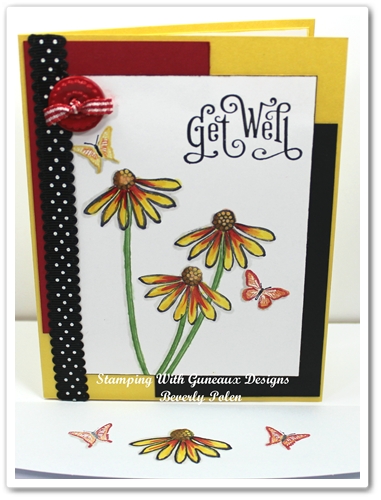
I made this Stampin’ Up! get well card for a young lady who had a lung removed  recently as a result of a massive tumor.  Her name is Carrie, and if you are inclined, please say a healing prayer for her.

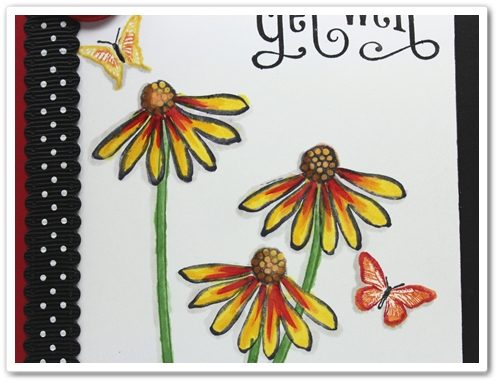
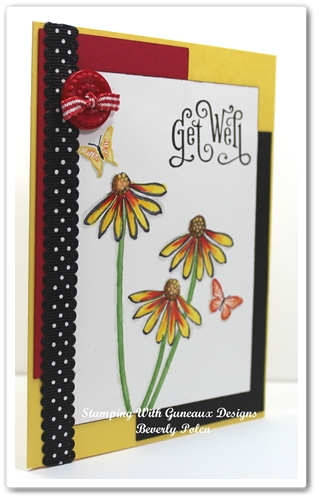
Look at the flowers on this Stampin’ Up! get well card and tell me what current stamp set the floral image is from.  I had not used this image before (or that I remember) and decided to do so on this card.  I wanted the card to be cheerful, and the floral image satisfied my need.

Loving butterflies as I do, I had to add a couple of them to the card.  The butterfly images are from the Stampin’ Up! Kindness Matters Stamp Set.  The “Get Well” sentiment is from the Stampin’ Up! Perfectly Penned Stamp Set.

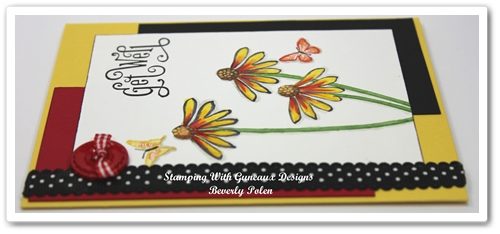
The card base is made from Stampin’ Up! Daffodil Delight Card Stock.  The red piece of card stock on the left is a 2-3/8″ x 4-1/2″ piece of Real Red Card Stock.  The black piece of card stock on the right is a 2-1/2″ x 4-1/4″ piece of Basic Black Card Stock.  The white center piece is a 3-3/4″ x 4-1/2″ piece of Whisper White Card Stock.  Notice the matching envelope in the first photo.

Enjoy your day, and take time to leave a comment!  I love reading your comments.


Stampin’ Up! Supplies Used for this Stampin’ Up! Get Well Card:

Stamp Sets:  Kindness Matters (122902), Perfectly Penned (122892), and an additional set that you’ll guess for me

Paper:  All mentioned above

Ink:  Various Alcohol Ink Markers

Accessories:  Basic Black 1/2″ Scallop Dots Ribbon (124145), a retired Real Red 3/16″ Gingham Ribbon, and a retired Real Red Holly Berry Designer Button.


Butterfly_1_1

God’s Blessings!
Stamping With Guneaux Designs By Beverly Polen
Firm Reliance on Divine Providence!

STAMPIN’ UP! GET WELL CARD

Stampin Up Kindness Matters

Stampin' Up! Kindness MattersWith Stampin’ Up!’s stamp set for the month of April being the Best of Butterflies, I have another butterfly card to share.  This one features the Stampin Up Kindness Matters Stamp Set along with the Flowering Flourishes.  Because the Not Quite Navy color is designated to retire soon, I decided to use Not Quite Navy Card Stock for my card base.  Cajun Craze Card Stock is the first layer of the card.

Have you ever seen Not Quite Navy floral stems?  Well, now you have.  I thought  Not Quite Navy floral stems would add a different touch and pull in the color of the card base.  Isn’t that one of the things that is so nice about art?  You don’t have to be true to reality.

Stampin Up Kindness Matters


The picture to the right shows the envelope I stamped to match the card.

The pictures below show the two dimensional butterfly.

Stampin Up Kindness Matters

Stampin Up Kindness Matters


SUPPLIES USED FOR THE STAMPIN UP KINDNESS MATTERS CARD:

Stamps:  Stampin Up Kindness Matters Stamp Set (122900) and Flowering Flourishes Stamp Set (126367)

Paper:  Stampin’ Up! Not Quite Navy, Cajun Craze, and Whisper White Card Stock

Ink:  Not Quite Navy Classic Ink, Not Quite Navy Stampin’ Write Marker, Pumpkin Pie Stampin’ Write Marker, and Cajun Craze Stampin’ Write Marker

Accessories:  Basic Rhinestones (119246),  3/16″ Bright Brads (Pumpkin Pie – 119740)


God’s Blessings!
Stamping With Guneaux Designs
by
Beverly Polen

Stampin Up Kindness Matters

Stampin Up Kindness Matters

Stampin’ Up! Tricky Tip Tuesday – Pretty Pom Poms

Stampin’ Up! Tricky Tip Tuesday – Pretty Pom Poms (Content belongs to Stampin’ Up!)

Today, Stampin’ Up! Tricky Tip Tuesday is dedicated to pom poms! They were big in the 60s—so it has been fun (for some of us!) to see them make a comeback in the crafting world. Let’s start with Baker’s Twine (US/CAN) mini pom poms.

Just follow the easy steps pictured below.

Stampin' Up! Tricky Tip Tuesday

If you would like to create a garland, just thread a needle with a length of Baker’s Twine and run it through the pom poms.

*****

After I finished making the Baker’s Twine pom poms, I began to wonder what would happen if I wound 1/2″ Seam Binding Ribbon around a fork instead of Baker’s Twine. To my surprise, the result looked very much like a marigold!

Then I thought: How can I create a bigger pom pom flower? The old-fashioned way: using cardboard donut shapes made with super-thin white cardboard, a 2-1/2″ Circle Punch, a 1/2″ Circle Punch, and our Daffodil Delight 1/2″ Seam Binding Ribbon. When I finished winding, cutting, and tying, out popped a daffodil . . . just the thing for embellishing a Mother’s Day gift! (Believe me . . . I don’t usually get this lucky!)

Stampin' Up! Tricky Tip Tuesday

Stampin' Up! Tricky Tip Tuesday

I could have kept going with flower-making . . . but then I saw a paper pom pom garland on Pinterest. I HAD to try that, too. The result: today’s Tricky Tip features three ways to make small pom pom projects—using Baker’s Twine, 1/2″ Seam Binding Ribbon, and Designer Series Paper. They are all so easy and fun!

Stampin' Up! Tricky Tip Tuesday

Got any more pom pom crafting ideas? We’d love to hear about them!

The white daffodil petals were made using the Big Shot, the Fun Flower Bigz L Die, and our White Creped Filter Paper.

God’s Blessings!
Stamping With Guneaux Designs
by
Beverly Polen

 STAMPIN’ UP! TRICKY TIP TUESDAY

Stampin’ Up! Papillon Potpourri

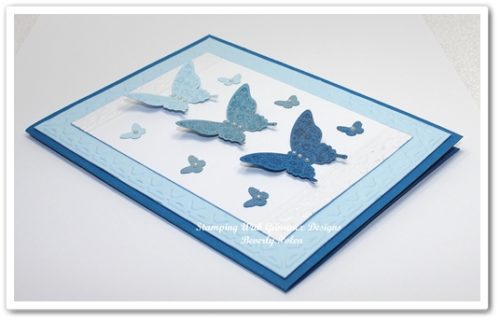
STAMPIN’ UP! PAPILLON POTPOURRI GREETING CARD.

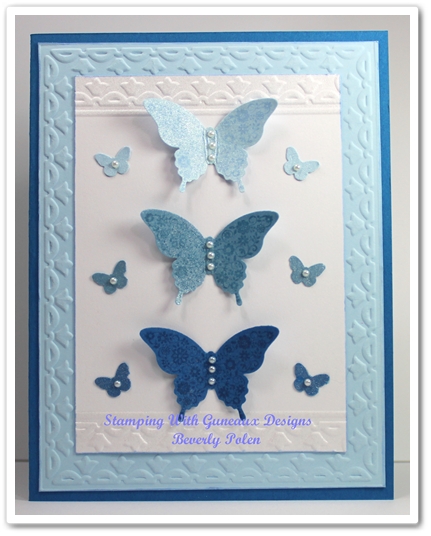
I was excited when Stampin’ Up! chose butterflies for the “Best of” stamp set for the month of April. That decision motivated me to create for you a simple card featuring butterflies from the Stampin’ Up! Papillon Potpourri Stamp Set.


SUPPLIES:

Stamps: Stampin’ Up! Papillon Potpourri Stamp Set (123759 – clear)

Paper: Pacific Point (111350), Bashful Blue (105120), Marina Mist (119682), and Whisper White Card Stock (100730)

Ink: Pacific Point (126951), Bashful Blue (126961), and Marina Mist Classic Ink (126962)

Accessories: Big Shot (113439), Framed Tulips Textured Impressions Embossing Folder (121809), Elegant Butterfly Punch (127526), Beautiful Wings Embosslit (118138) or a small butterfly punch, Vanilla Shimmer Smooch Spritz (118772), Adhesive of Your Choice, and Basic Pearls (119247)


INSTRUCTIONS FOR THIS STAMPIN’ UP! PAPILLON POTPOURRI CARD

Step 1. Cut the following pieces of card stock:

  • an 8-1/2″ x 5-12″ Pacific Point Card Stock for the card base,
  • a 4″ x 5-1/4″ piece of Bashful Blue Card Stock, and
  • a 3-1/8″ x 4-3/8″ piece of Whisper White Card Stock.

Step 2. Place the Bashful Blue Card Stock inside the Framed Tulips Embossing Folder and run through the Big Shot.

Step 3. Place one end of the Whisper White Card Stock inside the Framed Tulips Embossing Folder and run through the Big Shot.

Step 4. Place the other end of the Whisper White Card Stock into the Embossing Folder and run through the Big Shot.

Step 5. Spritz the embossed end of the Whisper White Card Stock (you’ll need to cover the remainder of the card stock so it isn’t spritzed.

Step 6. Using the floral butterfly stamp from the Stampin Up Popillon Potpourii, do the following:

  • Cover the stamp with Bashful Blue Classic Ink and stamp onto a small piece of Bashful Blue Card Stock,
  • Cover the stamp with Marina Mist Classic Ink and stamp onto a small piece of Marina Mist Card Stock, and
  • Cover the stamp with Pacific Point Classic Ink and stamp onto a small piece of Pacific Point Card Stock.

Step 7. Using the Elegant Butterfly Punch, punch out each butterfly and spritz them.

Step 8. Using the Beautiful Wings Embosslit and the Big Shot, cut out a small butterfly from Bashful Blue, Marina Mist, and Pacific Point Card Stock. Spritz the butterflies.

Step 9. Place three small Basic Pearls onto the floral butterflies, and one on the small butterflies.

Step 10. Attached the butteflies to the piece of Whisper White Card Stock
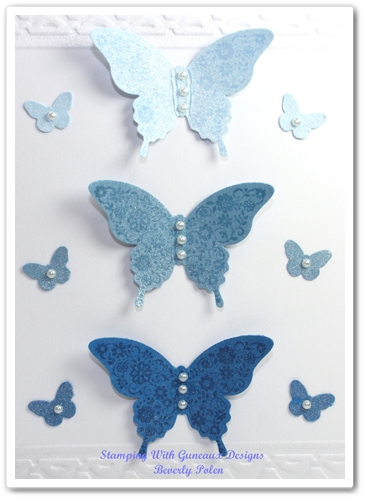
Step 11. Attach the Whisper White Card Stock with the butterflies onto the Bashful Blue Card Stock in the center of the embossed tulips.

Step 12. Attach the above card stock to the card base.

I did not add a sentiment to the card so it can be used for the appropriate occasion when the need arises. Now it’s your turn to make the card and to leave me feedback.


God’s Blessings!
Stamping With Guneaux Designs
by
Beverly Polen
STAMPIN’ UP! PAPILLON POTPOURRI