Everything Eleanor Stamp Set

Everything Eleanor Stamp Set

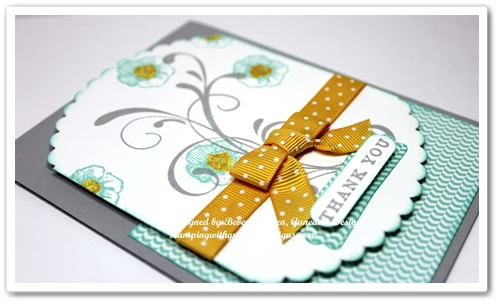
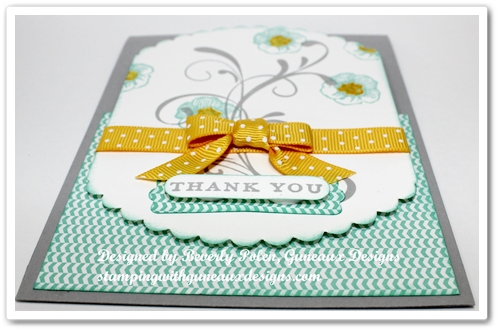
Thanks for stopping by for a Monday rubber stamping fix! (lol)  My card share for you today features the beautiful Everything Eleanor Stamp Set and two new Stampin’ Up! colors.  It is such a simple card to make, as you will see in the below instructions.
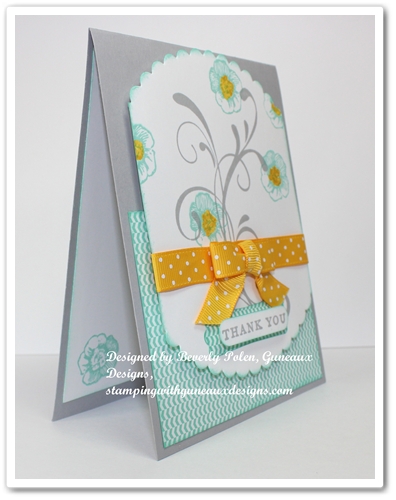
Also featured on the card is a sentiment from the hostess Morning Meadow Stamp Set.
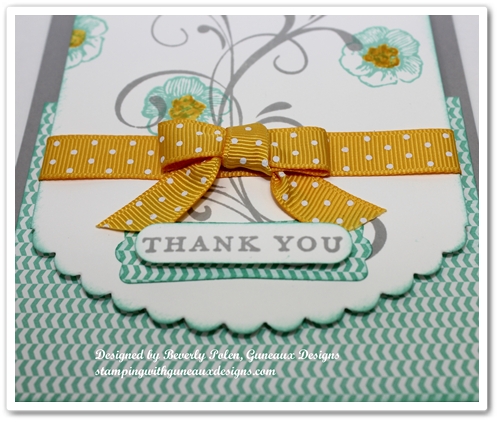

SUPPLIES USED FOR THE CARD FEATURING THE EVERYTHING ELEANOR STAMP SET:

Stamp Sets:  Everything Eleanor Stamp Set (124164 – c) and Morning Meadow Stamp Set (129675 -c)

Paper:  Designer Series Paper Stack (Coastal Cabana – 2013-2015 In Colors – 130136), Smoky Slate Card Stock (new Neutrals color – 131203), and Whisper White Card Stock (100730)

Ink:  Coastal Cabana Classic Ink (new In Color – 131175), Smoky Slate Classic Ink (new Neutrals color – 131181), and Daffodil Delight Marker (119677)

Accessories:  Stampin’ Up! Circles Collection Framelits (130911), Word Window Punch (119857), Modern Label Punch (119849), and retired Daffodil Delight Ribbon


INSTRUCTIONS:

  • Cut an 11″ x 4-1/4″ piece of Smoky Slate Card Stock.  Fold in the center for a card base with the fold at the top.
  • Cut a 4″ x 3″ piece of Coastal Cabana Designer Series Paper from the 2013-2015 In-Color Designer Series Paper Stack.  Use a sponge to apply Costal Cabana Classic Ink around the piece.
  • Using the largest circle from the Circles Collection Framelits, cut a piece of Whisper White Card Stock.
  • Cut both sides of the circle to make the piece 3-5/8″ wide.  Use a sponge to apply Costal Cabana Classic Ink around the piece.
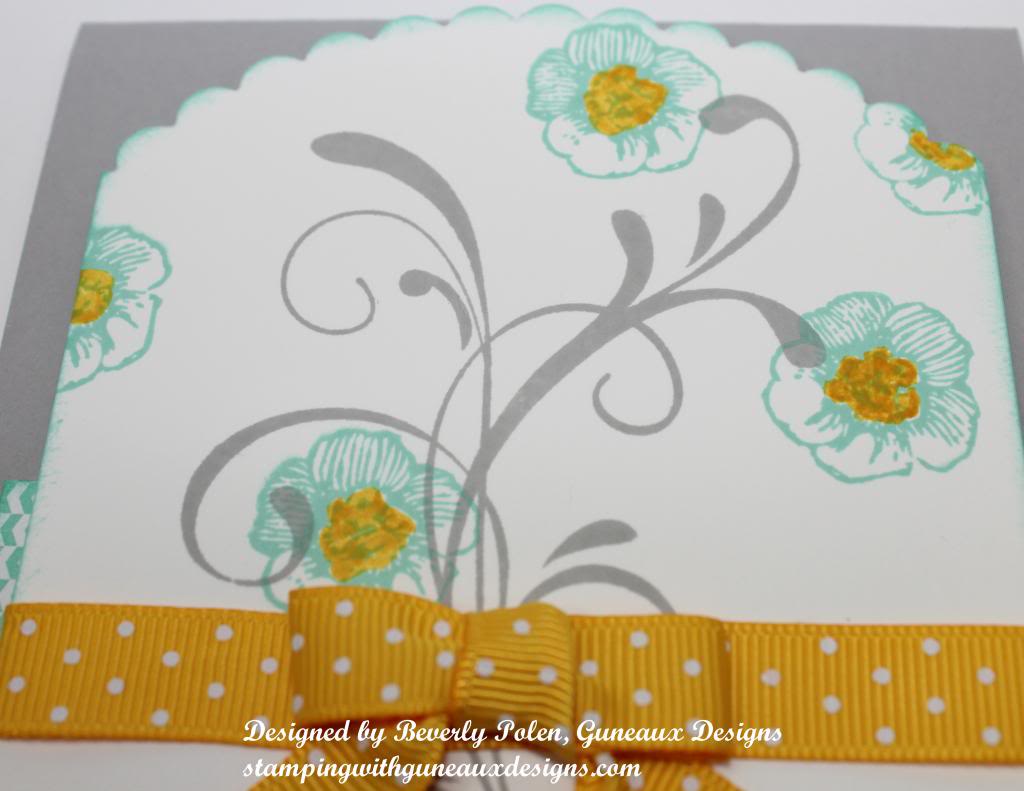
  • Cover the flourish image from the Everything Eleanor Stamp Set with Smoky Slate Classic Ink.  Stamp the image on the Whisper White modified circle.
  • Cover the small flower image from the Everything Eleanor Stamp Set with Coastal Cabana Classic Ink and randomly stamp the image around the stamped flourish.
  • Color the center of the flowers with the Daffodil Delight Marker.
  • Stamp the “Thank You” sentiment from the Morning Meadow Stamp Set onto a piece of Whisper White Card Stock with Smoky Slate Classic Ink.
  • Cut out the sentiment with the Word Window Punch.
  • Cut out a label using the Modern Label Punch from the Coastal Cabana Designer Series Paper.
  • Attach the sentiment onto the modern label using foam adhesive.
  • Attach this piece to the bottom of the stamped Whisper White Card Stock.
  • Add Daffodil Delight ribbon around the piece.
  • Attach the 4″ x 3″ piece of Coastal Cabana Designer Series Paper to the bottom of the Smoky Slate card base.
  • Using foam adhesive, attach the modified circle piece over the Coastal Cabana paper.
  • Finished – enjoy your card!

God’s Blessings!
Stamping With Guneaux Designs
by
Beverly Polen
 EVERYTHING ELEANOR STAMP SET

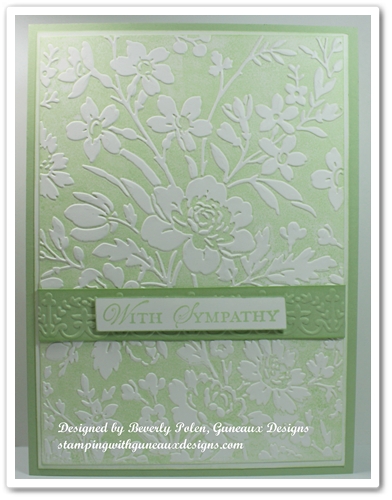
Loving Thoughts Sympathy Card

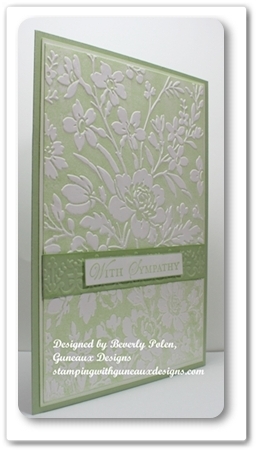
This Loving Thoughts Sympathy Card is a quick and easy handmade card.  It is simply made with card stock and ink.

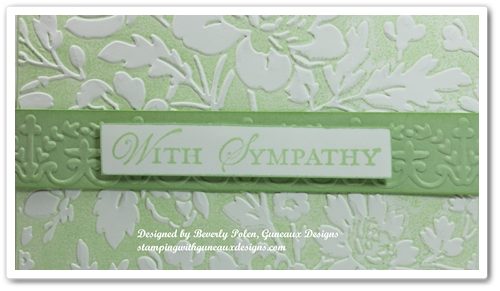
The card base is made from Stampin’ Up!’s new Pistachio Pudding Card Stock (131294).  The first layer is made with dry embossing on a piece of Whisper White Card Stock.  The embossing folder is an Anna Griffin Cuttlebug folder named, Wildflower Gate.  I used a brayer to roll Pistachio Pudding Classic Ink onto the negative side of the embossing folder, placed the piece of Whisper White Card Stock inside the folder, and ran it through the Big Shot Die Cutting Machine.

The embossing folder has a matching embossing banner.  It was used on the small piece of Pistachio Pudding Card Stock upon which the sentiment rests.  The sentiment is from the Stampin’ Up! Loving Thoughts stamp set.

Enjoy your day!

God’s Blessings!
Stamping With Guneaux Designs
by
Beverly Polen

LOVING THOUGHTS SYMPATHY CARD

Gingham Garden DSP Bird’s Nest Card

 Gingham Garden DSP Bird’s Nest Card

Gingham Garden DSP Bird's Nest CardWhile shopping at Michaels recently, I came across this beautiful bird’s nest stamp.  I had to buy it as I love stamps featuring birds.  I created a Stampin’ Up! Gingham Garden DSP Bird’s Nest Card with the stamp.

The stamp image is called Nestled Bird.  After coloring the image with various Copic markers, I realized that the Gingham Garden DSP blue and yellow design goes perfectly with it. Therefore, I used the design for the card’s first layer.

 Gingham Garden DSP Bird's Nest Card

The picture to the right provides a closer view of the bird and nest.  The bird picture below was my inspiration for coloring the bird on the card.  I don’t know what type of bird it is but I found it to be beautiful.    


I used the Stampin’ Up! Framelits Labels Collection (125598) to cut out the colored image and to create a So Saffron mat that is behind the image.  The card base was made from the Baked Brown Sugar Card Stock (131296). 

This picture shows the embossing I use on the back of all my cards.  The circular text says Guneaux Designs and my name is in the center.

I hope you’ve enjoyed my Gingham Garden DSP Bird’s Nest Card!  I made it for my brother who has been quite sick lately and I want him to know that I am thinking of him.

God’s Blessings!
Stamping With Guneaux Designs
by
Beverly Polen 
Gingham Garden DSP Bird's Nest Card


Happy 4th of July – Zentangle

HAPPY 4TH OF JULY – ZENTANGLE

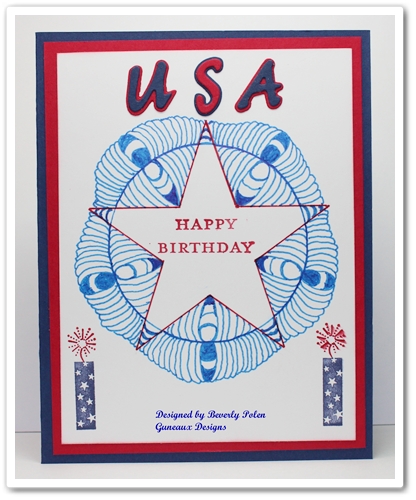
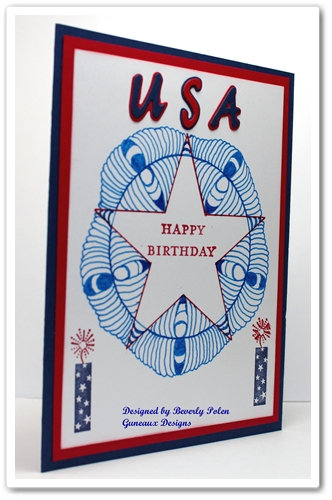
Happy 4th of July, everyone!!  I hope your day is filled with blessings!  May those of us who live in the wonderful USA be grateful as we celebrate our country’s birthday.  God bless the USA!

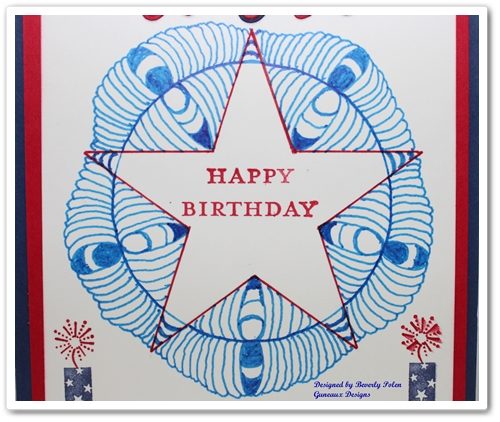
My Happy 4th of July card features tangling.  I created the design, therefore, there is no official name for the tangle.

The Happy Birthday sentiment is from the current Stampin’ Up! Hostess stamp set, the Morning Meadow.  The sparkles are from the Stampin’ Up! retired July Fourth stamp set. The “USA” is from an old Sizzix alphabet set that I have.  I have had this set of dies for years, and I foresee keeping and using it for many more.

The picture to the right shows more clearly the tangling I designed.  It is very simple and easily duplicable.


 ENJOY YOUR DAY!

God’s Blessings!
Stamping With Guneaux Designs
by
Beverly Polen
HAPPY 4TH OF JULY – ZENTANGLE

Stampin Up Courage Stamp Set – 4th of July 3-D Card

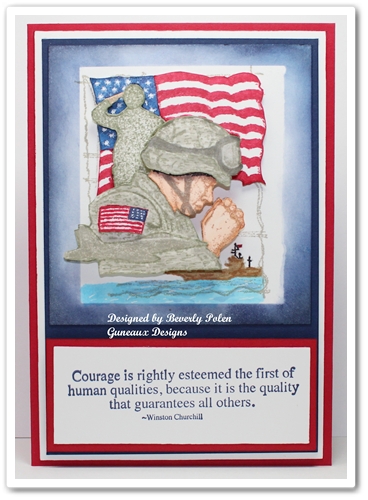
As I shared in my last post, I love the Stampin Up Courage stamp set that retired recently.  Having family members who were in the military and a Dad who loved the American Flag, I especially like this stamp set.  Personally, I think it was a mistake to retire the Stampin Up Courage stamp set.  Regardless, it’s retired, but I am featuring it on my card share for today.  This is my Stampin Up Courage Stamp Set – 4th of July 3-D Card.

Actually, I CASEd (i.e., copy and share everything) myself when making this card.  I made a similar card in 2010 for a special son-in-law who at the time was on active duty with the Army.  God took him home a year ago last month and I really miss him.

As for the card, it is a three-dimensional card.  It may not appear to be based on the photo, so let me share why it is.

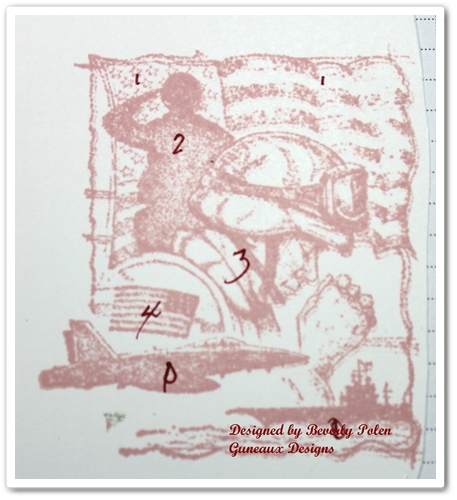
I decided that I wanted each piece on the military-related image to be raised at varying levels.  So I stamped the image onto scrap paper and numbered what part of the image that I wanted at what level.

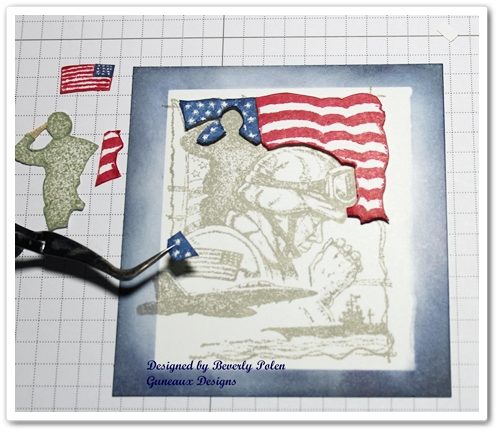
The picture to the right explains.  I numbered as “1” the item I wanted raised with one layer of Stampin Up Dimensionals (i.e., adhesive foam), “2” for those with two layers of dimensionals, and so on.  I re-stamped the image, applied various ink colors, and cut out the pieces.  I then attached the pieces according to the “map” in the photo.

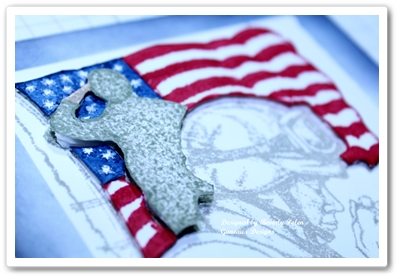
The following picture shows the process of attaching the pieces for the first level, which is the American Flag in the background.

Moving to the 2nd level, I attached the saluting soldier using two layers of dimensionals.  That is shown in the picture to the right.

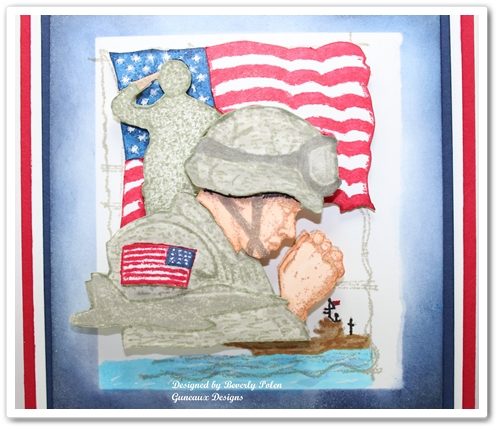
Moving to the 3rd level, I attached the praying soldier with three layers of dimensionals.  However, I did make one change.  I wanted the helmet and the American Flag on the soldier’s uniform to be raised a level above the soldier.  Therefore, I added four layers of dimensionals to the helmet and one to the flag. The following picture reflects this and the completed image.

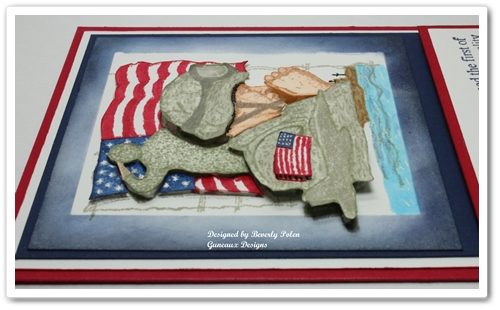
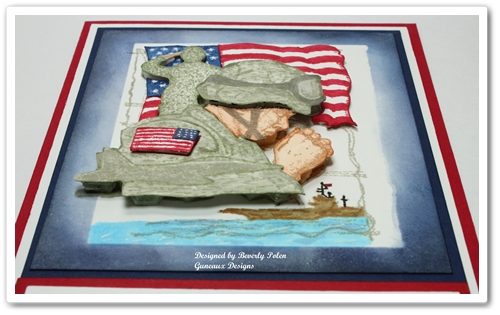
 The following pictures provide a better view of the dimensional elements.

The final product of the Stampin Up Courage card includes Real Red Card Stock as the base, Whisper White Card Stock for the 1st layer, and Night of Navy Card Stock as the 2nd layer.  Included is the sentiment from the Stampin Up Courage stamp set.

If you enjoyed the card and tutorial, please let me know by leaving a comment.


God’s Blessings!
Stamping With Guneaux Designs
by
Beverly Polen
STAMPIN UP COURAGE STAMP SET – 4TH OF JULY CARD

Stampin Up 4th of July Card – Courage

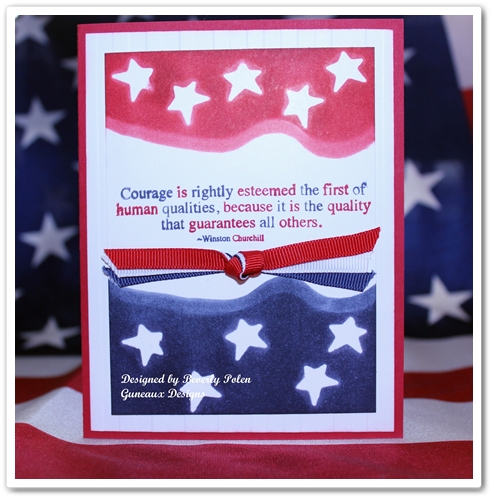
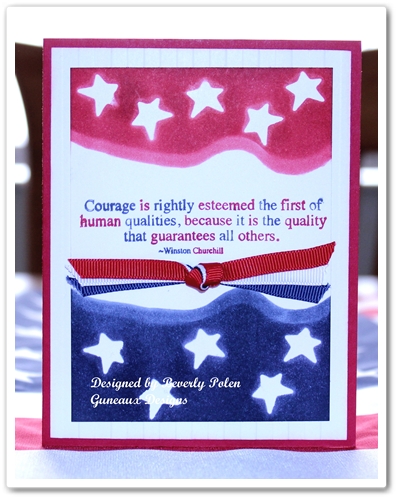
Hey, Stampers!  I have for you today a Stampin Up 4th of July card.  I love the meaning of July 4th and the “Stars and Strips”.  My card is based on my love of our American Flag, therefore, I call it Stars and Strips.

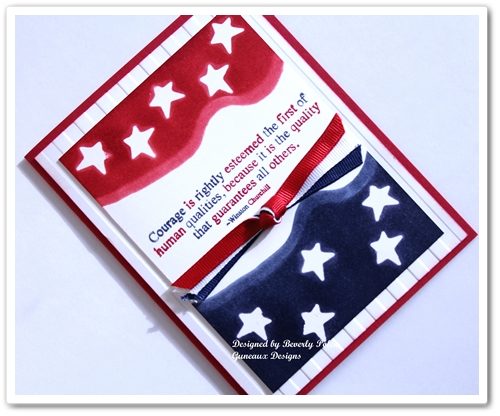
This Stampin Up 4th of July card is so easy to make.  For the top layer, I used an old Sizzix die to cut out stars.  I temporarily adhered them to the top and bottom of a 3-3/4″ x 5″ piece of Whisper White card stock.  I left a white space in the center for the sentiment.  I then used a brayer to add Real Red and Night of Navy Classic Ink over the stars and on the card’s top and bottom.  After the ink dried, I removed the temporary stars and I had white stars remaining in the red and blue areas.

The picture below shows the “strips”, which were created with the Stampin’ Up! Stripes Embossing Folder.

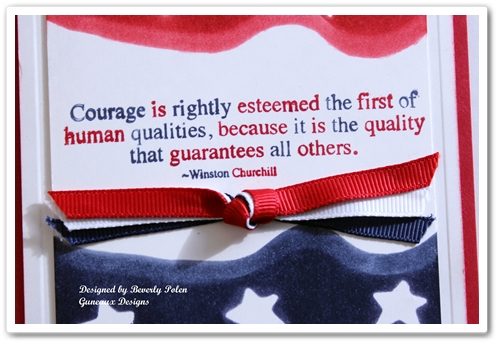
The sentiment in the center of the card front is from the retired Stampin’ Up! Courage stamp set.  I was so disappointed that this stamp set was retired!  The following picture provides a closeup of the sentiment.

Also in the center of the card is ribbon tied into a knot.  It was made with old Stampin’ Up! Real Red, Night of Navy, and Whisper White grosgrain ribbon.


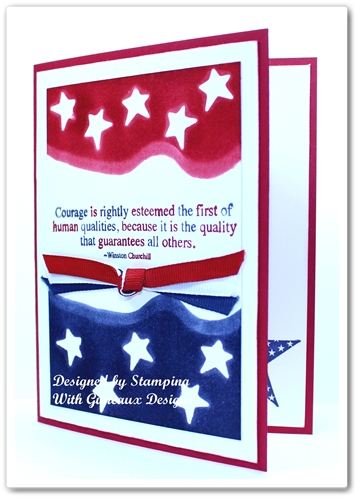
In the picture to the left, you can barely see a Night of Navy star at the bottom, right of the card’s inside.  I used a stamp from the retired Stampin’ Up! July Fourth stamp set for the star.

I hope you enjoy the card.  The 4th of July is right around the corner and I wish you a blessed July 4th.


 God’s Blessings!
Stamping With Guneaux Designs
by
Beverly Polen

STAMPIN UP 4TH OF JULY CARD – COURAGE