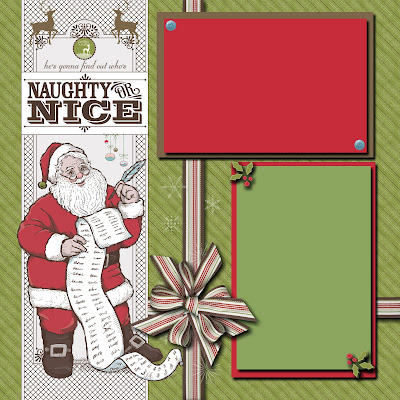
My Digital Studio Christmas Scrapbook Pages

I decided today to re-post two of my favorite My Digital Studio Christmas Scrapbook Pages that I previously created with the Stampin’ Up! My Digital Studio.  I had so much fun designing these 12″ x 12″ pages that I couldn’t stop adding elements to the pages, especially the Christmas tree on the first page.

My Digital Studio Christmas Scrapbook Pages

Can you see all the punches, stamp sets, and embellishments that I added to the tree as well as to the second page? That’s what is so great about Stampin’ Up!’s My Digital Studio; you can use its contents for unintended purposes. Wow, does it ever make creating scrapbook pages faster!

The primary element for these pages is the background paper.  It is from the My Digital Studio’s digital download,  Letters to Santa Designer Series Paper, which is only $4.95!  You cannot beat that price for 12 different Designer Series Paper patterns!

Did you notice the black cat sitting under the Christmas Tree? The cat represents my daughter’s sweet black cat, Bottecelli. I love this cat! He is so lovely and wants to be held and loved on all the time. I’ve never seen a cat like him.

I hope you enjoy these pages as much as I enjoyed designing them.  And if you’ve not tried Stampin’ Up!’s My Digital Studio, you are missing out on a great trend of digital scrapbooking.

God’s Blessings!
Stamping With Guneaux Designs
by
Beverly Polen

My Digital Studio Christmas Scrapbook Pages

Fall Scrapbook Page

This one-page fall scrapbook page features one of my favorite designer series paper, the Autumn Spice, which retired  a while back.  However, if you have Stampin’ Up!’s My Digital Studio (MDS) and have download the Autumn Spice Digital Kit, you can create this page with no problem.

Fall Scrapbook Page

SUPPLIES:

My Digital Studio (MDS) and its Autumn Spice Digital Kit (122175)

Autumn Spice Digital Kit -- Digital Download

Stamp Sets: Day of Gratitude (121148 – c), Lovely Letters Alphabet (127796 – c)

Ink (classic and markers): Cajun Craze, More Mustard, Old Olive, and Early Espresso

Paper: More Mustard Card Stock (100946), Cajun Craze Card Stock (119684), Old Olive Card Stock (100702), and Early Espresso Card Stock (119686)

Accessories: Big Shot Die-Cutting Machine (113439), Tasteful Trim Bigz XL Die 120893), Petite Pennants Builders Punch (122361), Petite Pennants Builder Punch (122361), Early Espresso Baker’s Twine (123124), and Brads of your choice

INSTRUCTIONS FOR MAKING THE FALL SCRAPBOOK PAGE:

  • Cut an 8″ x 8″ piece of More Mustard Card Stock.
  • Print onto Very Vanilla Card Stock one copy of the following design from the MDS Autumn Spice Digital Kit:

Autumn Spice Digital Kit

  • Cut two 8″ x 1″ pieces of the design that you just printed, ensuring the cut has the leaves flowing from top to bottom. (Obviously, if you have the original card stock you won’t need MDS to print a copy.)
  • Lay one piece of the design onto the scallop side of the Tasteful Trim die and run through the Big Shot. (Insure the card stock is oriented correctly so the scallops will be on the right side.)
  • Lay the second piece of the design onto the scallop side of the Tasteful Trim die and run through the Big Shot. (Insure the card stock is oriented correctly so the scallops will be on the left side.)
  • Attach one of the scallop pieces onto the right side of the 8″ square piece of More Mustard Card Stock, and the other on the left. (Insure correct orientation.)
  • Punch a small hole in the two corners at the top of the card stock.
  • Insert a piece of Early Espresso Baker’s Twine through the holes, allowing the twine to hand down slightly. Tie knots in the ends of the twine.
  • Using the Petite Pennants Builder Punch, punch out one set of pennants each from the printed Autumn Spice Card Stock, Cajun Craze Card Stock, Old Olive Card Stock, and Early Espresso Card Stock.

Petite Pennants Builder Punch - by Stampin' Up!

  • Adhere these pieces together (see picture).
  • Using the Broadsheet Alphabet Stamp Set (or other), stamp the letters F A L Lonto Very Vanilla Card Stock using Cajun Craze, Old Olive, More Mustard, and/or Early Espresso Ink.
  • Cut out the letters and attached them in order onto the pennants.

Lovely Letters Alphabet Clear-Mount Stamp Set

  • Punch a small hole at the top-center of each pennant.
  • Insert a brad (your choice).
  • Wrap a small piece of Early Espresso Baker’s Twine around each brad and tie into a bow.
  • Adhere each pennant along the Early Espresso Baker’s Twine that was inserted at the top.
  • Cut a photo mat to fit the size of your photo and adhere to the page.
  • Cover with a matching ink the leaf stamp from the Day of Gratitude stamp set (see picture), stamp the image onto Very Vanilla Card Stock, and cut out the leaf.
  • Repeat for a second leaf.
  • Using dimensionals, adhere the leaves onto the two corners of the photo mat.
  • Cover with ink the acorn stamp from the same stamp set, stamp the image onto Very Vanilla Card Stock, and cut it out.
  • Repeat for a second acorn.
  • Adhere the acorns adjacent to the leaves.

Day of Gratitude - Clear-Mount Stamp Set - by Stampin' Up!

NOTE: This scrapbook page can very easily be expanded to a 12″ x 12″ page. You may want to give that a try as well.

Fall Scrapbook Page

Fall Scrapbook PageFall Scrapbook Page

 Fall Scrapbook Page

 Click to Buy Stampin' Up! Products

God’s Blessings!
Stamping With Guneaux Designs
by
Beverly Polen


Enjoy making your fall scrapbook page!

My Digital Studio 2 – Any Witch Way Template

If you have Stampin’ Up!’s My Digital Studio 2, you’ll want to get this digital download, “Any Witch Way” (132266).  It  is soooo cute and has unique features (see below)!!! 

Any Witch Way Template for My Digital Studio 2Any Witch Way Template for My Digital Studio 2

 Any Witch Way Template for My Digital Studio 2

The My Digital Studio 2 “Any Witch Way” digital download includes the following:

  • 2-page décor designer template (8-1/2″ x 11″),
  • 10-piece SVG stamp brush set, and
  • 13 embellishments.

Its features are:

  • Digital-exclusive,
  • An adorable paper doll witch decoration that moves,
  • Fun to use her movable arms and legs for a Halloween decoration—on cards, treats, in a frame, on the wall, or anywhere, and
  • Easy to print as-is or color yourself.

The coordinating colors are Basic Black, Basic Gray, Apricot Appeal, Blush Blossom, Calypso Coral, Creamy Caramel, Crushed Curry, Going Gray, and Kiwi Kiss.

Additional new My Digital Studio 2 downloads include the following:

Year End Review Infographic Postcard Template -- Digital Download

Year End Review Infographic Postcard Template (131522)

Neon Notes Kit -- Digital Download

Neon Notes Kit (132664)

Everyday Woodcuts -- Digital Download

Everyday Woodcuts (12 Embellishments – 132191) 

Quick Wit Costumes Templates -- Digital Download

Quick Wit Costumes Template (132667)

 Click to Buy Stampin' Up! Products

God’s Blessings!
Stamping With Guneaux Designs
by
Beverly Polen


My Digital Studio & Spooktacular Project Kit Offer

On Friday, September 14, the 31% discount on certain Stampin Up My Digital Studio digital downloads will expire.  If you’ve not purchased the ones you wanted, this week is your last opportunity.  There are 31 digital downloads for My Digital Studio at the 31% discount.  Don’t tarry!

If you have not tried My Digital Studio, you have options should you want to try it:

  1.  A free 30-trial of My Digital Studio 2, the new version.  With the trial, you’ll  get:
    * Full access to the software at NO COST for 30 days
    * Full access to design tools to create cards, photo books, calendars, and more
    * Full access to a sample of exclusive artwork from My Digital Studio 2+
    * The chance to buy additional downloads that you can keep after your trial expires
    * Ability to order your projects from our professional print services
    To use the software more than 30 days, buy MDS 2 (software only)or MDS 2+ (software plus $500 in content).
  2. A download of the complete My Digital Studio 2 software, which includes:
    * Full software with design tools to create cards, photo books, calendars, and more
    * $500 in digital content (See it all here)
    Features:
    * A downloadable version of the software to start designing right away
    * Easy to order professional prints of your designs
    * Mac and Windows compatible

Also, on Sunday, September 16, your opportunity to get the really cool Spooktacular Project Kit expires. If you have wanted to join the Stampin Up family, which makes you eligible for the Kit, don’t delay.

God’s Blessings!
Stamping With Guneaux Designs
by
Beverly Polen

My Digital Studio – Scrapbook Page

My Digital Studio is an intutive digital design software featuring Stampin’ Up!’s exclusive artwork, colors, and templates for creating multiple digital items.  If you are a beginner with My Digital Studio, this site provides you with great videos for training beginners.  My share with you today is a My Digital Studio Scrapbook Page and it is one for featuring your summer memories.

My Digital Studio Scrapbook Page

MY DIGITAL STUDIO SCRAPBOOK PAGE INSTRUCTIONS:

1.  Within My Digital Studio, select Photobooks and Individual Pages, 12” x 12” Square and Create Your Own. Name your new project.

2. Under the Design Center, select Background Papers, Card Stock, Daffodil Delight, and OK.

3.  Select Background Paper, Designer Series Paper (DSP), Summer Smooches, Summer Smooches – 9, Add as a Layer, and OK.

4. Double click on the small square of the DSP that appears.  Place cursor over the double arrows (<->) and resize to 11-3/4” x 11-3/4”.

5. Move the DSP to the center of the Daffodil Delight background paper.

6.  Select Punches, Add Punch, Basics (category), Scallop Circle Punch, Apply, and Close.  Double click the Scallop Circle and resize it to 10” (W) and 10.24” (H). 

 8.  With the Scallop Circle highlighted, select Paper Fill (under Punches), Designer Kits, Summer Smooches, Summer Smooches – 2, and OK.

 9.  Click on Mat (under Punches), Size – 4, Color – Change, Island Indigo, OK, and OK.

10. Move the Scallop Circle to the bottom right with part of it outside of the design area.

 11. Select Punches, Add Punch, Basics, Scallop Circle Punch, Apply, and Close.

12. Double click on the Scallop Circle and resize it to 7.54” (W) and 7.72” (H). With it highlighted, select Color Fill, Real Red, and OK.

13. Click on Mat, Size – 2, Color – Change, Tempting Turquoise, OK, and OK.

14. Move the Scallop Circle to the bottom right with part of it outside of the design area.

15. Select Punches, Add Punch, Basics, 1.25” Square Punch, Apply, and CloseDouble click and resize it to 5.64” (W) and 4.84” (H). Click on Color Fill, Real Red, and OK. 

16.  Right click the Square Punch and select Send Backward until it is behind the large Scallop Circle.

17.  Select Punches, Add Punch, Basics, 1.25” Square Punch, Apply, and CloseDouble click on the Square Punch and resize it to 3.9” (W) and 4.14” (H). Click on Color Fill, Tempting Turquoise, and OK.

18. Center the Tempting Turquoise Square Punch over the Real Read Square Punch. Right click on the Tempting Turquoise Square Punch and select Send Backward until it is behind the large Scallop Circle.

19. Select Punches, Add Punch, Borders, Scallop Edge Punch, Apply, and Close.  Color Fill it Tempting Turquoise.

20. With the Scallop Edge Punch highlighted and under Rotate, move the slide to -180.  Move the punch on top of the Real Red Square (see picture).  Right click it and select Send Backward until it is behind the large Scallop Circle.

21. Select Punches, Add Punch, Borders, Scallop Edge Punch, Apply, and Close.  Color Fill it Tempting Turquoise.  Move it to the bottom of the Real Red Square, right click it, and select Send Backward until it is behind the large Scallop Circle.

22. Select Stamps, Add Stamp, King of the Grill, King of the Grill – hot grillSelect Change Color and Real Red. Move the stamp over the Tempting Turquoise Square.

23. Select Embellishments, Add Embellishment, Summer Smooches – fabric brads, Summer Smooches – fabric brad – 2, Apply, and CloseDouble click the brad and resize it to 1” (W) and 1” (H). 

24. Right click the brad and select Copy and Paste.  Repeat and move the three brads to the corners of the page. 

25. Select Add Stamp and Broadsheet Alphabet.  Select the letters to spell “SUMMER” and rotate the letters according to the picture.

25.  Cut photo into a circle and add on top the Real Red scallop. 

Buy Stampin' Up! ProductsGod’s Blessings!

Stamping With Guneaux Designs

Beverly Polen 

Enjoy creating your My Digital Studio Scrapbook Page! 

My Digital Studio – Happy Father’s Day

I developed this Happy Father’s Day card with Stampin’ Up!’s My Digital Studio.  Happy Father’s Day to all the fathers out there who fulfill their responsibilities as a father!!  May you have a blessed day filled with happiness and the respect you deserve as a good dad!


Supplies Used:
 
Digital Cardstock:  Garden Green, Soft Suede, Early Espresso, Very Vanilla
Digital Designer Series Paper:  Woodland Walk – 10 Digital Stamp Brush Set: Lovely As A Tree – Pine Bough
Accessories:  Soft Suede Baker’s Twine, Early Espresso Brads, and Chocolate Chip Button Latte – Button 1
 
God’s Blessings!
 
 
Stamping With Guneaux Designs
by
Beverly Polen
 
My Digital Studio