CottageCutz Church Scene

CottageCutz Church Scene

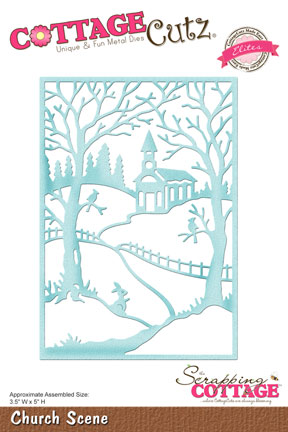
Hello, friends, and welcome to Guneaux Designs!  I am pleased to bring you a card featuring the CottageCutz Church Scene Die.  This Church Scene die is versatile as it can be adapted to create a card for each season of the year (i.e., spring, summer, fall, and winter).  For Christians, Easter is today.  When I think of Easter, I recall memories of my childhood of going to church on Easter morning and getting Easter-related goodies (no, that was not the only reason for going – LOL).  My childhood memories of Easter are the driving force behind my Easter card. This card also features the Stamping Inlay Technique.
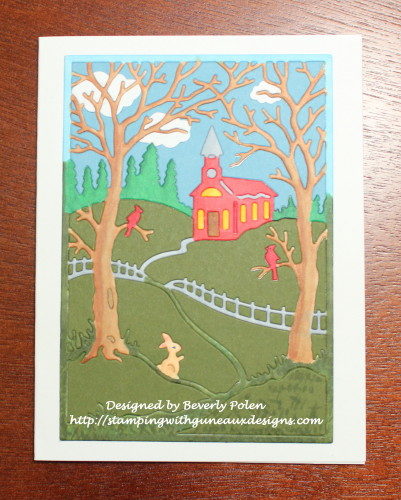
CottageCutz Church Scene

To create the card, follow these steps:

Step 1.  Cut out the CottageCutz Church Scene frame from white card stock.
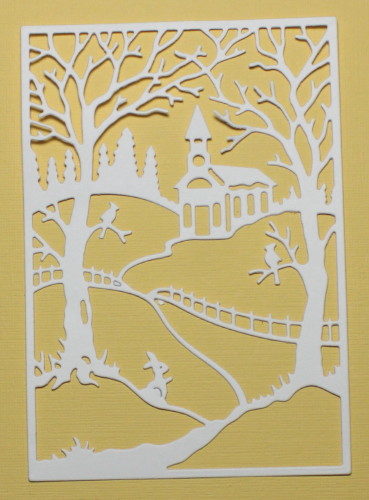
Step 2:  Color the white cut out frame as desired along with the tiny pieces for the church’s door, windows, etc.  I used Copic Sketch Markers to color the cut out.
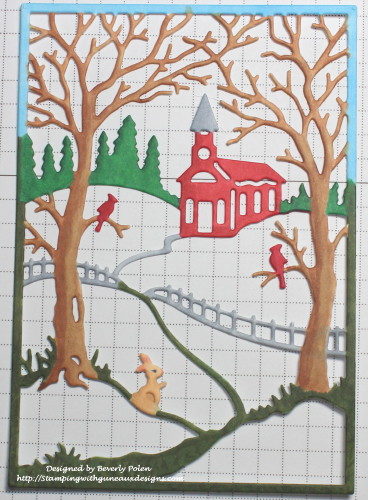
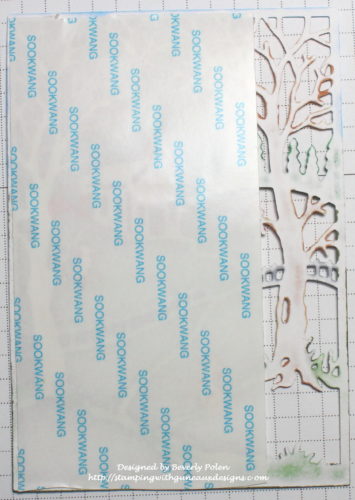
Step 3.  After coloring the scene and tiny church pieces, turn the frame over and add strips of a strong adhesive.
Step 4.  Turn the church scene frame back over and add the church’s windows, door, etc. that you colored in Step 3.  Ensure these pieces attach well to the adhesive.

Step 5.  Cut a 2-1/2″ x 3-3/4″ piece of blue card stock.  This will be used for the sky.

Step 6.  Cut out three white clouds using the CottageCutz Lighthouse w/ Clouds Die.

Step 7.  Position the clouds where you want them to show in the sky and attach them to the small piece of blue card stock.
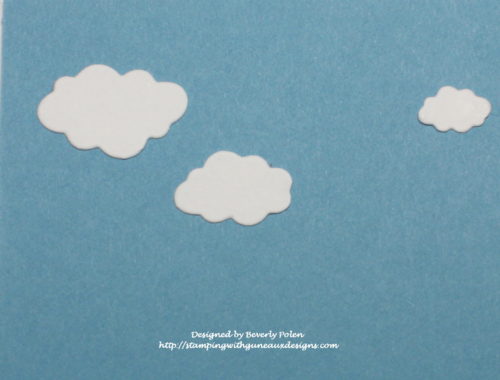
Step 8.   Place the CottageCutz Church Scene Die face down on the blue piece of card stock, ensuring the sky portion of the die is fully covered by the die.

Step 9.  Run this through a die cutting machine and add the blue pieces to the sky section of the church scene frame.  Ensure the pieces adhere well.  I love the clouds behind the tree branches.  (Note the church door, windows, etc.)
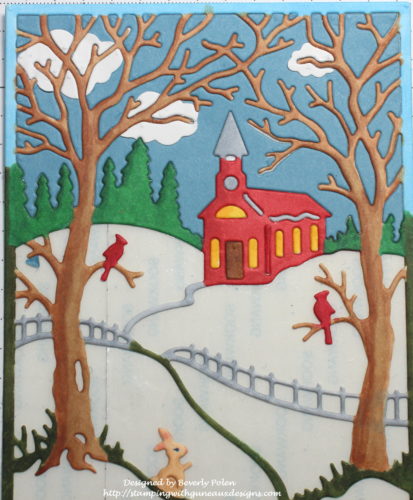
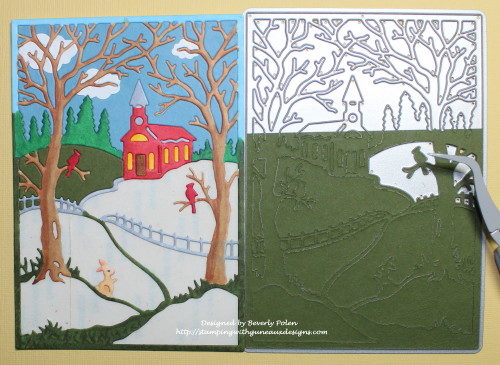
Step 10.  Cut a 4″ square of dark green card stock.  Lay the CottageCutz Church Scene Die face down onto the card stock, ensuring the grassy areas of the scene are covered by the die.

Step 11.  Run this through a die cutting machine.  Because this section has tiny pieces along the fence, try to keep the pieces within the die so it will be easier to determine their appropriate location.  To accomplish this, after running the die and card stock through the die cutting machine, lift the bottom cutting board with the die still on it. Take it to your work station, turn it over so the die cuts are facing upward, and use tweezers to carefully remove the pieces and adhere them well to the church scene frame.
Step 12.  After adding all the pieces, the church scene will look similar to the following photo.  At this point, I think the scene comes alive!  The little bunny is now very visible.
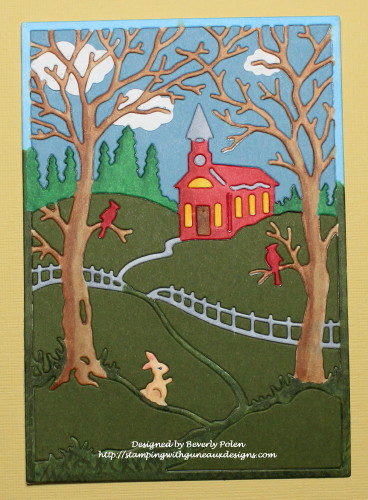
Step 13.  Add the scene to a card base and add a sentiment.

(Option:  cut small leaves and attach to the two trees in the scene.)


Butterfly_1_1God’s Blessings!
Stamping With Guneaux Designs By Beverly Polen
Firm Reliance on Divine Providence!


MARK 16:6-7

“Don’t be alarmed,” he said.  “You are looking for Jesus the Nazarene, who was crucified.  He has risen!  He is not here.  See the place where they laid him! 

CottageCutz Cross With Vine Die

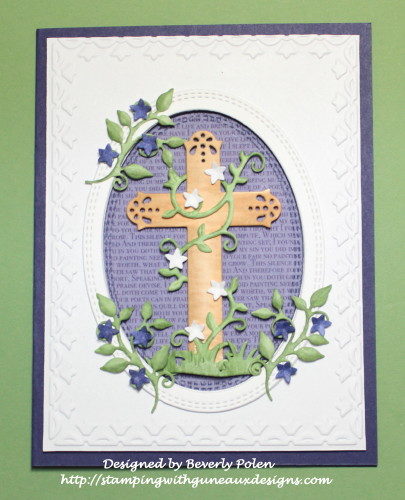
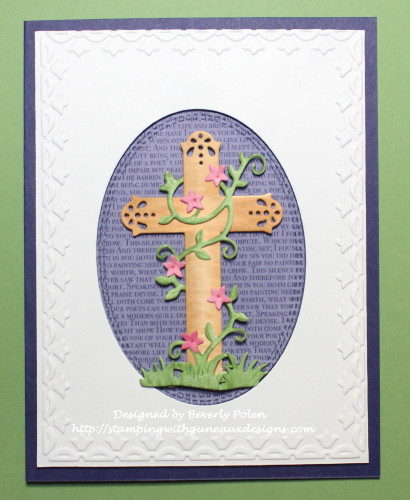
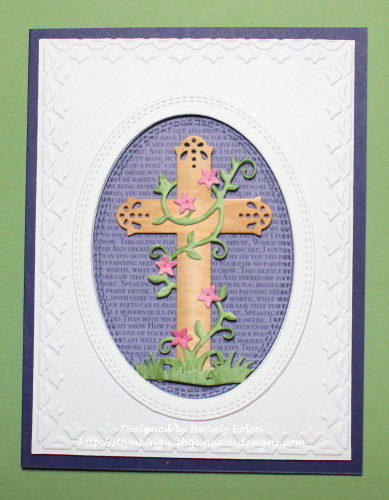
Hello, and welcome to Guneaux Designs!  Today it is my pleasure to be a guest designer again for the Scrapping Cottage Blog.  Because Sunday is the Easter holiday for Christians, I want to  share a card with you that showcases the CottageCutz Cross With Vine Die.
CottageCutz Cross With Vine

You can make this card too by following the instructions below:

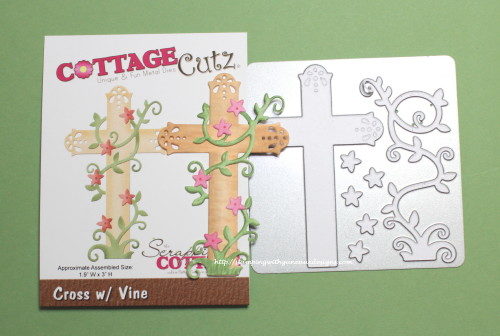
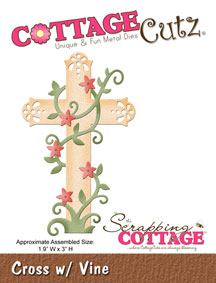
  • Cut out the cross, vine, and flowers using the Cottage Cutz Cross With Vine Die.
  • Color the cross, vine, and flowers (I used Copic Sketch Markers), and attach the vine around the cross. (I started with pink flowers following the die image but changed to white.)

CottageCutz Cross With Vine

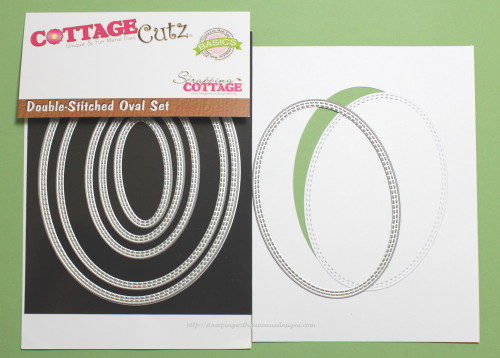
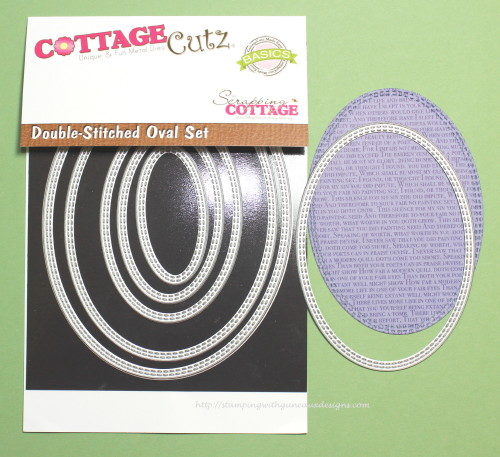
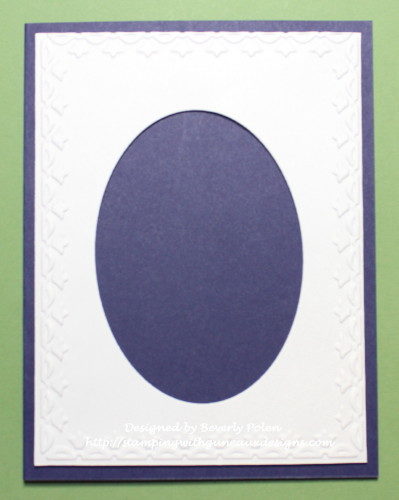
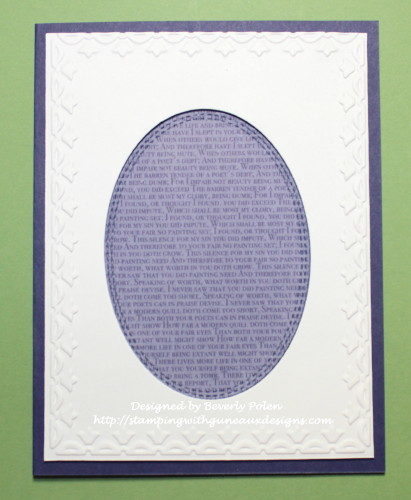
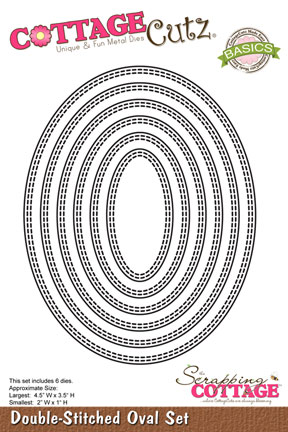
  • Cut a 4″ x 5-1/4″ piece of white card stock and use the third to the largest CottageCutz Double-Stitched Oval Die to cut out an oval in the center of the card stock.  If desired, emboss this piece.  The oval cut out will not be used.

CottageCutz Cross With Vine

  • Cut an oval from a piece of purple designer paper using the same die.

CottageCutz Cross With Vine

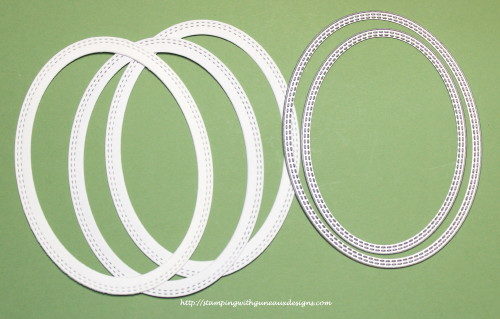
  • Cut out three ovals using the second and third largest dies from the CottageCutz Double-Stitched Oval Set.  Glue these together.

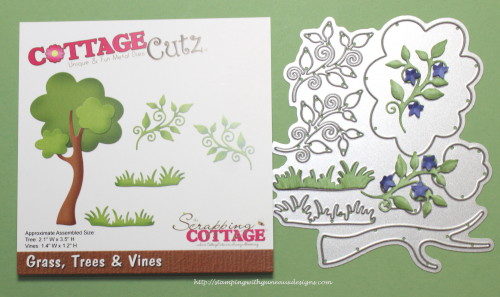
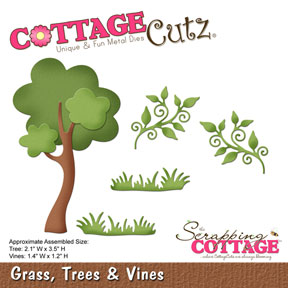
  • Cut out and color two vines and grass using the CottageCutz Grass, Trees, and Vines Die.  Cut and color purple the flowers from the CottageCutz Cross With Vine Die.  (Note:  after finishing the card, I decided to add three vines with flowers.)

CottageCutz Cross With Vine

  • Cut a 8-1/2″ x 5-1/2″ piece of purple card stock, fold in the middle for the card base, and begin assembling the card.
  • Adhere foam tape to the back of the piece of white card stock with an oval cut from the center.  Attach this to the center front of the card base.

  • Attach the purple designer paper oval inside the oval on the card front.

  • Attach foam tape to the piece of grass and adhere it to the bottom of the cross.
  • Attach foam tape to the cross and adhere it to the center of the oval on the card front.

  • Attach the three glued ovals onto the card front.

  • Attach the vines with flowers around the oval.

CottageCutz Cross With Vine

  • Add a sentiment if desired.  I added one inside the card.

COTTAGECUTZ DIES USED:


Butterfly_1_1God’s Blessings!
Stamping With Guneaux Designs By Beverly Polen
Firm Reliance on Divine Providence!


MATTHEW 28:5-7

“The angel said to the women, “Do not be afraid, for I know that you are looking for Jesus, who was crucified.  He is not here: he has risen, just as he said.  Come and see the place where he lay.  Then go quickly and tell his disciples: ‘He has risen from the dead and is going ahead of you into Galilee.  There you will see him.’  Now I have told you.” 

CottageCutz Daffodil Flower – March

CottageCutz Daffodil Flower – March

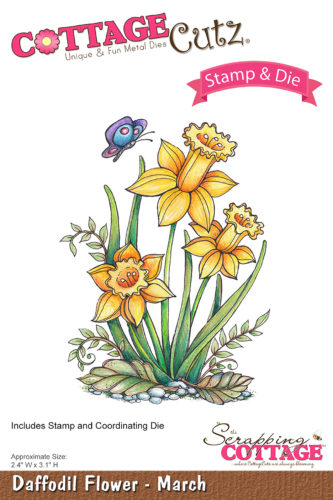
Hello, my friends!  WeIcome to Guneaux Designs.  As a  guest designer for the Scrapping Cottage, I  have for you a project featuring the CottageCutz Daffodil Flower – March stamp and coordinating die set.

Speaking of March, did you know that the  month of March is synonymous with the onset of spring in the Northern Hemisphere. Accordingly, the flower associated with the month of March is the Daffodil.  The Scrapping Cottage has a stamp and coordinating die for the flower of each month. Check out these beautiful stamps and dies HERE.

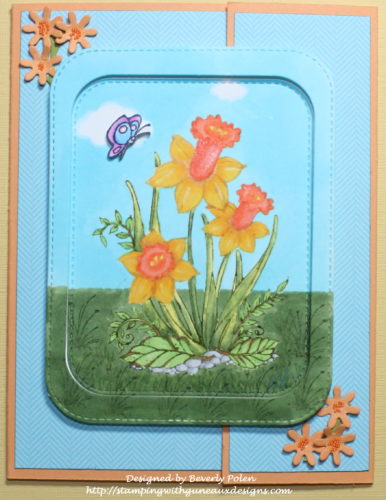
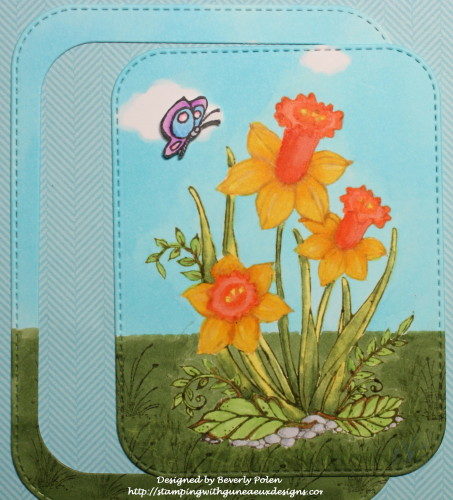
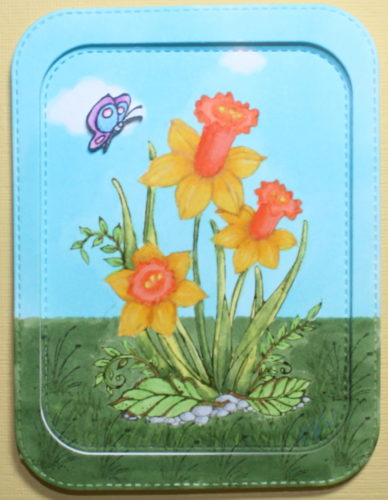
Moving on, here is the card I made with the beautiful CottageCutz Daffodil Flower – March stamp.

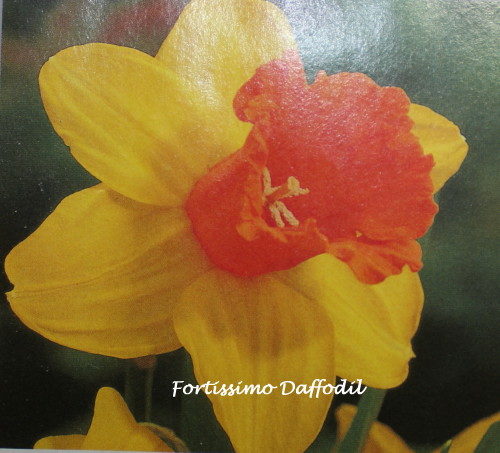
My Daffodil is designed after the Fortissimo Daffodil that has yellow petals and a cup of glowing orange to red.  Here is a picture of the flower.

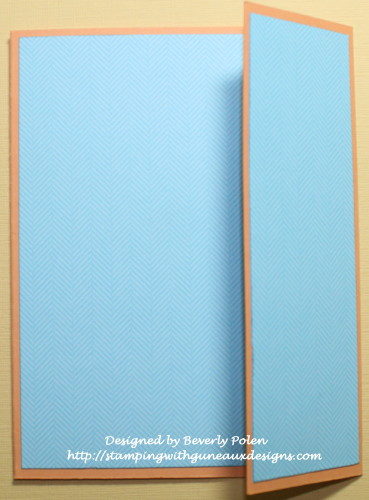
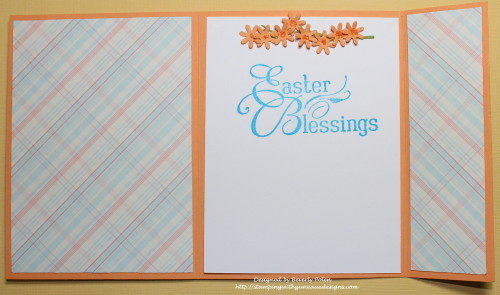
I made the card as a “Big Flap” card, and you can make this card too by following these instructions:

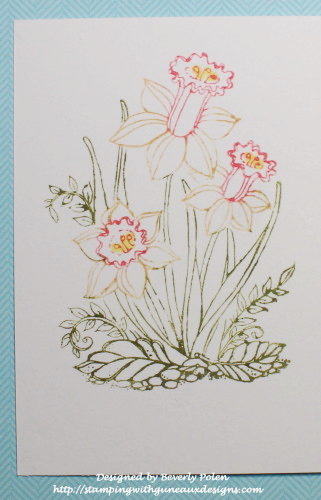
Step 1.  Stamp the CottageCutz Daffodil Flower onto a piece of white card stock.  I wanted a “no-line coloring” image; therefore, I used different colors of markers to add ink to sections of the image and stamped them separately.  I used yellow for the petals of the daffodil, peach for the cup, green for the leaves and stems, and gray for the rocks.

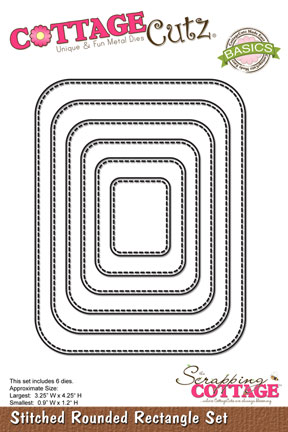
Step 2.  Color the image as desired.  I used various Copic Sketch Markers to color my image.  After coloring it, I used the two largest dies from the CottageCutz Stitched Rounded Rectangle Set to cut out the image.  Also, I stamped, colored, fussy cut, and attached the butterfly that is part of the CuttageCutz Daffodil Flower – March set using foam tape.

Step 3.  Set aside the image and start creating the card base.

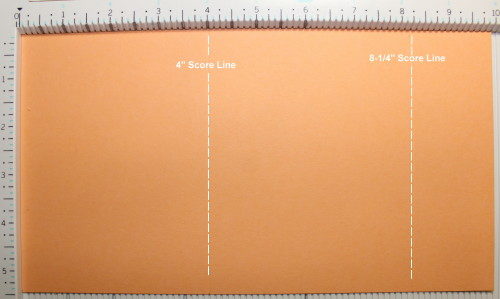
Step 4.  Cut a 5-1/2″ x 10″ piece of card stock (your choice of color).

Step 5.  Place the card stock horizontally onto a score board and score at the 4″ and 8-1/4″  marks.

Step 6.  Fold the score lines toward each other.

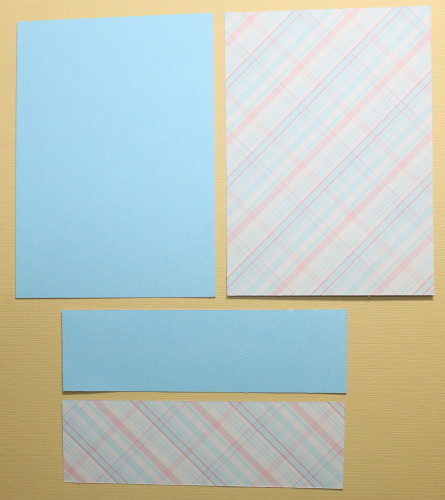
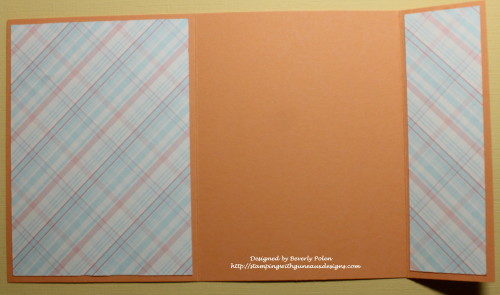
Step 7.  Select a double-sided designer paper and cut two 3-3/4″ x 5-1/4″ pieces, and two 1-1/2″ x 5-1/4″ pieces.

 Step 8.  Attach one of the 3-3/4″ x 5-1/4″  pieces of designer paper to the larger flap on the front of the card base.

Step 9.  Attach one of the 1-1/2″ x 5-1/4″ pieces of designer paper to the small flap on the front of the card base.  (I selected the same side of the designer paper for the front.)

Step 10.  Attach the second 3-3/4″ x 5-1/4″ piece of designer paper onto the inside large flap.  I used the other side of the designer paper.

Step 11.  Attach the second 1-1/2″ x 5-1/4″ piece of designer paper onto the inside small flap..

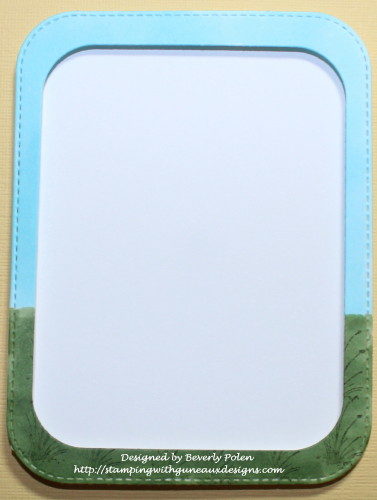
Step 12.  Cut a piece of white card stock with the largest die from the CottageCutz Stitched Rounded Rectangle Set 

Step 13.  Attach the outside frame cut from the image (see Step 2.) to the piece of white card stock using a double layer of double-sided foam tape.

Step 14.  Attach the image inside of the above frame. 

Step 15.  Apply a strong adhesive to the back left side of the above image piece.  

Step 16.  Close both flaps of the card base with the right one over the left one.  Attach the framed image to the front large flap of the card base, ensuring it is centered over the front and not attached to the right small flap of the card.  The strong adhesive is necessary to ensure the image piece will not come off as the card is opened and closed.

Step 17.  Cut a 4″ x 5-1/4″ piece of card stock, add a sentiment and/or an embellishment, and attach to the center of the inside of the card.

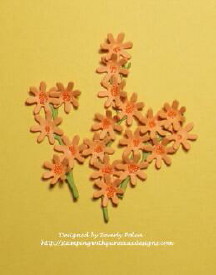
Step 18.  Embellish the card as desired.  I cut several small flowers using the   CottageCutz Tree of Nature Die.  I cupped them with a stylus and adhered micro beads to the centers.  I used the CottageCutz Winter Branches Die to cut green stems (not branches LOL) for the tiny flowers and added them to the two corners of my card front and the center piece inside the card. 

I hope you are inspired by my CottageCutz Daffodil Flower – March card.


CottageCutz Dies Used:


Butterfly_1_1God’s Blessings!
Stamping With Guneaux Designs By Beverly Polen
Firm Reliance on Divine Providence!


II Timothy 3:16 & 17

“All scripture is given by inspiration of God, and is profitable for doctrine, for reproof, for correction, for instructions in righteousness:  That the man of God may be perfect, thoroughly furnished unto all good works.”

Smackin’ Acetate Technique

Splitcoaststampers’ Try A New Technique Challenge, TLC577, Smackin’ Acetate Technique

On Monday, Splitcoaststampers’ Try A New Technique Challenge, TLC577, is to create using the “Smackin’ Acetate” Technique.  This technique is similar to that of coloring on acrylic blocks and transferring the color to paper.  Have you tried the Smackin’ Acetate Technique before?  I had not heard of it until Monday.  LOL

Splitcoaststamper’ Clean and Simple Challenge, CAS368, Spring Critters

Also on Monday, Splitcoastampers’ Clean and Simple Challenge,  CAS368, Spring Critters, is to create in celebration of spring!  Seeing more signs that spring is here and to celebrate the springing forward of our clocks, the challenge is to bring out our spring critters.

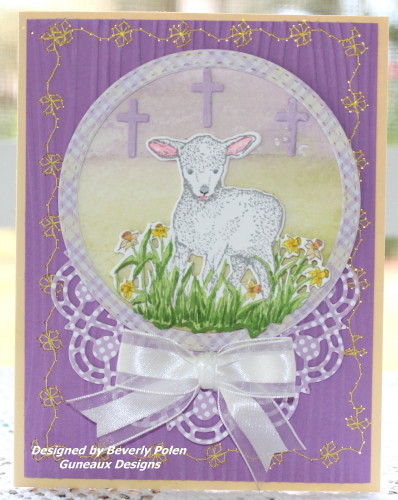
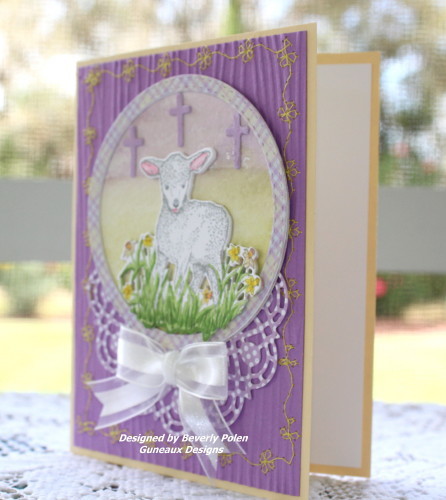
I combined the challenges and created this card.

(Update:  This card was in the Splitcoaststampers favorites for the week ending on March 20, 2016.)

(Update #2:  I am so honored that this card was picked today, March 31, 2016 as the Customer Card of the Day by Our Daily Bread Designs (ODBD)!  I am so blessed and grateful for this recognition!  You can read about it on ODBD Blog.)

Smackin' Acetate Technique

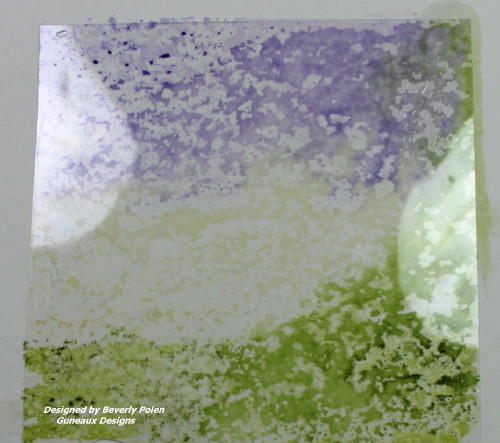
I used the Smackin’ Acetate Technique for the land behind the lamb.  The following explains the technique.

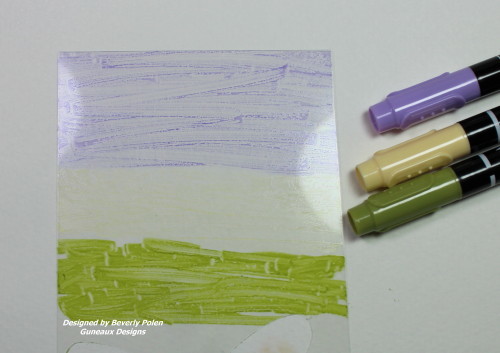
  1.  I used the Stampin’ Up! Lavender Lace Marker to color the top of the acetate, Barely Banana to color the middle, and Old Olive to color the bottom.

Smackin' Acetate Technique

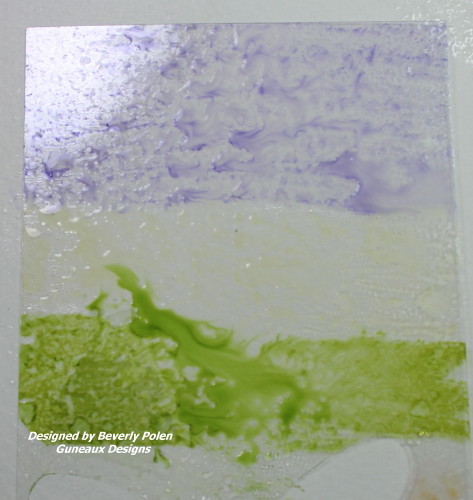
2.  I spritzed water on the acetate next.  The water moves the ink around.

Smackin' Acetate Technique

3.  I placed the inked and spritzed side of the acetate down onto watercolor paper and used my fingers to push the ink on the paper.

Smackin' Acetate Technique

4.  I removed the acetate and used a slightly wet watercolor brush to spread the inks.

Clean and Simple Challenge, CAS368, Spring Critters

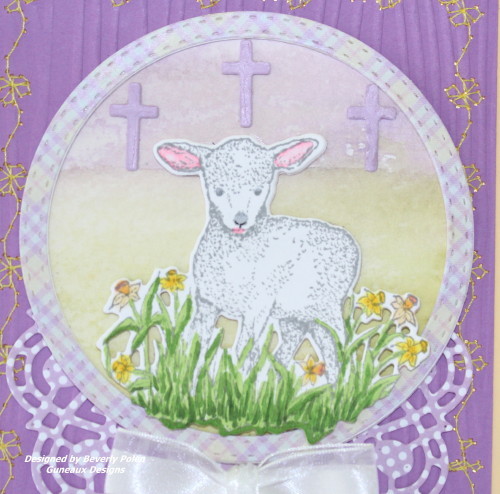
The part of my card that incorporates the CAS368, Spring Critters, is the Lamb.  Having been raised on a small farm, every spring we looked forward to the births our little “spring critters”; lambs, chicks, calves, piglets, foals, etc.

Also Easter is in the spring time.  Therefore, my Lamb represents more than a critter.  It is the Lamb of God, Jesus.  The three crosses in the background represent the cross upon which Jesus was hung, and the crosses upon which the prisoners hung beside Jesus.

Smackin' Acetate Technique

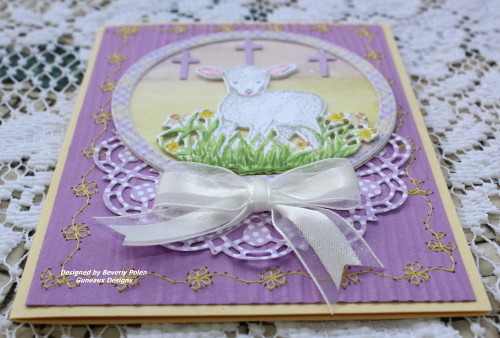
As for the rest of the design, I sewed (or tried to) yellow flowers around the border of the card to replicate the yellow flowers around the lamb, which I colored with copics.  I embossed the lavender paper with a wood grain embossing folder which represents the wooden cross upon which Jesus hung.  I added a cut out from Our Daily Bread Designs (ODBD) doily die that lies underneath the lamb and topped it off with a white bow made with Stampin’ Up! Whisper White Organza Ribbon.  The circle encompassing the lamb and the doily were made with ODBD Pastel Paper, ODBD Double Stitched Circles Dies, and ODBD Doily Die .  Here are additional photos:

Smackin Acetate Technique Smackin' Acetate Technique

I hope you try the technique and join in on the Splitcoaststampers.com challenges!

CCOD Button

BlogDivider_zpsed339ea1

SUPPLIES:

STAMPS:  ODBD Sheep

PAPER:  Watercolor Paper, ODBD Pastel Paper, and Stampin’ Up! Barely Banana and a Lavender Card Stock

INK:  Stampin’ Up! Lavender Lace, Barely Banana, and Old Olive Markers, and Copics

ACCESSORIES:  ODBD Little Lamb Die, ODBD Ornamental Crosses Dies, ODBD Doily Dies, ODBD Double Stitched Circles Dies, Stampin’ Up! Whisper White Organza Ribbonand Stampin’ Up Wood Grain Embossing Folder

CARD SIZE: A2 

TECHNIQUES: Smackin’ Acetate Technique

BlogDivider_zpsed339ea1

Swallowtail Butterfly

GOD’S BLESSINGS!

STAMPING WITH GUNEAUX DESIGNS BY BEVERLY POLEN

“Be anxious for nothing, but in everything by prayer and supplication, with thanksgiving, let your requests be made known to God; and the peace of God, which surpasses all understanding, will guard your hearts and minds through Christ Jesus”.  Philippians 4:6 

SU Easter Blossoms

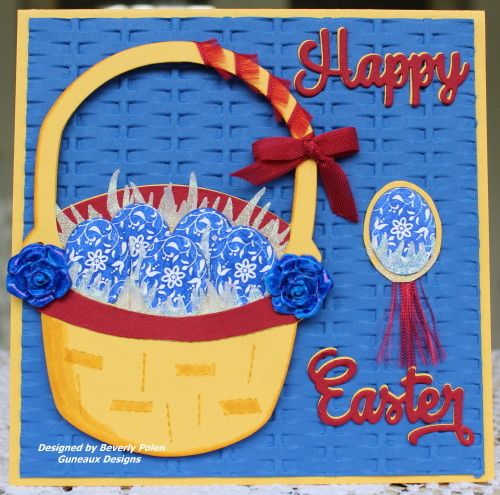
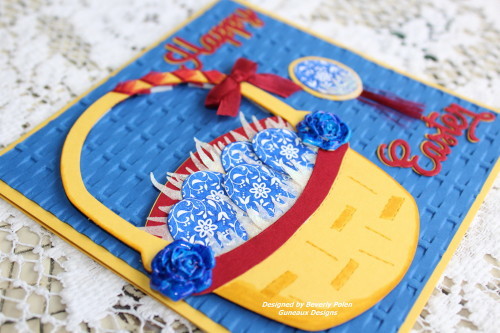
Hello, my friends!  Thanks for stopping by to see my SU Easter Blossoms card.   I created this card in response to an Inspiration Challenge on Splitcoaststampers as described below.  The stamp set, SU Easter Blossoms, has beautiful stamps, and I used the egg stamp to create the eggs on my card.  This card features my favorite colors, the primary colors of red, blue, and yellow.

SU Easter Blossoms

Audrie (girlgeek101) hosted Saturday’s Splitcoaststampers Inspiration Challenge, IC536 Easter Egg Hunt. She selected this Pinterest page for our Easter Egg Hunt. What an outstanding and beautiful inspiration site.  She always picks marvelous sites for the Inspiration Challenges on each Saturday.

This is my selection from which I drew my inspiration.  I love the blue color in the inspiration piece, so I picked the retired Stampin’ Up! Brilliant Blue color to be a close match.  I wish Stampin’ Up! would bring back that color.

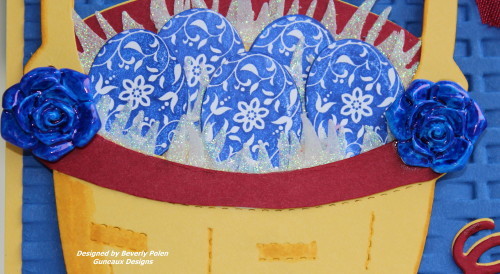
This is a closeup of the eggs in the basket.  Notice the “white shiny grass” in the basket? I made that with a grass die and SU White Glitter Tape.  Also notice the two flowers on the basket.  These are SU Vintage Flowers that I colored with a Copic Marker.

SU Easter Blossoms

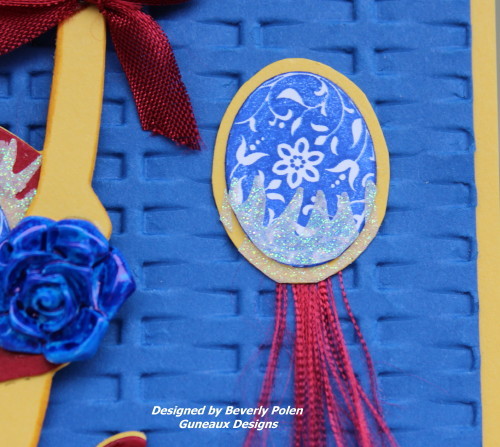
I added to the side of the card an extra egg and added some dangling thread that I unraveled from Cherry Cobbler Seam Binding.

SU Easter Blossoms

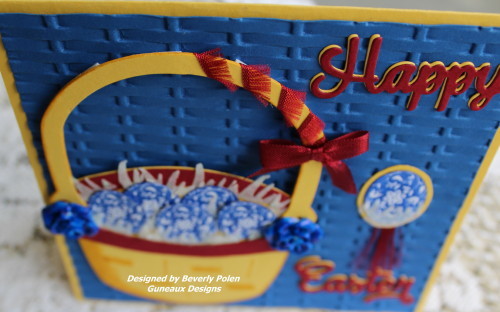
When I unraveled the thread, I kept part of the seam binding together to add as a ribbon and bow along the right side of the basket’s handle as seen below.

SU Easter Blossoms

I created the basket from a Sizzix Basket Original Die.

SU Easter Blossoms

I hope you’ve enjoyed your visit and will return soon!

BlogDivider_zpsed339ea1

SUPPLIES:

Stamps:  SU Easter Blossoms

Paper:  SU Daffodil Delight, Cherry Cobbler, and Brilliant Blue

Ink:  SU Brilliant Blue and Copic Marker B28

Card Size:  5-1/2″ sq.

Accessories:  We R Memory Keepers Next Level Woven, Spellbinders Classic Oval Dies, SU Vintage Flowers, ODBD Happy Easter Die, SU Cherry Cobbler Seam Binding, SU White Glitter Metallics Tape, Sizzix Original Basket Die, and Lawn Cuts Grassy Border Die

BlogDivider_zpsed339ea1

Swallowtail Butterfly

GOD’S BLESSINGS!

STAMPING WITH GUNEAUX DESIGNS BY BEVERLY POLEN

Jesus said:  “Everyone will hate you because of me.  But not a hair of your head will perish.  Stand firm, and you will win life.”  Luke 21:17.

Blossoms Around the Tidal Basin

Have you ever seen the cherry blossoms around the Tidal Basin?  Every spring, nearly 1,700 cherry trees that line the Washington, D.C. Tidal Basin burst into a magnificent pink floral fireworks.  I think, it is the most beautiful site in the Washington, D.C. area. The weather determines when this great display of blossoms burst, and unfortunately, these magnificent blooms only last a few days.  The exact time this will occur is unpredictable, but what is predictable is that it will happen sometime every spring. Oh what a lovely site to behold!  If you’ve never been to the Tidal Basin when the cherry trees blossom, it is so worth the trip!

Blossoms Around The Tidal Basin

Isn’t the above photo just gorgeous?  I sure enjoyed the cherry blossoms every spring when I worked in D.C. for 30 years.  I was fortunate that one of my job sites was just across the street from the Tidal Basin.  My desk was at a window where I could stand and inhale the beauty of the scene.  Wow, what a wonderful few days that was each spring!

Thousands of people embark upon D.C. every spring to enjoy such beauty and participate in the annual Cherry Blossom Parade.  It is so crowded around the Basin, but people make room for each other.  Some people either don’t know, or choose to show a lack of respect, that climbing the trees to take great snapshots is no allowed.  It’s shameful and those who choose this behavior are damaging these gorgeous trees.  The last time I was there, the damage was quite obvious.

Blossoms Around the Tidal Basin

These beauties are not just cherry trees, they are Japanese cherry trees.  It was in 1912 that Mayor Yukio Ozaki of Tokyo, Japan, gifted 3,000 cherry trees to the city of Washington, DC. The gift and annual celebration honor the lasting friendship between the United States and Japan, and the continued close relationship between the two countries.

Did you notice that I said the United States was gifted 3,000 trees?  It’s so sad that only around 1,700 trees are left and the others have died.  Some have died as a result of the tree climbers that I described above.  But, what a pleasure to get to enjoy what is left!

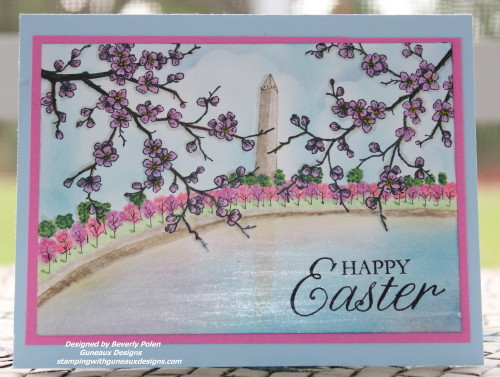
Moving on, I made the following card to honor a Featured Stamper, Geni, on Splitcoaststampers.  This challenge, FS474, involved viewing Geni’s gallery of beautiful cards and pick one to CASE (i.e., copy and share everything).  I was inspired by this card she had created.  The cherry blossoms on her card reminded me of the Japanese cherry tree blossoms in Washington, D.C. Therefore, instead of casing her card, I had to create a scene of the cherry trees blossoms around the tidal basin.

Blossoms Around the Tidal Basin

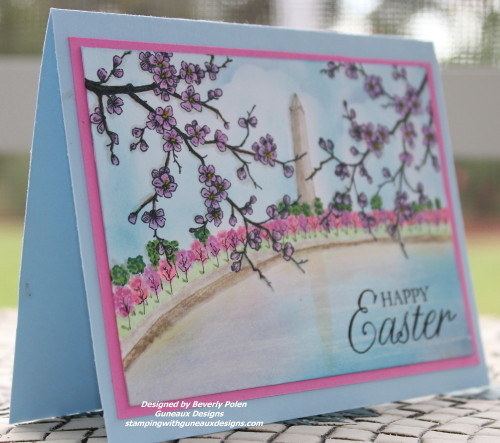
What do you think?  Is my scene a decent replica of the one near the top of this post? The Washington Monument was hand drawn and well as the cherry trees and the green trees. The only stamps used was the cherry blossoms in the foreground and the sentiment. The blossoms in the foreground were colored with copics. Here’s another photo of my card.

(UPDATE:  This cared was featured in Splitcoaststampers FAVORITES of the week ending March 13, 2016)

Blossoms Around The Tidal Basin

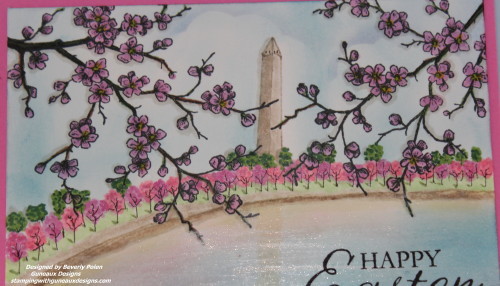
This photo is a closeup of the scene.

Blossoms Around the Tidal Basin

I hope you enjoyed learning about the blossoms around the tidal basin and my card! Thanks for stopping by!

BlogDivider_zpsed339ea1

SUPPLIES:

Stamps:  Stampin’ Up! Easter Blossoms (retired)

Paper:  Stampin’ Up! Whisper White, Pink Passion, and Bashful Blue Card Stock

Ink:  Stampin’ Up! Pretty in Pink, Pear Pizzazz, Bashful Blue, Marina Mist, Basic Black, and Copics

Card Size:  A2

Technique: Sponging and Coloring with Copics

BlogDivider_zpsed339ea1

Swallowtail Butterfly

GOD’S BLESSINGS!

STAMPING WITH GUNEAUX DESIGNS BY BEVERLY POLEN

“If God is for us, who can be against us.”  Romans 8:31