July 4th God Bless America

Today’s Splitcoaststampers Clean and Simple Challenge, CAS383, “Good Ole Red, White & Blue” is to create a card with any theme, technique, and/or any embellishment, but to use only Red, White and Blue colors!   Red, white, and blue means one thing to me – July 4th and God’s blessings upon America.  Therefore, I created this card, July 4th God Bless America.  I tried to keep this card as simple as I could, which is difficult for me.

July 4th God Bless American

I used the Our Daily Bread Designs (ODBD) God Bless America flag stamp covered with black ink to stamp a flag image onto white paper. I colored it with copics and cut out the star with ODBD Star Dies. Hopefully you can see the star embossing on the white card base that I created with a Stampin’ Up! Stars embossing folder.

God Bless America2_1


God Bless America3_1

BlogDivider_zpsed339ea1

SUPPLIES

Stamps:  ODBD God Bless America

Paper: Neenah Solar White, ODBD Old Glory Paper

Ink:   Copics, SU Brilliant Blue (retired), and Memento Tuxedo Black

Accessories: ODBD Double Stitched Stars, ODBD Sparkling Stars, ODBD Pierced Rectangles, SU Lucky Stars Embossing Folder

BlogDivider_zpsed339ea1

SU Fifth Avenue Floral

God’s Blessings!

Stamping With Guneaux Designs

“Be still before the LORD and wait patiently for him; do not fret when people succeed in their ways, when they carry out their wicked schemes.”  Psalm 37:7 

Happy 4th of July – Zentangle

HAPPY 4TH OF JULY – ZENTANGLE

Happy 4th of July, everyone!!  I hope your day is filled with blessings!  May those of us who live in the wonderful USA be grateful as we celebrate our country’s birthday.  God bless the USA!

My Happy 4th of July card features tangling.  I created the design, therefore, there is no official name for the tangle.

The Happy Birthday sentiment is from the current Stampin’ Up! Hostess stamp set, the Morning Meadow.  The sparkles are from the Stampin’ Up! retired July Fourth stamp set. The “USA” is from an old Sizzix alphabet set that I have.  I have had this set of dies for years, and I foresee keeping and using it for many more.

The picture to the right shows more clearly the tangling I designed.  It is very simple and easily duplicable.


 ENJOY YOUR DAY!

God’s Blessings!
Stamping With Guneaux Designs
by
Beverly Polen

HAPPY 4TH OF JULY – ZENTANGLE

Stampin Up Courage Stamp Set – 4th of July 3-D Card

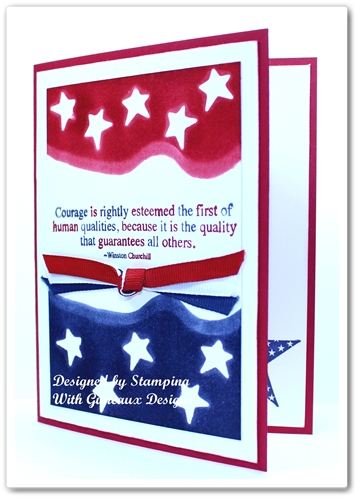
As I shared in my last post, I love the Stampin Up Courage stamp set that retired recently.  Having family members who were in the military and a Dad who loved the American Flag, I especially like this stamp set.  Personally, I think it was a mistake to retire the Stampin Up Courage stamp set.  Regardless, it’s retired, but I am featuring it on my card share for today.  This is my Stampin Up Courage Stamp Set – 4th of July 3-D Card.

Actually, I CASEd (i.e., copy and share everything) myself when making this card.  I made a similar card in 2010 for a special son-in-law who at the time was on active duty with the Army.  God took him home a year ago last month and I really miss him.

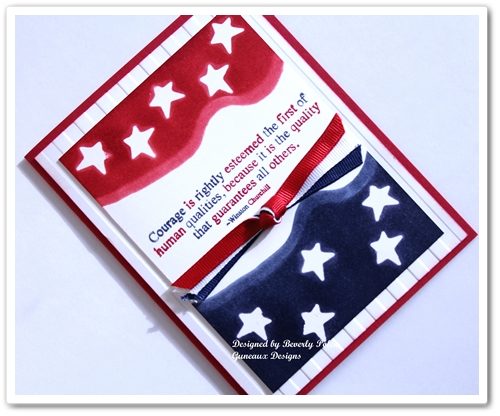
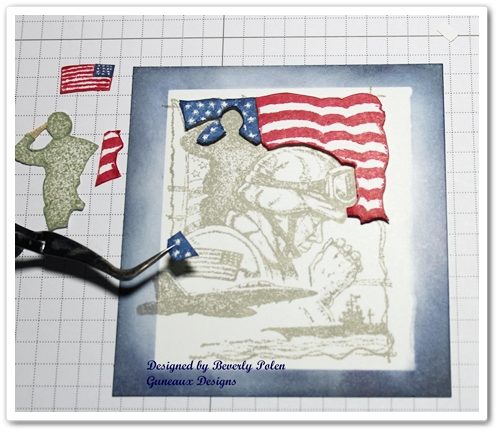
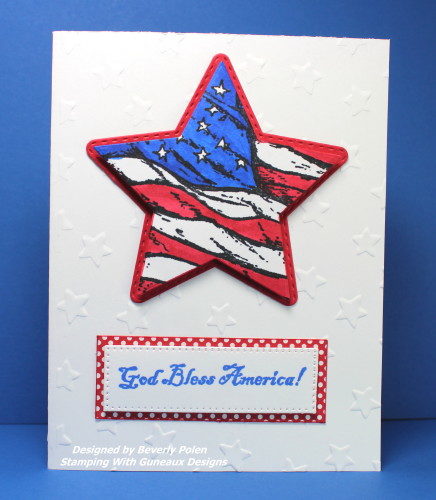
As for the card, it is a three-dimensional card.  It may not appear to be based on the photo, so let me share why it is.

I decided that I wanted each piece on the military-related image to be raised at varying levels.  So I stamped the image onto scrap paper and numbered what part of the image that I wanted at what level.

The picture to the right explains.  I numbered as 
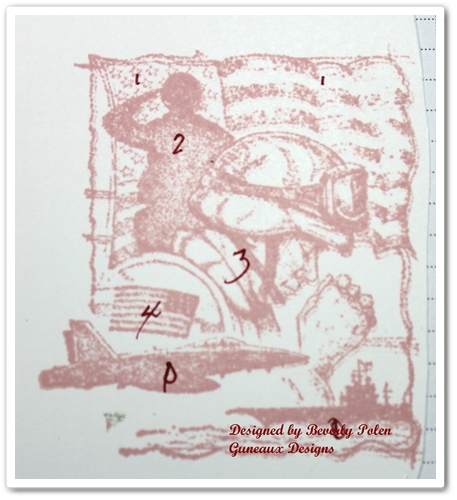
“1” the item I wanted raised with one layer of Stampin Up Dimensionals (i.e., adhesive foam), “2” for those with two layers of dimensionals, and so on.  I re-stamped the image, applied various ink colors, and cut out the pieces.  I then attached the pieces according to the “map” in the photo.

The following picture shows the process of attaching the pieces for the first level, which is the American Flag in the background.

Moving to the 2nd level, I attached the saluting soldier using two layers of 
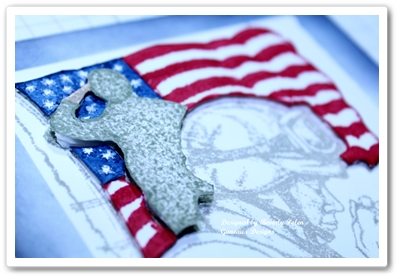
dimensionals.  That is shown in the picture to the right.

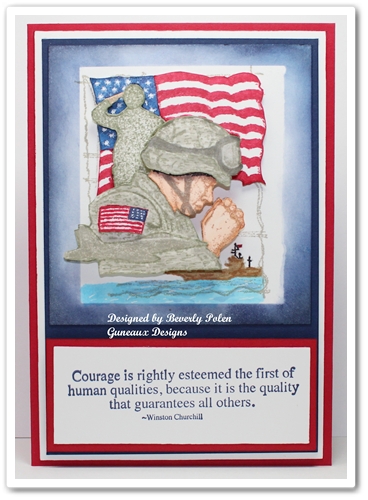
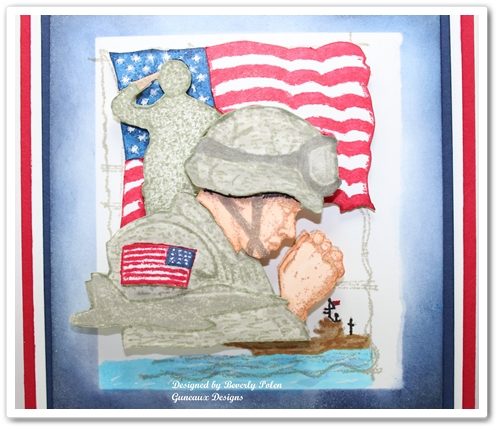
Moving to the 3rd level, I attached the praying soldier with three layers of dimensionals.  However, I did make one change.  I wanted the helmet and the American Flag on the soldier’s uniform to be raised a level above the soldier.  Therefore, I added four layers of dimensionals to the helmet and one to the flag. The following picture reflects this and the completed image.

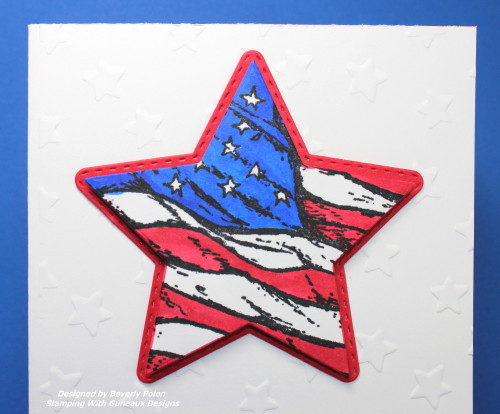
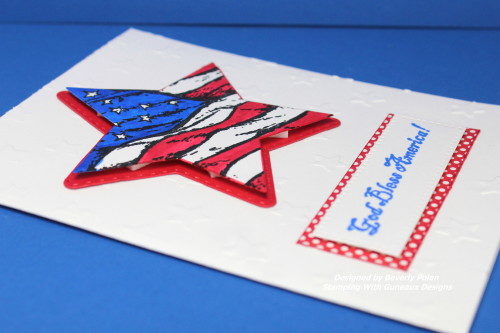
 The following pictures provide a better view of the dimensional elements.

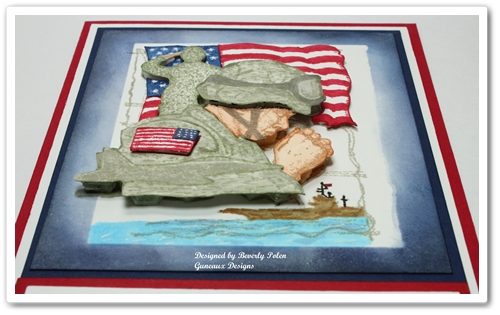
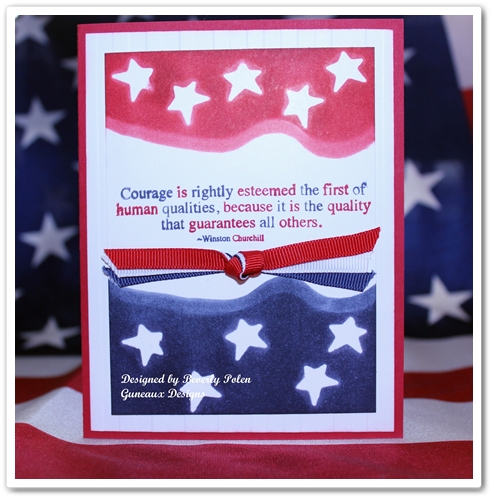
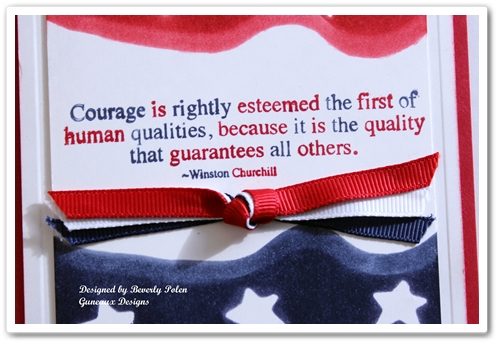
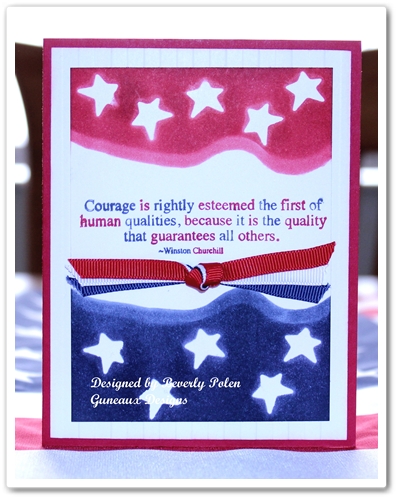
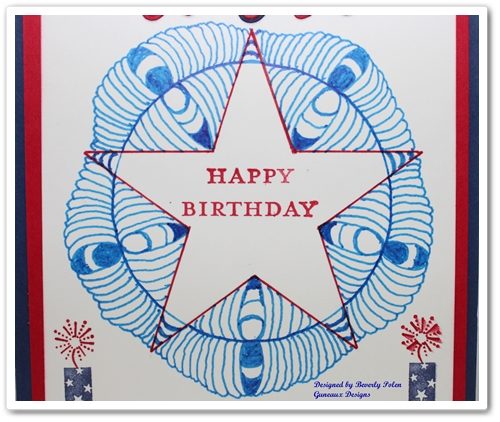
The final product of the Stampin Up Courage card includes Real Red Card Stock as the base, Whisper White Card Stock for the 1st layer, and Night of Navy Card Stock as the 2nd layer.  Included is the sentiment from the Stampin Up Courage stamp set.

If you enjoyed the card and tutorial, please let me know by leaving a comment.


God’s Blessings!
Stamping With Guneaux Designs
by
Beverly Polen

STAMPIN UP COURAGE STAMP SET – 4TH OF JULY CARD
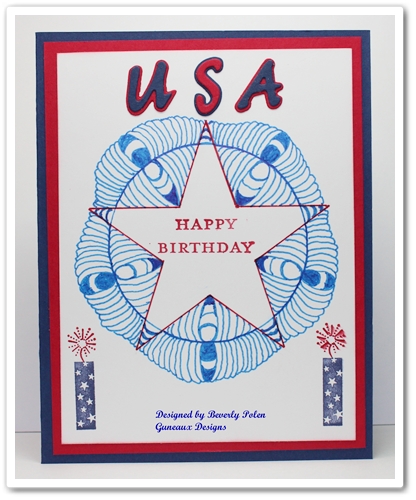
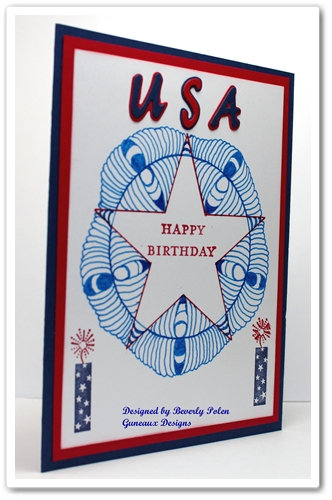
Stampin Up 4th of July Card – Courage

Hey, Stampers!  I have for you today a Stampin Up 4th of July card.  I love the meaning of July 4th and the “Stars and Strips”.  My card is based on my love of our American Flag, therefore, I call it Stars and Strips.

This Stampin Up 4th of July card is so easy to make.  For the top layer, I used an old Sizzix die to cut out stars.  I temporarily adhered them to the top and bottom of a 3-3/4″ x 5″ piece of Whisper White card stock.  I left a white space in the center for the sentiment.  I then used a brayer to add Real Red and Night of Navy Classic Ink over the stars and on the card’s top and bottom.  After the ink dried, I removed the temporary stars and I had white stars remaining in the red and blue areas.

The picture below shows the “strips”, which were created with the Stampin’ Up! Stripes Embossing Folder.

The sentiment in the center of the card front is from the retired Stampin’ Up! Courage stamp set.  I was so disappointed that this stamp set was retired!  The following picture provides a closeup of the sentiment.

Also in the center of the card is ribbon tied into a knot.  It was made with old Stampin’ Up! Real Red, Night of Navy, and Whisper White grosgrain ribbon.


In the picture to the left, you can barely see a Night of Navy star at the bottom, right of the card’s inside.  I used a stamp from the retired Stampin’ Up! July Fourth stamp set for the star.

I hope you enjoy the card.  The 4th of July is right around the corner and I wish you a blessed July 4th.


 God’s Blessings!
Stamping With Guneaux Designs
by
Beverly Polen

STAMPIN UP 4TH OF JULY CARD – COURAGE

Stampin’ Up! Petal Cone Die-Happy July 4th!

Do you have plans to celebrate today with family and friends?  How do you plan on decorating the table that will hold all of the yummy food?  I have an idea for you that features the Petal Cone Die, but you’ll need to get started creating it early in the day so you’ll have your table decorated prior to food being served.  Making several of these would further enhance your table.

Again, this table decoration features the Stampin’ Up! Petal Cone Die.  I love this die and use it often.

(Click on the pictures to enlarge)

 SUPPLIES:
 
Paper: Real Red Cardstock (102482), Whisper White Cardstock (100730), Night of Navy Cardstock (100867), Silver Glimmer Paper (124005), and Red Glimmer Paper (121790)
Accessories:  Big Shot Die-Cutting Machine (113439), Petal Cone Bigz L Die (121810), Retired Stars #2 Original Die, Full Heart Punch (119883), Strips Embossing Folder (123128), Vanilla Shimmer Smooch Spritz (118772), Adhesive of your choice, and Fourth of July decorations from a local craft store
 
To make this table decoration, follow these steps:
 
  • Cut 3 petal cones using the Petal Cone Die – 1 Whisper White, 1 Real Read, and 1 Night of Navy
  • Emboss each cone with the Strips Embossing Folder
  • Spritz each with the Vanilla Shimmer Smooch Spritz
  • Fold along each score line
  • Adhere the Real Red cone to the Whisper White cone, lining up the embossed strips
  • Adhere the Whisper White cone to the Night of Navy cone, lining up the embossed strips
  • Lay the adhered pieces face down (at this point you have not adhered the Night of Navy flap yet)
  • Adhere your craft store decorations about 1″ down from the top portion of the Whisper White cone (you will need to cut a small half circle from the top of each cone so that when you close and adhere the final pieces together, the decorations fit nicely into the top)
  • Place adhesive on the flap of the Night of Navy cone and adhere it to the Real Red cone, folding under the flaps of each cone
  • Adhere the folded flaps to each other
  • Set the adhered cones down on Real Red Cardstock and trace around it
  • Cut out the traced piece of Real Red Cardstock and adhere it to the bottom of the cones (this provides a bottom cover to hide the flaps)
  • Using the Stars #2 Die (or a star punch), cut out stars from the Red Glimmer and Silver Glimmer paper and Night of Navy Cardstock
  • Adhere the stars onto the final adhered cone where desired.
  • Decide on your sentiment and place it onto Whisper White Cardstock
  • Using the Full Heart Punch, punch out the sentiment from the Whisper White Cardstock, as well as a heart from the Read Glimmer Paper and Night of Navy Cardstock
  • Layer the hearts as shown in the pictures and adhere them to the cone
  • Enjoy
 
God’s Blessings!
 
 
Stamping With Guneaux Designs by Beverly Polen

Designer Rosette Bigz XL Die

Stampin’ Up!’s Designer Rosette Bigz XL Die  comes in handly this week; a special week that has been since July 4, 1776 when the U.S. declared its independence from the Kingdom of Great Britain.  Do you have special plans for celebrating the 4th?  I plan to spend the early evening at an outdoor concert and afterwards watch beautiful fireworks.

It can get quite hot here in Florida, so I decided to make a hand fan to use while at the concert, and the Designer Rosette Bigz XL Die will do the job for me.  Of course the hand fan had to be patriotic.  I think it is so cute, and it is actually quite sturdy.

The steps I followed to make the hand fan are:

  • Cut an 11″ x 5-1/4″ piece of Real Red, Whisper White, and Night of Navy Cardstock
  • Place each piece onto the Stampin’ Up! Designer Rosette Big XL Die (125594) and run through the Big Shot(113439)
  • Cut off the pointed ends of each rossette
  • Fold each piece into accordian folds
  • Glue the three pieces together
  • Add glue to the ends of the rosettes and dip them into Silver Glass Glitter (120995) – let it dry
  • Insert a piece of twine into the half-circles along the bottom of the rosettes and tie them together tightly (this will cause the pieces to spread into a fan)
  • Cut an 11″ x 1-1/2″ piece of Real Red Cardstock
  • Score this piece at the 1/2″ and 1″ marks
  • Fold along the two score lines and glue the piece together to form a band for the outer sides of the fan
  • Glue the band onto the outer edges of the fan, leaving the very bottom unglued
  • Use a glue gun to apply hot wax at the very bottom of the fan to further reinforce and stabilize it
  • Decorate as desired
God’s Blessings!
Stamping With Guneaux Designs
by Beverly Polen
Have fun creating your fan using the Designer Rosette Bigz XL Die!