Paper Purse Card with SU Paisley Petals

Welcome, my friends!  Yesterday I free-handed a Paper Purse Card with SU Paisley Petals DSP.   I designed this paper purse card for a challenge to create a card in a shape other than the normal rectangle or square.

Paper Purse Card with SU Paisley Petals

Copyright – Stamping With Guneaux Designs

Using my personally-designed template, I created the paper purse card base and handles with Marina Mist card stock.  I used Stampin’ Up!’s lovely retired Paisley Petals DSP on the front and back of the card base.  I made the top flap on the paper purse card with the same DSP using an Impression Obsession 6 in 1 frames die.  The die is one die that cuts out 6 different frames and they nest together perfectly.  I used the 6 frames cut from the two DSP designs, and alternated them on the flap.  I attached that onto a piece of Old Olive card stock.  I attached the flap to the card base with foam tape.  I created a Tangerine Tango rose with a Swarovski Crystal in the center and attached it to the purse flap.

Paper Purse Card with SU Paisley Petals

Copyright – Stamping With Guneaux Designs

Using an ODBD oval die, I cut out two ovals to which I added the sentiment and two Swarovski Crystals.  The paper purse card folds like a regular card and there is plenty of room on the inside for a personal message.  The card measures 7″ x 5-1/2″.

Paper Purse Card with SU Paisley Petals

Copyright – Stamping With Guneaux Designs

Get inspired to design a paper purse card!  Thanks for stopping by!


Paper Purse Card with SU Paisley Petals   Paper Purse Card with SU Paisley Petals  Paper Purse Card with SU Paisley Petals      


Butterfly_1_1God’s Blessings!
Stamping With Guneaux Designs By Beverly Polen
Firm Reliance on Divine Providence!


1 JOHN 4:10

“This is love: not that we loved God, but that He loved us and sent His Son as an atoning sacrifice for our sins.”

Christmas Tree Angel Topper

Hello, and thanks for stopping by!  Today I have for you a beautiful Christmas Tree Angel Topper.  I made it for one of Splitcoaststampers Falliday Fest Challenges, FF16annsforte3, to make an angel card or ornament angel using Ann Forte’s provided template.  I created my angel as an ornament.  (Click HERE for the template.)

christmas-tree-angel-topperI cut out all the pieces from Ann’s template using SU Shimmery White Card Stock, Silver Foil, and Silver Glimmer Paper.  I used a Christmas Tree Embossing Folder to emboss the angel’s body and then added the SU Heat and Stick Powder and SU Dazzling Diamonds Glitter (can’t see this in the photo).

I glued the body together, attaching the Silver Glimmer wings onto the back.  As for the job of creating a face, well, let me say I have MANY faces on my crafting table.  After a while, I gave up and used the one that is attached to the silver foil and tinsel halo.  I used ODBD paper to create the bow and added a SU basic pearl to its center.  I cut a 1” x 2” piece of ODBD paper for the sheet music that the angel is holding in her hands.

christmas-tree-angel-topper-2_1


Paper: SU Shimmery White, SU Silver Foil, SU Silver Glimmer Paper, and ODBD Christmas Card Collection 2015 and 2016

Ink: Copics

Accessories: Ann Forte’s Angel Template, Cuttlebug Christmas Tree EF, SU Silver Trim Tinsel, VersaMark, SU Heat and Stick Powder, and SU Dazzling Diamonds Glitter


Butterfly_1_1

God’s Blessings!

Stamping With Guneaux Designs By Beverly Polen

Firm Reliance on Divine Providence! 

During Jesus’ ministry, He instructed us to love our enemies.  He said:  “But I tell you who hear me:  Love your enemies, do good to those who hate you, bless those who curse you, pray for those who mistreat you.” Luke 6:27-28

Splitcoaststampers Falliday Fest Challenges

I have made 30 cards and some projects for the Splitcoaststampers Falliday Fest Challenges, and I plan to post a few at a time.  The Splitcoastsampers Falliday Fest Challenges include creating 30 cards and 10 projects following supplied tutorials.  There will be little details shared here on some projects; therefore, and if you want to CASE a card or project, please feel free to leave a comment asking for the details and I’ll get them to you. Here we go:

 1.  FF16punchboardpumpkin

pumpkin-box_1

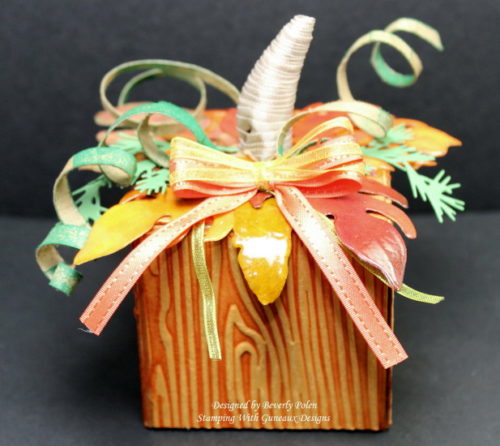
This pumpkin box is for the SCS Falliday Fest Tutorial #1 to create a pumpkin box.

Using the SU Score Board, I scored, cut, and assembled the box and covered the four sides with an orange card stock that was embossed with the SU Woodgrain EF that I covered with Pumpkin Pie Ink. I then sponged Pumpkin Pie Ink on the four corners of the box.

Not having any burlap ribbon, I used SU Crumb Cake Seam Binding to form the stem for the pumpkin. I rolled and glued, rolled and glued, and rolled and glued the binding until I had 2″ for the stem. I manipulated the top to curve it somewhat to the right. I then adhered it to the box top.

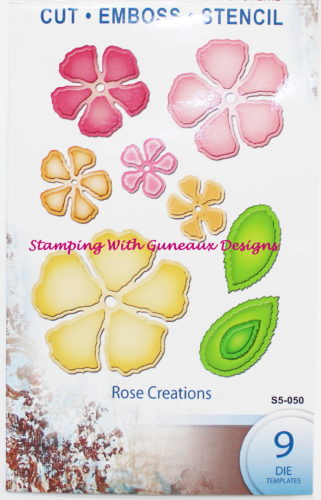
Using a leaf die, I cut and colored three types of leaves, and embossed and added them to the box top. I also added two mini holiday greens within the leaves.

I cut three thin strips of crumb cake card stock, selectively added crumb cake and emerald envy ink, and twirled them with a quilling tool. I added these to the box top.

I made a multiple loop bow with two SU ribbons and added it to the box top.


Stamps: None

Paper: SU Baked Brown Sugar, Light Orange (from stash), Neenah Solar White

Ink:  SU Pumpkin Pie, Crumb Cake, Emerald Envy, and Copics

Accessories: SU Scoring Board, SU Woodgrain EF, Tim Holtz Holiday Greens Die, Leaves Die, SU Lucky Limeade Ribbon, SU Tangerine Tango Ribbon, SU Crumb Cake Seam Binding, Glue Dotsimg_3432


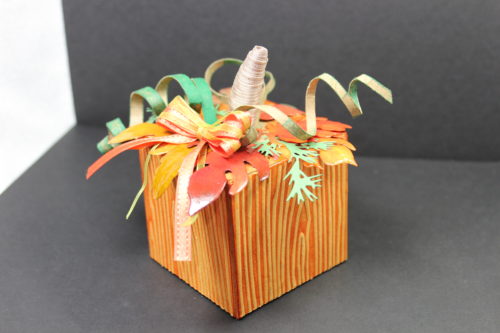
2)  FF16stampmommaA, Always Thankful

harvest-of-blessings_1

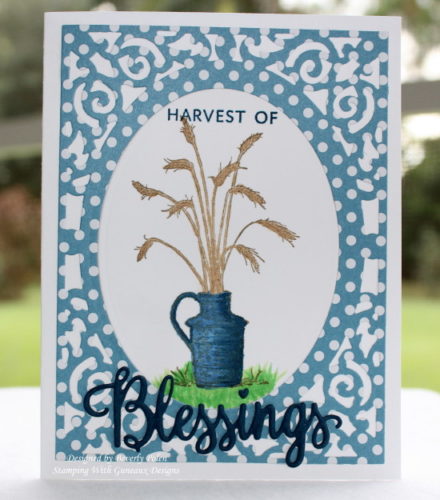
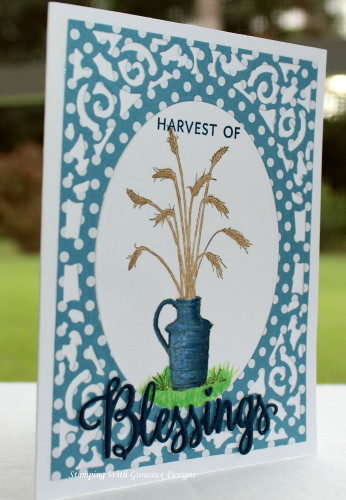
Lori Craig (stamp_momma), a host for a Falliday Fest Challenge, asked participants to create a thanksgiving card and include wheat in the image. This card is my submission to her challenge.

I had to search for a wheat related stamp, and this is the only one I found among my many stamps. It is from a retired SU Always Thankful Stamp Set, and it’s the first time I’ve used it. I colored the image with copics.

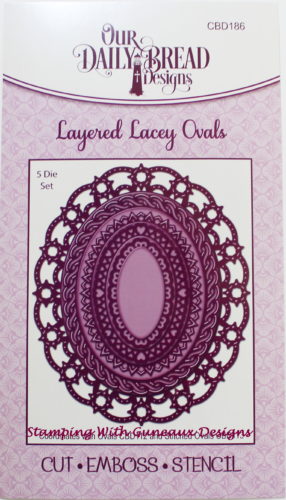
I used the Spellbinders A2 Filigree Delight Dies to cut out the image and cut a frame for the image from polka dots DSP. I added my sentiment which is a stamp, Harvest Of, and die cut, Blessings, from ODBD.


Stamps: SU Always Thankful, ODBD Many Blessings

Paper: Solar White Card Stock and SU Polka Dot DSP

Ink: Copics and SU Not Quite Navy

Accessories: ODBD Many Blessings Die, Spellbinders A2 Filigree Delight Dies


harvest-of-blessings-side-view_1


3)  FF16UnderstandBlueA, NY Fall

forever-young-fall_1
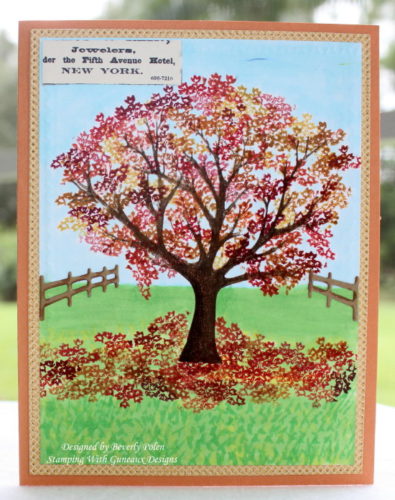
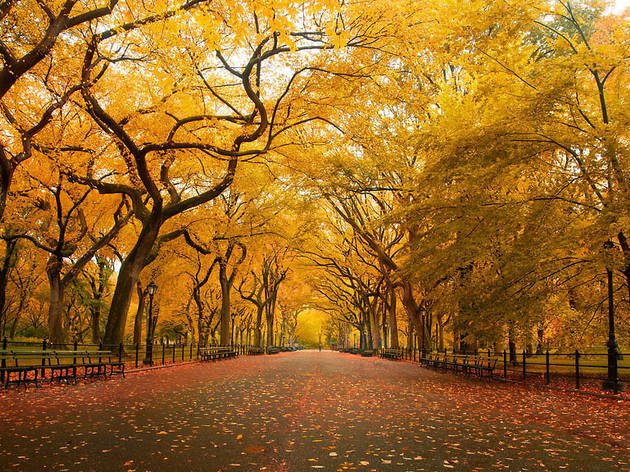
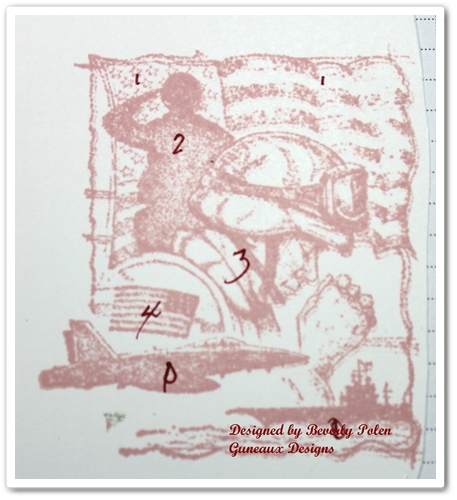
This card is my submission to Lydia (UnderstandBlue) Falliday Fest Challenge (FF16UnderstandBlueA) to make a card with the brilliant colors of a New York fall AND include print – newsprint, book pages, or text.  The following photo was my inspiration.

 (Photograph: Courtesy Creative Commons/Flickr/Chris Ford)

To qualify for the challenge, I added a small piece of “newsprint” regarding NY. The fence was inspired by the above mentioned photo. The fall tree had no leaves, so I cut a piece of a mini stamp from a SU Happy Seasons fall tree stamp and stamped leaves on the tree and grass. I had to stamp the leaves probably a hundred times! {sore arm today}


Stamps: SU Forever Young and SU Happy Seasons

Paper: Solar White, Autumn Spice DSP, SU Newsprint DSP, and SU Orange Card Stock

Ink: Fall Colors of SU Markers and Copics

Accessories: IO Fence Dies, Foam Tape


Butterfly_1_1

God’s Blessings!

Stamping With Guneaux Designs By Beverly Polen


“In Him we have redemption through His blood, the forgiveness of our trespasses, according to the riches of His grace.”  Ephesians 1:7
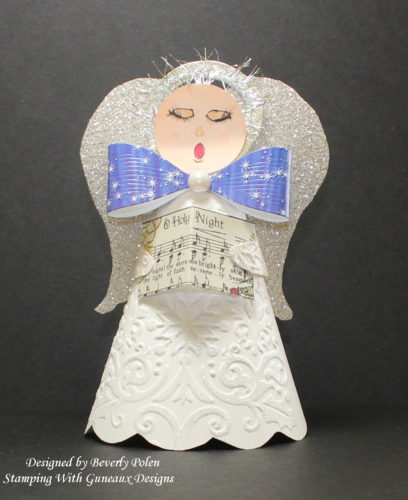
Stampin Up Courage Stamp Set – 4th of July 3-D Card

As I shared in my last post, I love the Stampin Up Courage stamp set that retired recently.  Having family members who were in the military and a Dad who loved the American Flag, I especially like this stamp set.  Personally, I think it was a mistake to retire the Stampin Up Courage stamp set.  Regardless, it’s retired, but I am featuring it on my card share for today.  This is my Stampin Up Courage Stamp Set – 4th of July 3-D Card.

Actually, I CASEd (i.e., copy and share everything) myself when making this card.  I made a similar card in 2010 for a special son-in-law who at the time was on active duty with the Army.  God took him home a year ago last month and I really miss him.

As for the card, it is a three-dimensional card.  It may not appear to be based on the photo, so let me share why it is.

I decided that I wanted each piece on the military-related image to be raised at varying levels.  So I stamped the image onto scrap paper and numbered what part of the image that I wanted at what level.

The picture to the right explains.  I numbered as 
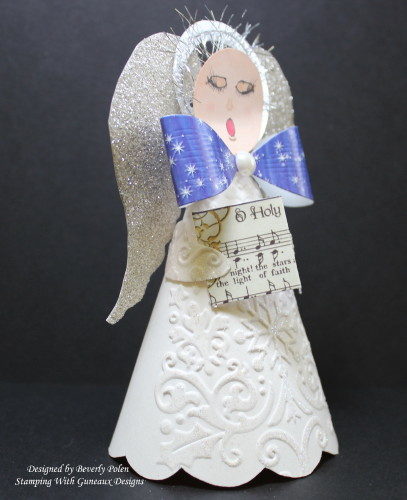
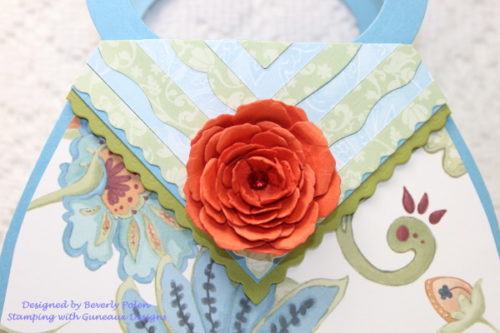
“1” the item I wanted raised with one layer of Stampin Up Dimensionals (i.e., adhesive foam), “2” for those with two layers of dimensionals, and so on.  I re-stamped the image, applied various ink colors, and cut out the pieces.  I then attached the pieces according to the “map” in the photo.

The following picture shows the process of attaching the pieces for the first level, which is the American Flag in the background.

Moving to the 2nd level, I attached the saluting soldier using two layers of dimensionals.  That is shown in the picture to the right.

Moving to the 3rd level, I attached the praying soldier with three layers of dimensionals.  However, I did make one change.  I wanted the helmet and the American Flag on the soldier’s uniform to be raised a level above the soldier.  Therefore, I added four layers of dimensionals to the helmet and one to the flag. The following picture reflects this and the completed image.

 The following pictures provide a better view of the dimensional elements.

The final product of the Stampin Up Courage card includes Real Red Card Stock as the base, Whisper White Card Stock for the 1st layer, and Night of Navy Card Stock as the 2nd layer.  Included is the sentiment from the Stampin Up Courage stamp set.

If you enjoyed the card and tutorial, please let me know by leaving a comment.


God’s Blessings!
Stamping With Guneaux Designs
by
Beverly Polen

STAMPIN UP COURAGE STAMP SET – 4TH OF JULY CARD

Stampin Up Paper Purse and Cards – Gingham Garden DSP

I have a cutie for you today; a Stampin Up Paper Purse and matching cards made with the  new Gingham Garden Designer Series Paper (129310).  I have noticed a lot of up-scale stores offering pink purses, so I decided the Gingham Garden DSP would be perfect for this Stampin Up Paper Purse.

  Stampin Up Paper Purse Gingham Garden DSP

The design for this paper purse is one that I developed back in 2011. You can see that purse here.

These are the three 3″ x 3″ “Thank You” greeting cards with matching envelopes.  The cards match the Stampin Up Paper Purse.

Stampin Up Paper Purse and Cards

 Stampin Up Paper Purse and Cards - Gingham Garden DSP

This picture is of the Stampin Up Paper Purse’s fastener that is made with the Daffodil Delight and floral design from the Gingham Garden DSP.  (Personally, I think the color is closer to So Saffron.)  I used a paper piercer around the edges of the fastener and stitched  a blue embroidery thread around it.  I topped it off with a Spring Catalog Designer Builder Brad.  Attached to that brad is a Midnight Muse In Color Dahlia (127556).

Stampin Up Paper Purse and Cards - Gingham Garden DSP
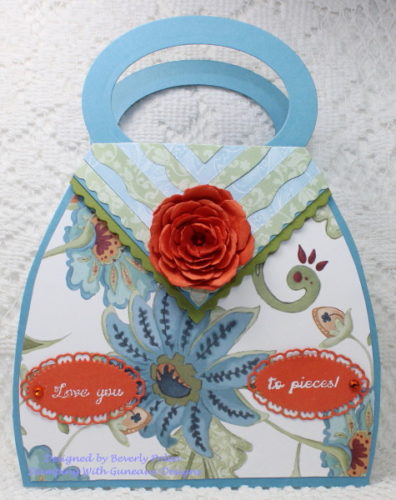
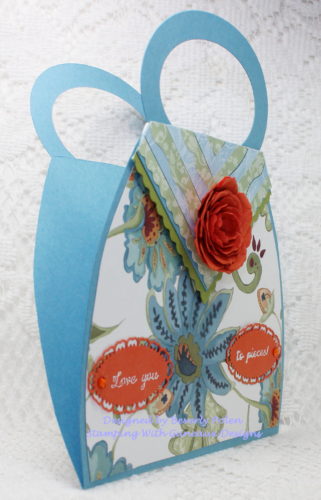
To the right is a picture of the back of the purse.  You can see the back of the fastener as well as the two side embellishments that extend to the front.  They are made with the Daffodil Delight and floral design from the Gingham Garden DSP and Primrose Petals In Color Dahlias.

The 3″ x 3″ matching “Thank You” greeting cards fit perfectly into the opening of the purse.  I made three of the cards; however, I could easily fit six inside the Stampin Up Paper Purse. 

 Stampin Up Paper Purse

 Individual pictures of the greeting cards that match the Stampin Up Paper Purse

Stampin Up Paper Purse and Cards 

This card features the new Gingham Garden Designer Washi Tape (129314).  I’ve not used washi tape before, and I must say I really like Stampin’ Up!’s.   Also featured are flowers from the Stampin’ Up!’s Boho Blossoms Punch (119858).


 Stampin Up Paper Purse and Matching Card


The primary features on this card are the Gingham Garden Designer Series Paper and the Boho Blossoms Punch flowers.


 Stampin Up Paper Purse and Matching Card

Stampin’ Up! products featured on this card are the Dotted Scallop Ribbon Border Punch (119275), 1″ Square Punch (124094), 1-1/4″ Square Punch (retired), Bitty Butterfly Punch (129406), and Gingham Garden DSP.  

Enjoy!


God’s Blessings!
Stamping With Guneaux Designs
by
Beverly Polen 

 Stampin Up Paper Purse and Matching Cards

STAMPIN UP PAPER PURSE, MATCHING CARDS, AND GINGHAM GARDEN DSP

Easter Basket With Blown Eggs – Stampin’ Up!

Easter Basket With Blown Eggs - Stampin' UpMy art project today is an Easter Basket with Blown Eggs that were decorated.

The Easter Basket was made with the retired Bigz Scallop Envelope Die.  I cut out four of the envelopes from Stampin’ Up! Daffodill Delight Card Stock.  Using Stampin’ Up! Sticky Strip, I adhered one envelope to another until all four sides were formed.

The sides of the Easter Basket with Blown Eggs were decorated with flowers made with the Stampin’ Up! Mixed Bunch Stamp Set, Blossom Punch, Designer Builder Brads, Bashful Blue Card Stock, and Melon Mambo Card Stock.

Easter Basket With Blown EggsHave you ever blown eggs?  If not and you want to learn, follow these instruction.  You will need raw eggs (not boiled) that are not cracked or boiled.

Wash your eggs well. Carefully poke a small hole in each pointed end of the raw egg.  (The Stampin’ Up! Paper-Piercing Tool worked great for poking the holes.)  Hold the egg over a bowl and blow into one of the holes. The egg liquid should slowly come out the other hole. (Sometimes this is a big job, and kids should get an adult’s help and permission before trying this.)  Once the egg shell is empty, rinse it off (inside and outside) and set it aside to dry.  I set mine upright so any liquid would drain from the inside.

   Easter Basket With Blown Eggs - Stampin' Up!

Now the fun begins!! 

Because an egg shell is non-porous and, thus, won’t absorb ink and certain paints well, I used Folk Art Acrylic Paint and a sponge to paint the eggs.  You can find this paint at any craft store.  I found that acrylic paint with glitter or metallic paint, as well as the Stampin’ Up! Reinkers, would not cover the shells.  Believe it or not, the reinkers left a very pale color but didn’t cover well at all.  I tried the reinkers as I was curious about using them.  Anyway, you may want to consider this when selecting your form of color for the eggs.

Easter Basket With Blown Eggs - Stampin' Up!

Next, decorate the eggs to your heart’s desire.  As you can see, I created a bunny, chicken, and decorated egg with flowers and some tangling (Zentangle).  I used Stampin’ Up! Card Stock to create elements (e.g., eyes, ears, wings, feet) of both the bunny and chicken.  If you look closely in the above picture, you can see the feet of both of them.


STAMPIN’ UP! SUPPLIES (unless otherwise noted) USED FOR THE EASTER BASKET WITH BLOWN EGGS 

Stamps:  Mixed Bunch Stamp Set (125537)

Paper: Bashful Blue Card Stock (195120), and Melon Mambo Card Stock (115320)

Ink:  Bashful Blue Classic Ink (126961) and Melon Mambo Classic Ink (126948)

Accessories:  Stampin’ Up Bigz Scalloped Envelope Die (retired), Blossom Punch (125603),1-3/4″ x 7/8″ Large Oval Punch (119855), 1-3/8″ x 5/8″ Oval Punch (119863), Designer Builder Brads (129329), Bird Builder Punch (117191), Sticky Strip (104294), and Paper-Piercing Tool (126189).

Other:  Acrylic Paint for the Egg Shells


God’s Blessings!
Stamping With Guneaux Designs
by
Beverly Polen

Easter Basket With Blown Eggs - Stampin' Up!

EASTER BASKET WITH BLOWN EGGS