As I shared in my last post, I love the Stampin Up Courage stamp set that retired recently. Having family members who were in the military and a Dad who loved the American Flag, I especially like this stamp set. Personally, I think it was a mistake to retire the Stampin Up Courage stamp set. Regardless, it’s retired, but I am featuring it on my card share for today. This is my Stampin Up Courage Stamp Set – 4th of July 3-D Card.
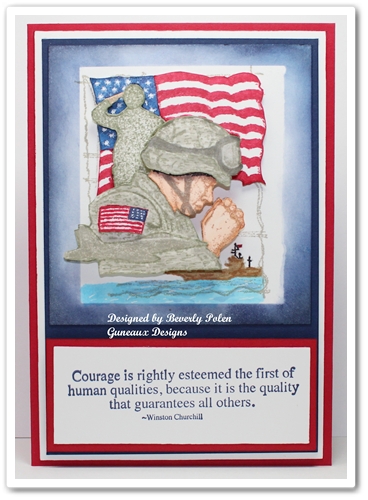
Actually, I CASEd (i.e., copy and share everything) myself when making this card. I made a similar card in 2010 for a special son-in-law who at the time was on active duty with the Army. God took him home a year ago last month and I really miss him.
As for the card, it is a three-dimensional card. It may not appear to be based on the photo, so let me share why it is.
I decided that I wanted each piece on the military-related image to be raised at varying levels. So I stamped the image onto scrap paper and numbered what part of the image that I wanted at what level.
The picture to the right explains. I numbered as 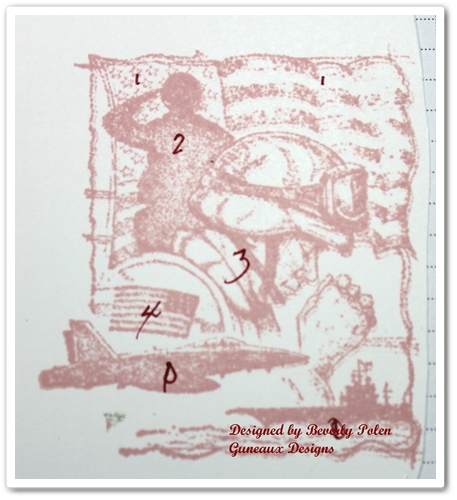 “1” the item I wanted raised with one layer of Stampin Up Dimensionals (i.e., adhesive foam), “2” for those with two layers of dimensionals, and so on. I re-stamped the image, applied various ink colors, and cut out the pieces. I then attached the pieces according to the “map” in the photo.
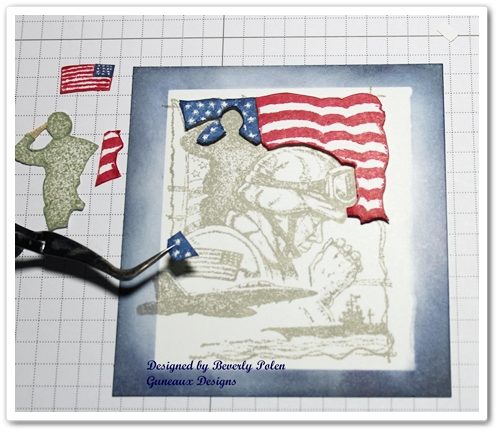
The following picture shows the process of attaching the pieces for the first level, which is the American Flag in the background.
Moving to the 2nd level, I attached the saluting soldier using two layers of 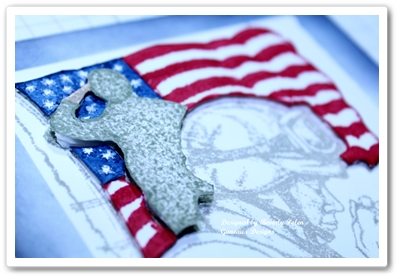 dimensionals. That is shown in the picture to the right.
Moving to the 3rd level, I attached the praying soldier with three layers of dimensionals. However, I did make one change. I wanted the helmet and the American Flag on the soldier’s uniform to be raised a level above the soldier. Therefore, I added four layers of dimensionals to the helmet and one to the flag. The following picture reflects this and the completed image.
The following pictures provide a better view of the dimensional elements.
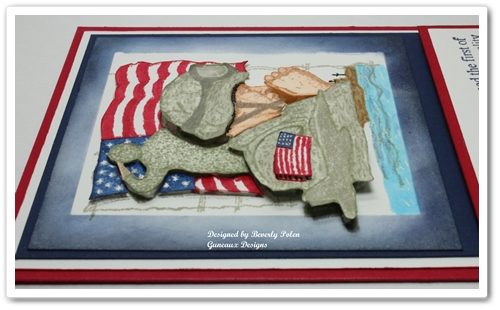
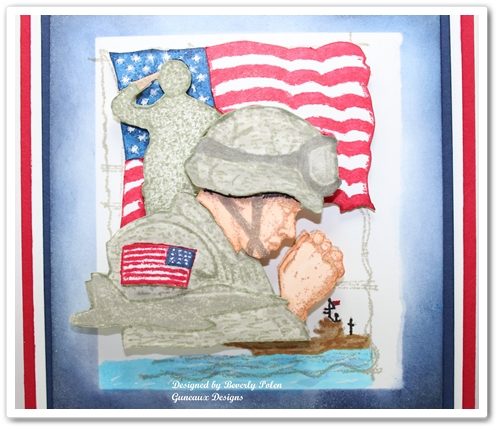
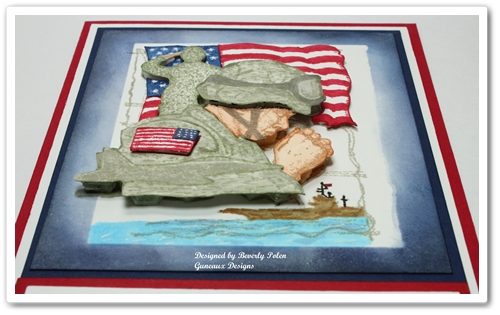
The final product of the Stampin Up Courage card includes Real Red Card Stock as the base, Whisper White Card Stock for the 1st layer, and Night of Navy Card Stock as the 2nd layer. Included is the sentiment from the Stampin Up Courage stamp set.
If you enjoyed the card and tutorial, please let me know by leaving a comment.
God’s Blessings!
Stamping With Guneaux Designs
by
Beverly Polen
STAMPIN UP COURAGE STAMP SET – 4TH OF JULY CARD
![]()
![]()



 “1” the item I wanted raised with one layer of
 dimensionals. That is shown in the picture to the right.

