Water Coloring Technique – Stampin’ Up! Bold Butterfly Framelits

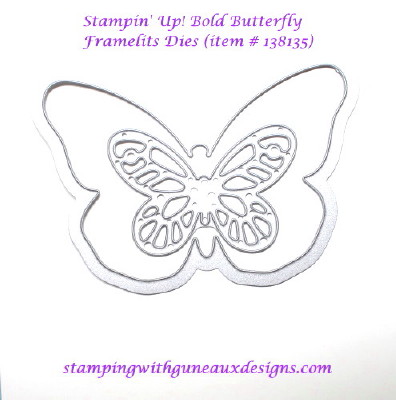
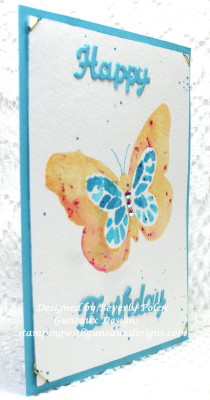
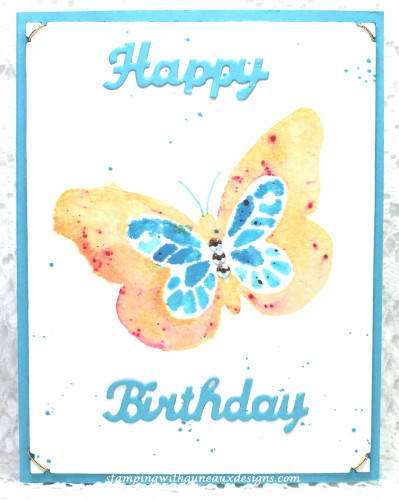
I hope everyone had a blessed and safe New Year!  Mine was uneventful, which is just what I wanted.  Today’s card features a water coloring technique and is a Happy Birthday Card that features the Stampin’ Up! Bold Butterfly Framelits Dies.

http://stampingwithguneauxdesigns.com/water-coloring-technique-su-bold-butterfly-framelits

http://stampingwithguneauxdesigns.com/water-coloring-technique-su-bold-butterfly-framelits

Have you ever been inspired to create a piece of artwork based on something you saw on a website (e.g., websites featuring jewelry, clothes, shoes, purses, etc.)?  It is a fun process, and that process was used for creating this card.

Yesterday’s (1/2/15) Inspirational Challenge on the Splitcoaststampers.com website involved using punches or die cuts for a basic shape, and then picking a favorite medium and several colors to get a beautiful confetti effect. The Etsy.com website, The Wildlands, was to be viewed for inspiration.  This item inspired me to use the Stampin’ Up! Bold Butterfly Framelits Dies (item #138135) to create my project.  Check out the site as you will find such beautiful artwork featured there.
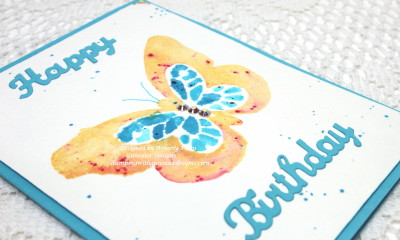
Water Coloring Technique SU Bold Butterfly Framelits4_1The Water Coloring Technique required using an adhesive tape (e.g., Frog Tape, a Painters’ Tape) from which to punch or die cut an image.  After cutting out an image, what is left (i.e., the tape’s negative cutout)  became a “mask” that is attached to a piece of water color paper.  After attaching the mask, the image is to be water colored.

A better explanation of the technique can be found in this YouTube video by Lydia (aka; Understand Blue) who was the wonderful hostess for this challenge.  Her video provides a wonderful tutorial on the technique.  Stop by and watch it.

This is a closeup of the water colored butterflies.  Unfortunately, I didn’t have my tape adhered correctly to my piece of water color paper, so the colors bled.  🙁  But, I gave it my best shot as water coloring is not my forta.
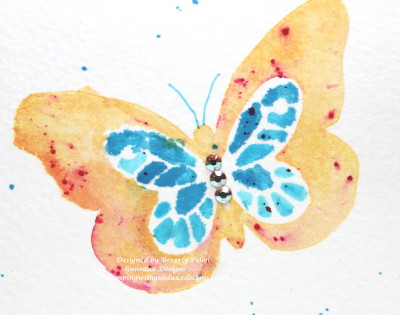
Water Coloring Technique SU Bold Butterfly Framelits3_1I added three Swarovski® crystals to the butterfly body to give it some dimension.

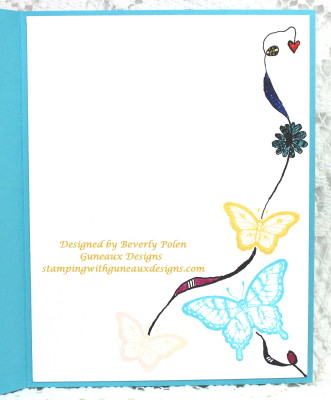
The photo below is one of the inside of the card.  I added some doodling along with stamp images from Stampin’ Up! Papillon Potpourri Stamp Set (item # 123759).

water-coloring-technique-su-bold-butterfly-framelits

Don’t forget to watch Lydia’s video and try the technique!


http://stampingwithguneauxdesigns.com/water-coloring-technique-su-bold-butterfly-framelits

God’s Blessings!

Stamping With Guneaux Designs By Beverly Polen

Water Coloring Technique - SU Bold Butterfly Framelits

Happy Birthday Frozen Style

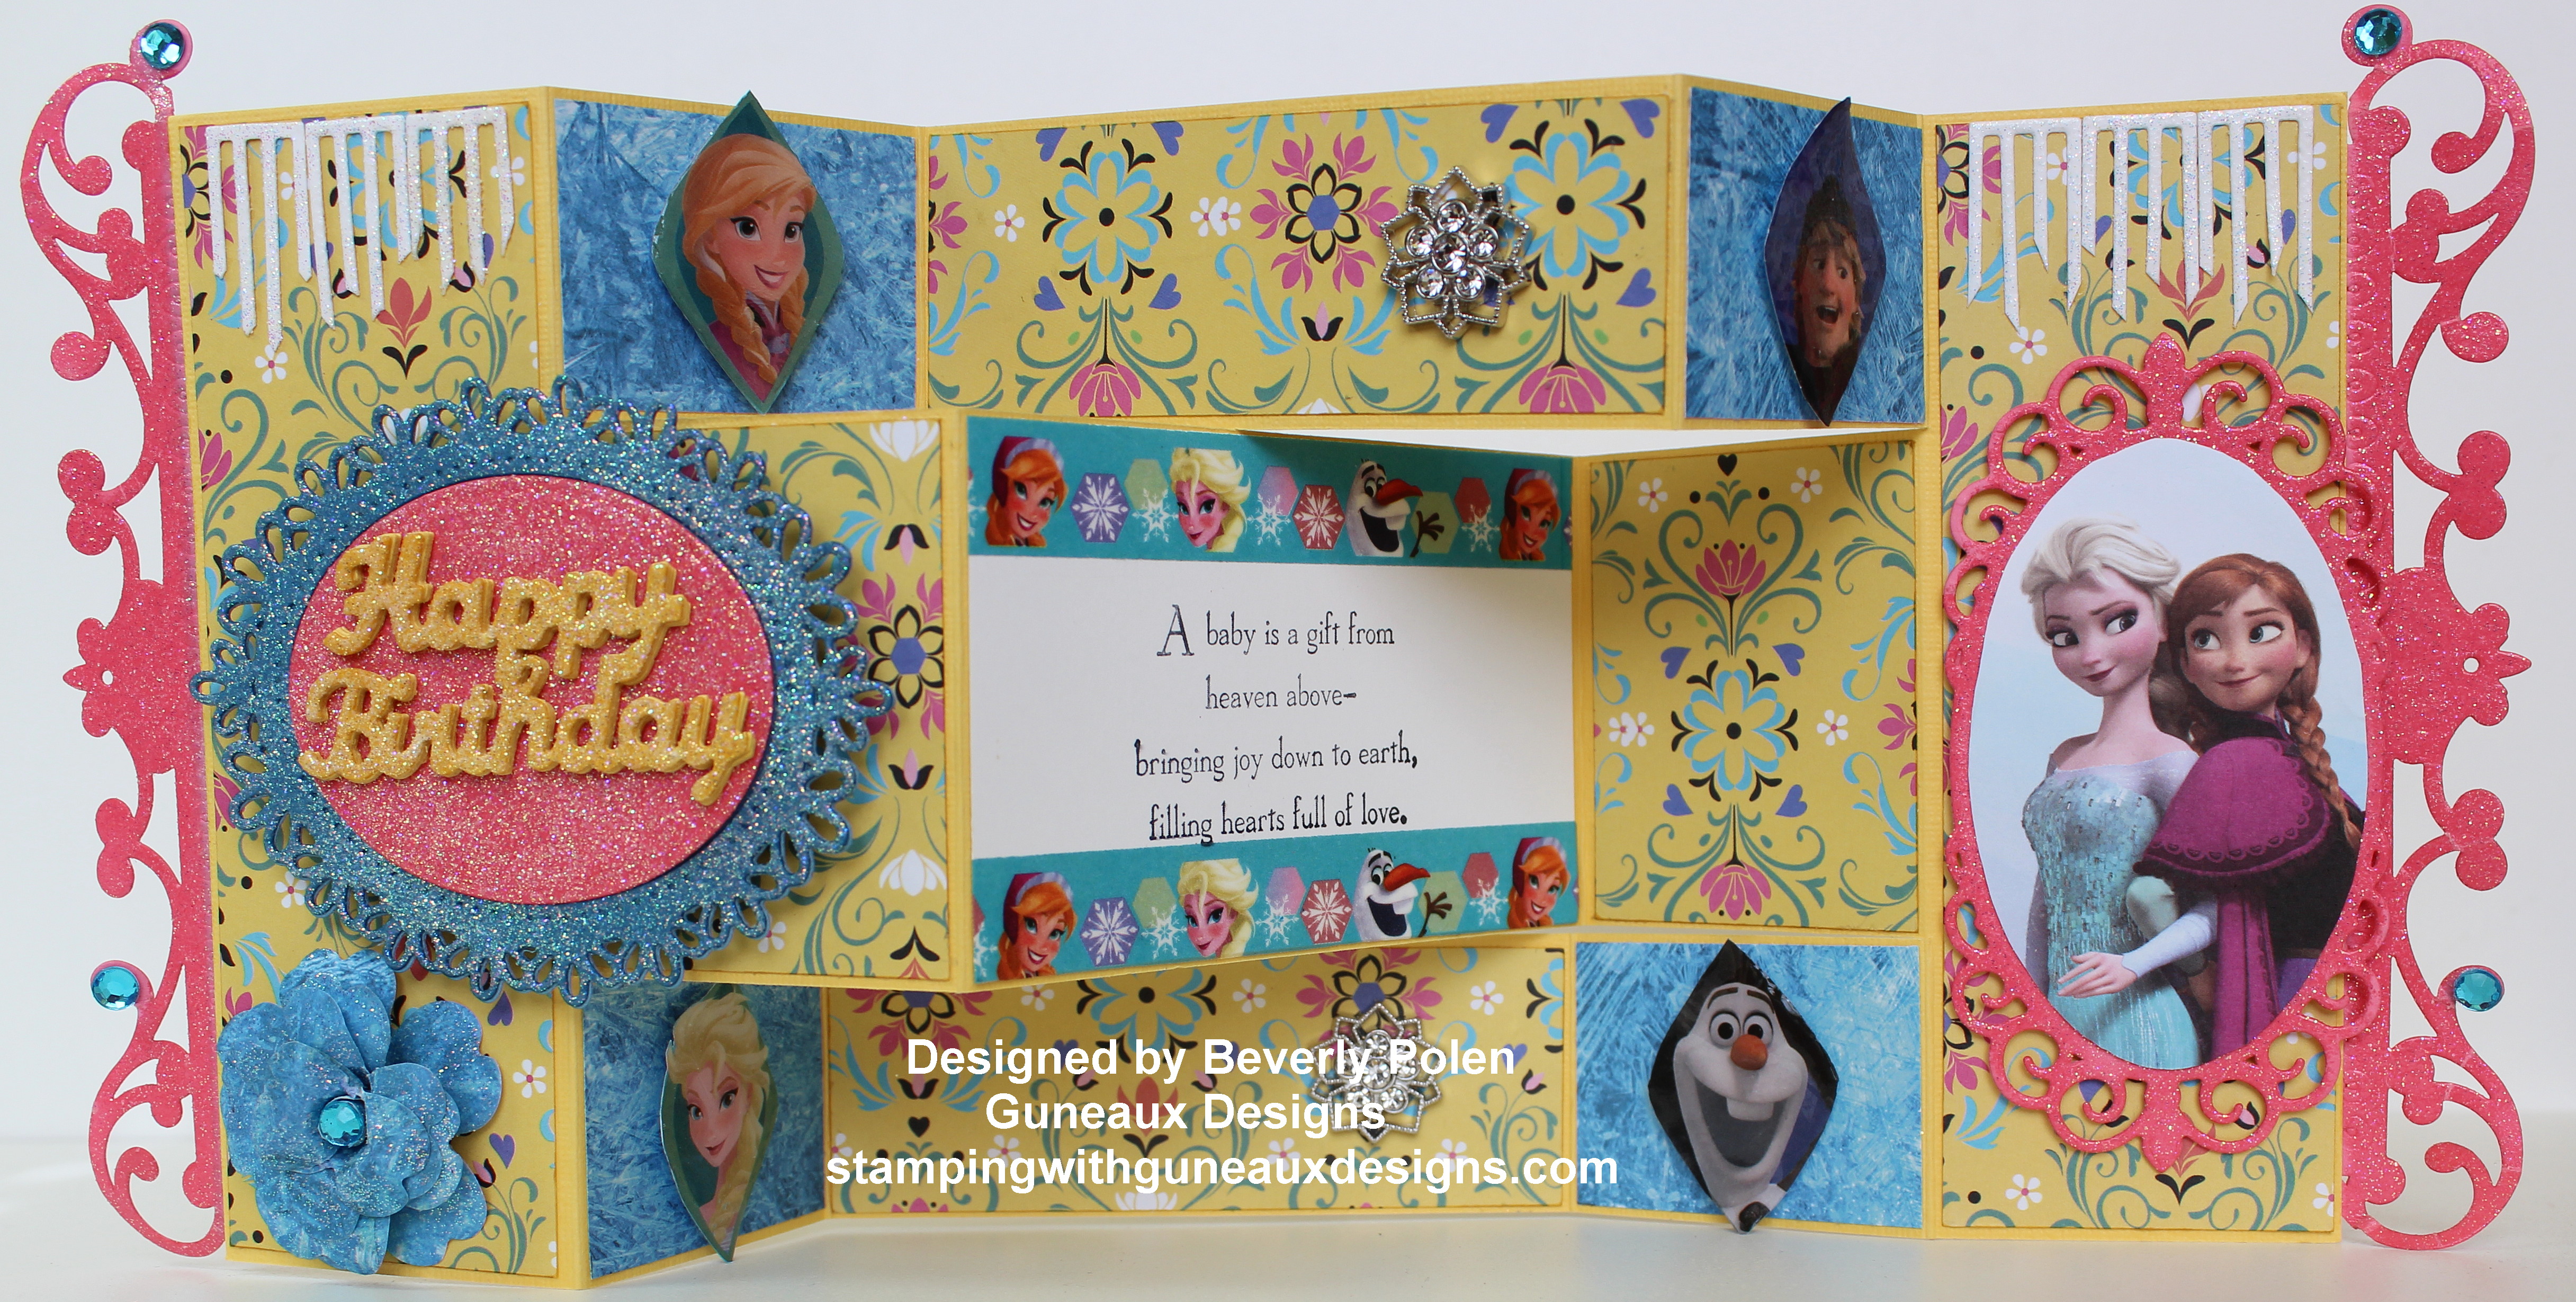
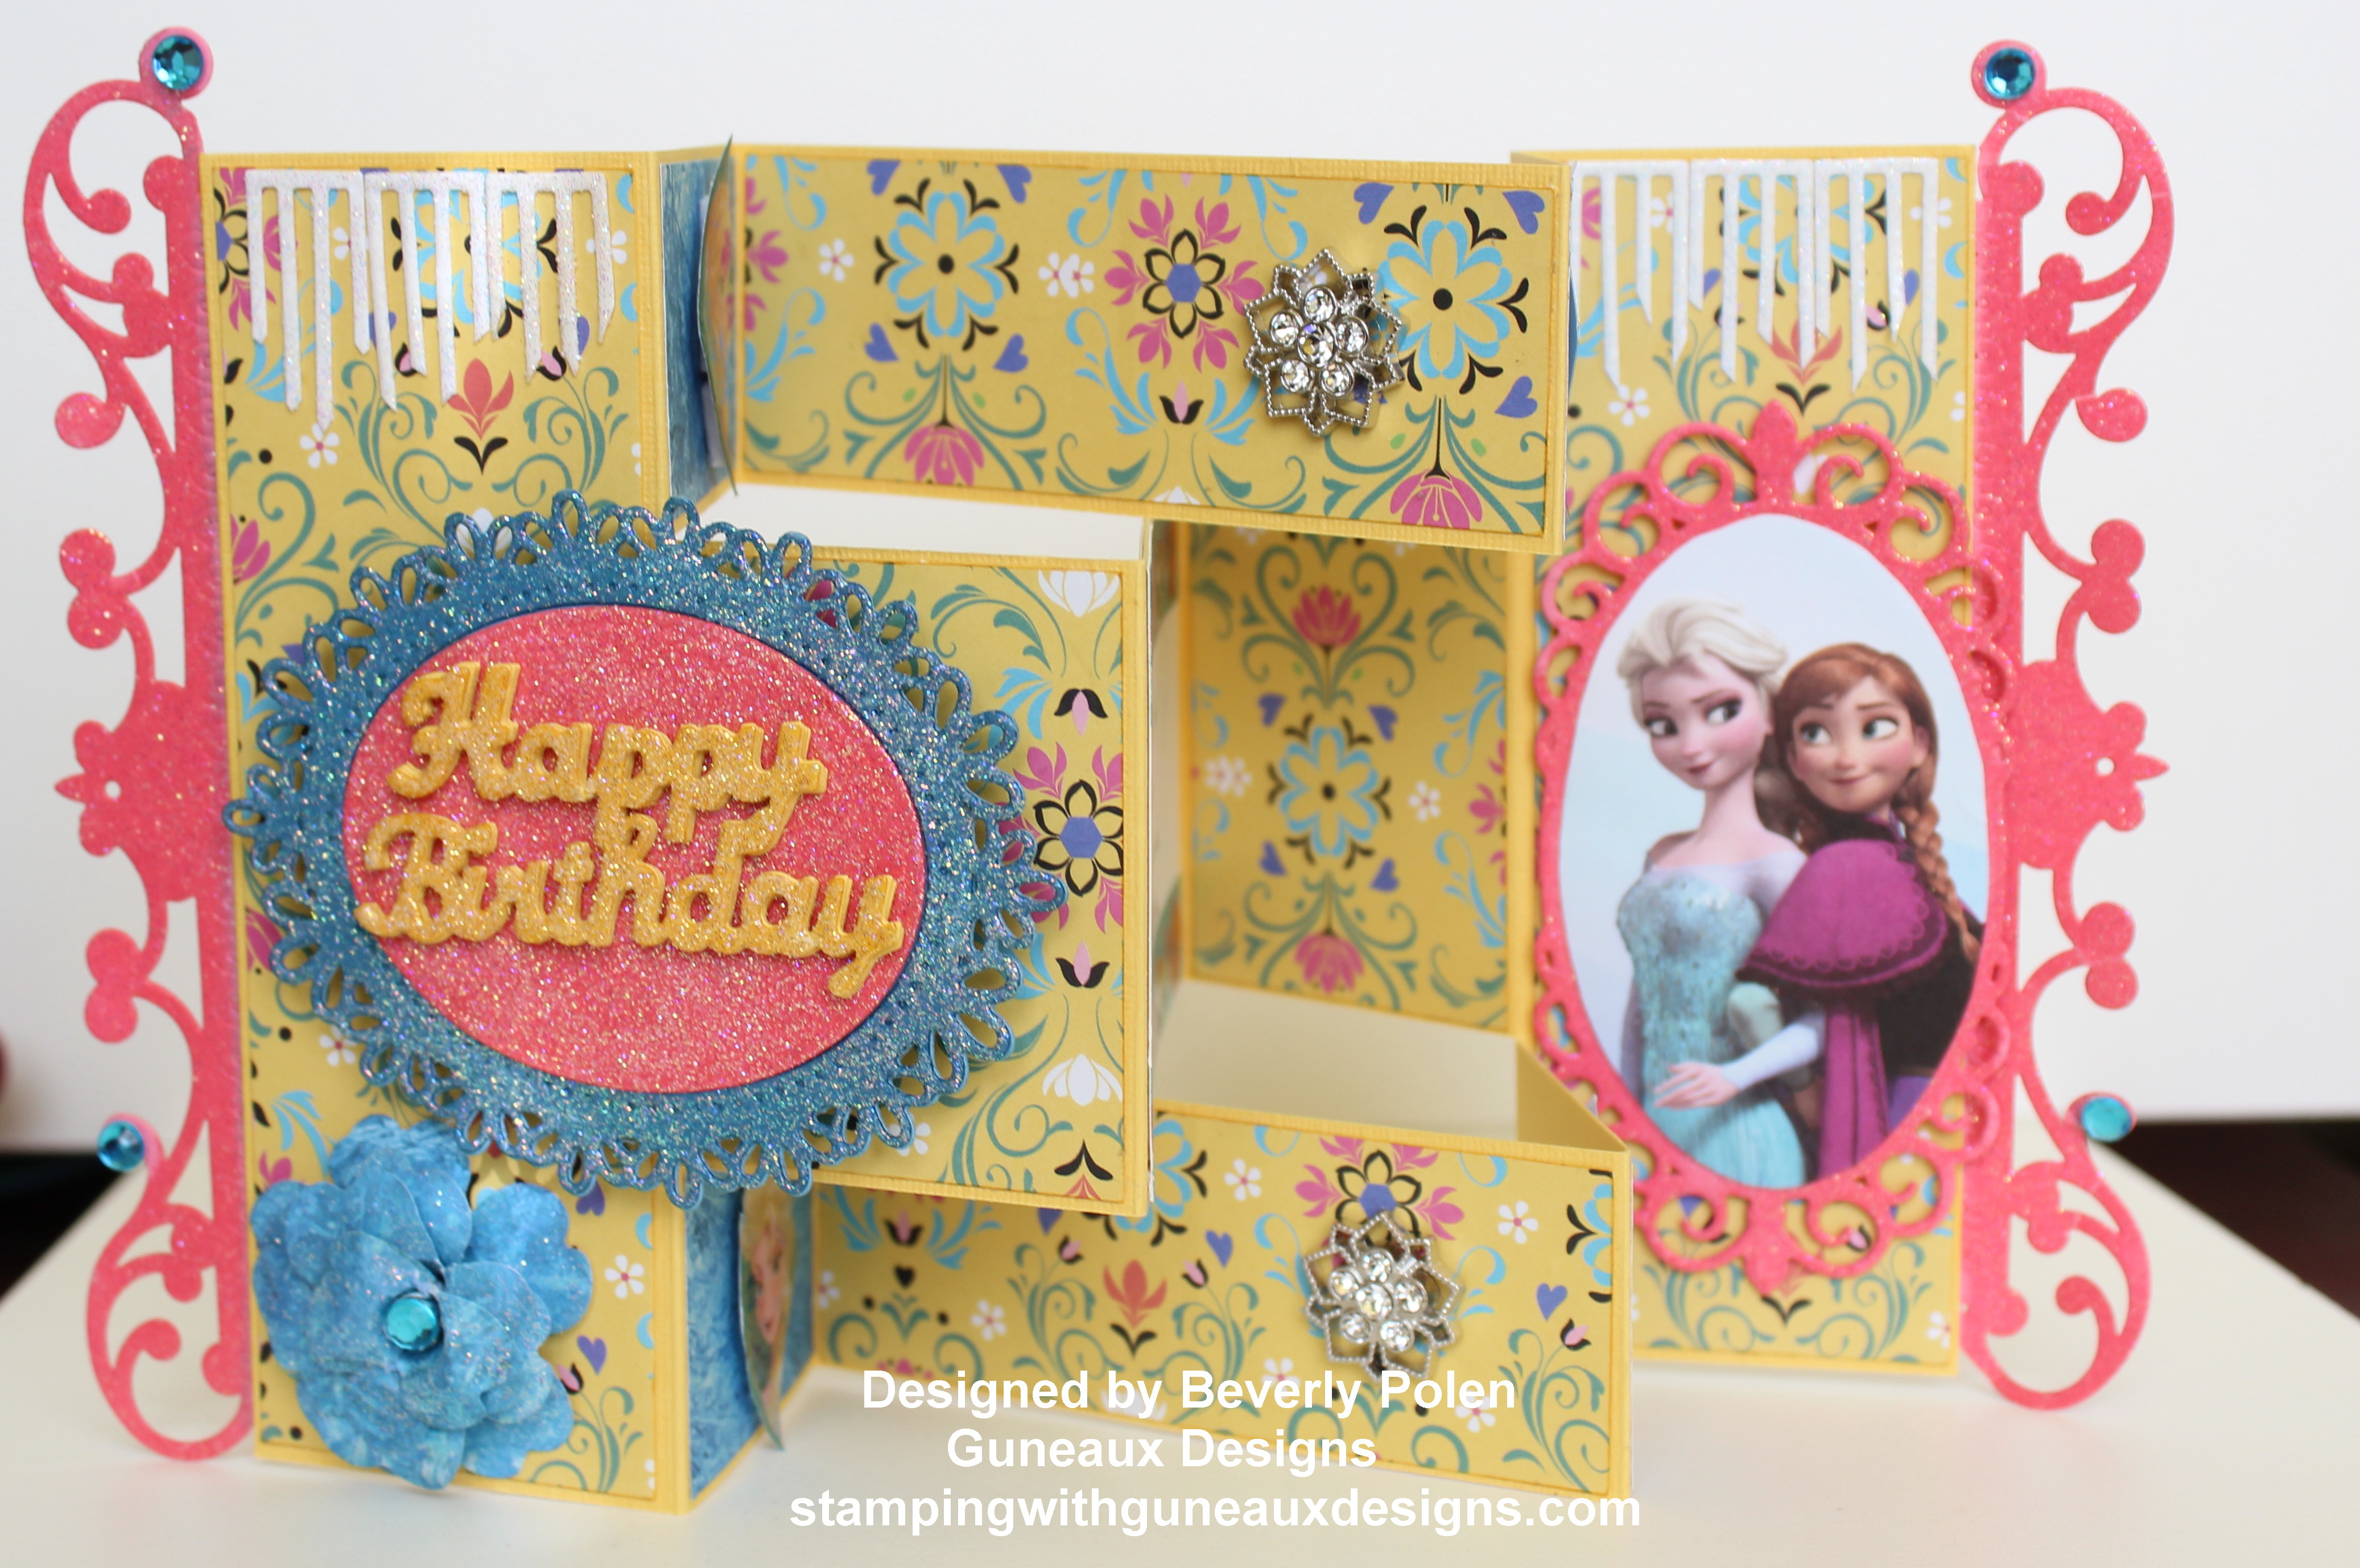
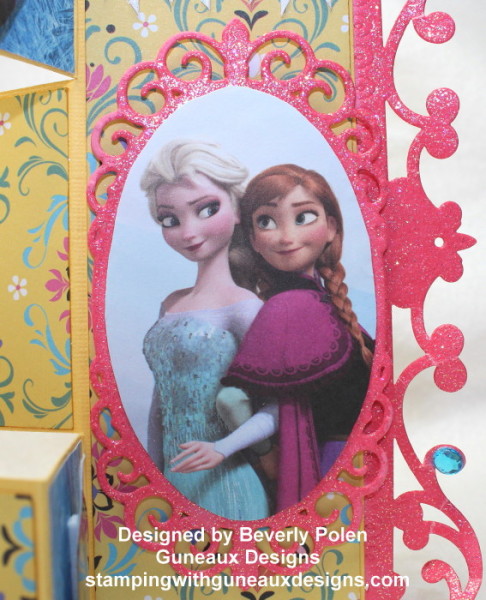
I have had three birthdays to celebrate in the last several days, one of which was for my one-year old granddaughter.  She LOVES the Disney movie, Frozen; therefore, I made her card around the Frozen theme and call it “Happy Birthday Frozen Style“.  As you can see, the card is a Tri-Shutter card.


UPDATE:  This card was chosen for one of the Splitcoaststampers FAVORITES for the week ending December 20, 2015.  Splitcoaststampers’ comment:  

“Congratulations! In the General Stamping forum, you’re in the FAVORITES for the week ending December 20, 2015.”


Happy Birthday Frozen Style


Happy Birthday Frozen Style

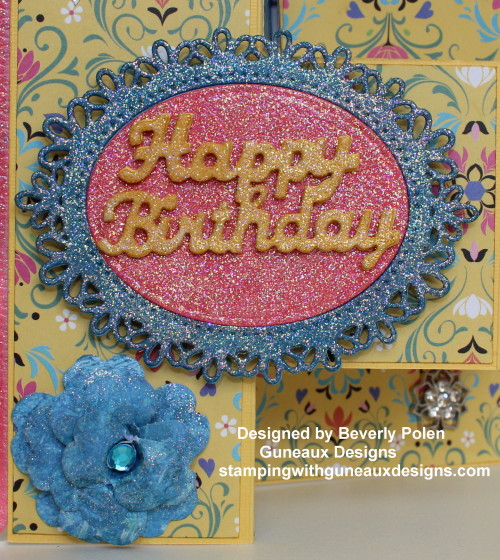
The above photo shows the happy birthday sentiment and “frozen” flower.  You will note the blue stone in the center of the flower as well as on the sides of the card. My granddaughter’s birthstone is Blue Zircon as she was born in December.  I had to include them on the card.  Several elements on the card are embossed with Stampin’ Up!’s Iridescent Ice embossing powder to accentuate the “frozen” theme.

Happy Birthday Frozen Style

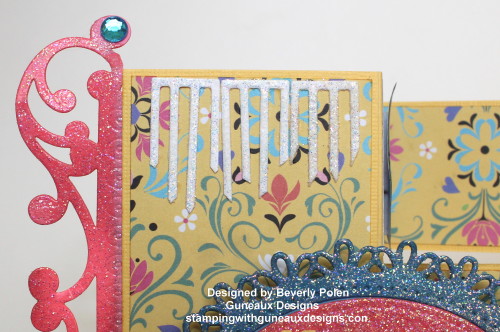
The above photo shows the ice icicles that I included on both sides of the card.  You can also see them in the below photo.

Happy Birthday Frozen Style

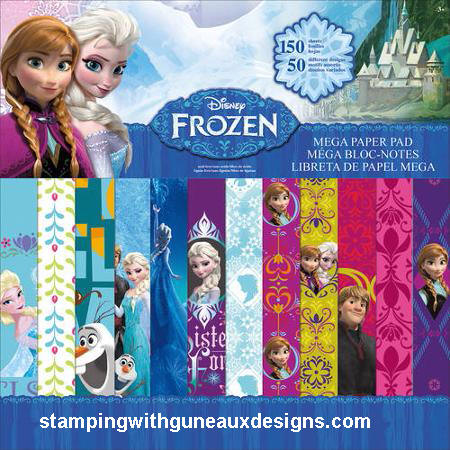
The crafting paper that I used (see below) in making the card is from the Disney Frozen Mega Paper Pad that can be purchased at Walmart as well as other places.  I was surprised to see the color yellow in the paper pad, but it was perfect as my granddaughter loves the color yellow.

(FOLLOW ME ON TWITTER! I share things there that you won’t find here.)

This is a photo of the Disney Frozen Mega Paper Pad:


Happy Birthday Frozen Style

SUPPLIES USED:

Stampin’ Up! Daffodil Delight and Rose Red Card Stock
Disney Frozen Mega Paper Pad
Spellbinders 5×7 Reflective Moment Die (S6-011)
Spellbinders 5×7 Mystical Embrace Die (S6-012)
Spellbinders Oval Floral Die (S6-028)
Disney Frozen Washi Tape
Stampin’ Up! Frosted Finishes Embellishment (unavailable)
Stampin’ Up! Pansy Punch
Stampin’ Up! Iridescent Ice Embossing Powder


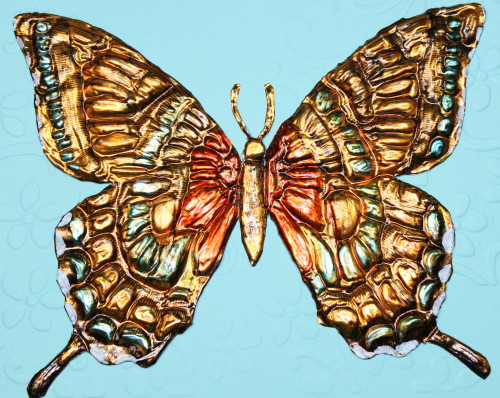
Swallowtail Butterfly

God’s Blessings!

Stamping With Guneaux Designs
By
Beverly Polen
Happy Birthday Frozen Style

HAPPY BIRTHDAY FROZEN STYLE BIRTHDAY CARD

Chewbacca Happy Birthday Card

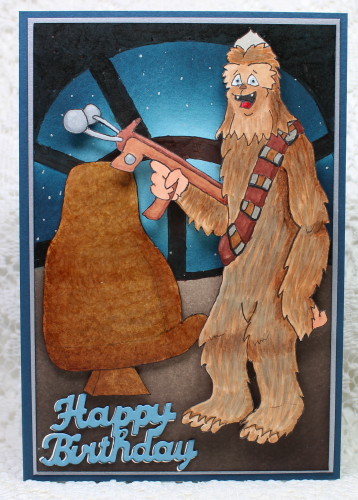
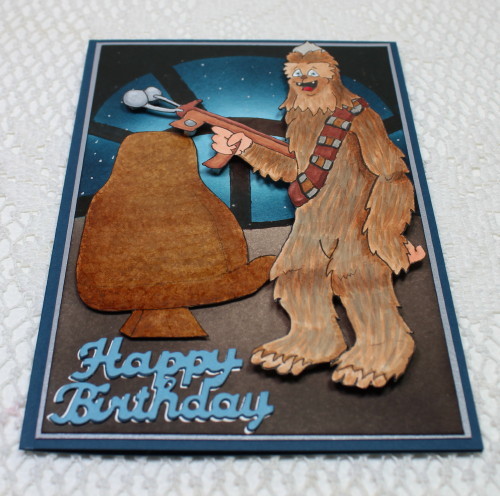
Hello and thanks for stopping by!  Today I have a Chewbacca Happy Birthday Card for you that is quite different from other cards I’ve made.  This past weekend was my son-in-law’s birthday and he loves the Star Wars character, Chewbacca.  Therefore, my birthday card to him had to be related to Chewbacca!

Chewbacca Happy Birthday Card

Because I drew the elements of the card, I spent several hours (and days) drawing Chewbacca and his seat.  I would draw Chewbacca and the seat over and over and over, and my trash can is evidence! 🙂  I just could not reach a point that I was happy with him.  But, all good things take patience, so I prevailed.

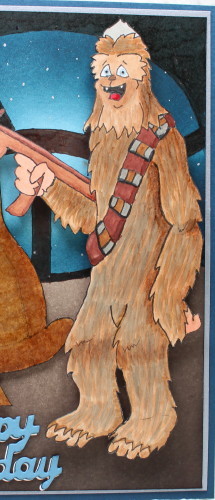
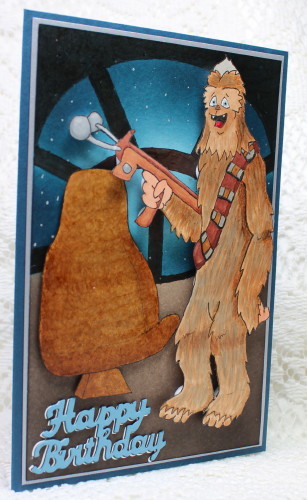
Drawing Chewbacca was only half of the battle.  Coloring him was a nightmare! (LOL). I used copic sketch markers to color him and I’ve not used copics but a very few times.  I certainly have not used them for something this difficult. However, my love for my son-in-law pushed me to carry on.  And, so I did!  Now if you are an expert at coloring with copics, I’m sure you will have a lot of feedback for me on how I could improve on Chewbacca, right??? Your feedback would be greatly appreciated.  Let me give you a better look at him.

Chewbacca Happy Birthday Card


The Chewbacca Happy  Birthday Card shows him standing inside the spaceship.  Can you tell that?  I do have to say that I really like the sky outside the spaceship’s windows! The Chewbacca figure hides this a little, but the center of the sky is lighter than the surrounding sky areas.  I wanted it to appear that the spaceship’s lights were shining into the darkness.  LOL  So how did I do?

Chewbacca Happy Birthday Card

The above photo shows the dimensions on the card.  The seat is adhered to the card with Stampin’ Up! Dimensionals and Chewbacca is attached with thicker foam dots. Therefore, he rests higher on the card than does his seat.

I hope you enjoy the card!  Any questions or comments are welcomed!

Oh, BTW, my son-in-law loved the card!


Swallowtail Butterfly

God’s Blessings!

Stamping With Guneaux Designs by Beverly Polen
Chewbacca Happy Birthday Card-6_1

CHEWBACCA HAPPY BIRTHDAY CARD

How to Make a Center Step Card – Happy Birthday

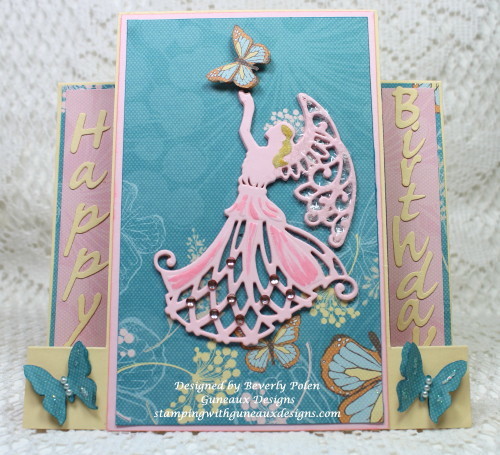
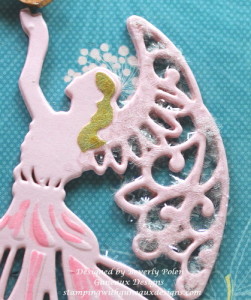
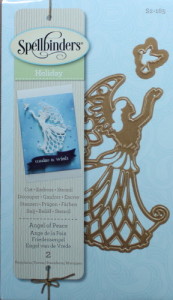
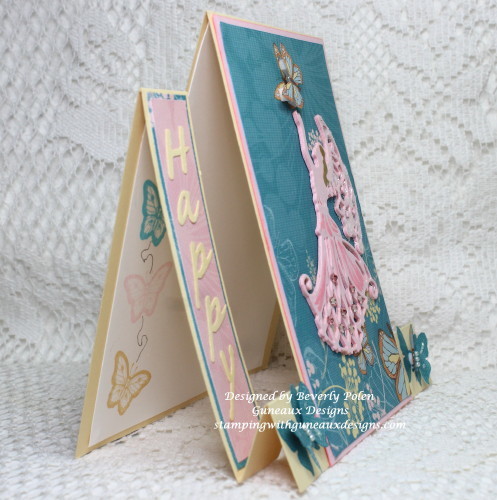
The purpose of this post is to provide a tutorial on how to make a center step card. The card shown in the post is a Happy Birthday card that I made for my little angel granddaughter.  I refer to her as my angel, thus I thought the Spellbinders Holiday Angel of Peace Dies would work perfectly for my center step card.

How to make a Center Step CardThe following pictures are closeups of card sections.  You will note that the angel’s wings are covered with a tinsel glitter, which is Martha Stewart’s Crystal Tinsel Glitter (discontinued).

How to make a Center Step CardHow to make a Center Step Card

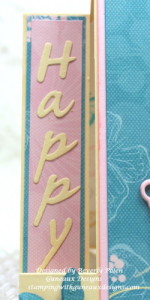
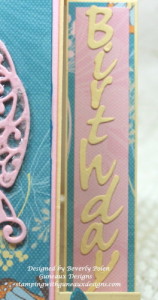
These pictures are closeups of the Happy Birthday sentiment on the left and right sides of the card and the Spellbinders Angel of Peace Dies.

How to make a Center Step CardHow to make a Center Step CardSpellbinders Holiday Angel of Peace


TUTORIAL ON HOW TO MAKE A CENTER STEP CARD

STEP 1: Using a paper trimmer/cutter, cut an 11″ x 5-1/2″ piece of card stock.

How to Make a Center Step Card

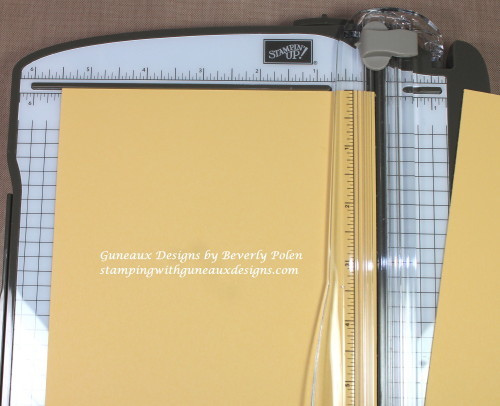
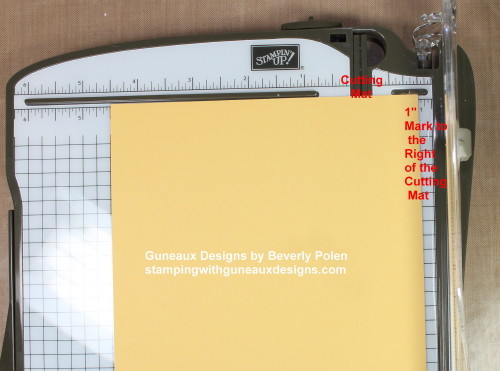
STEP 2:  Leave the 11″ x 5-1/2″ cut piece of card stock on the trimmer, moving the right side to the 1″ mark on the right side of the cutting mat (i.e., the rubber channel that the blade slides through when cutting).

NOTE:  The terms used for a trimmer depends on the type of trimmer used (e.g., Guillotine cutter, Bypass trimmer, etc.).  Thus, in this tutorial,  I have used terms that are applicable to my paper trimmer. Follow the directions for use of your type of trimmer.

How to Make a Center Cut Card

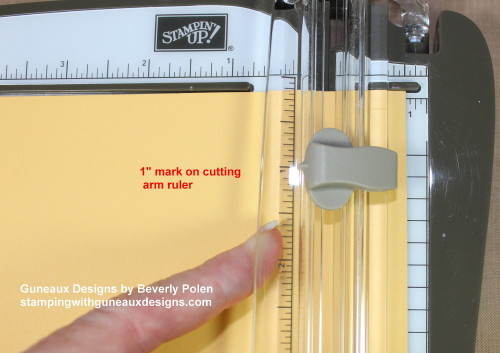
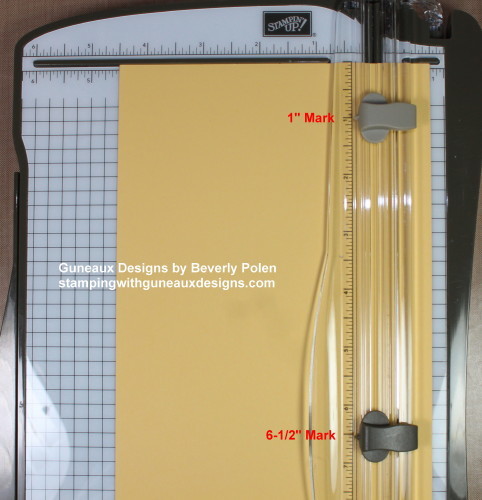
STEP 3:  Using the ruler on the cutting arm, move the cutting blade down to the 1″ mark. Lay the cutting arm down on the paper.

How to Make a Center Step Card Happy Birthday

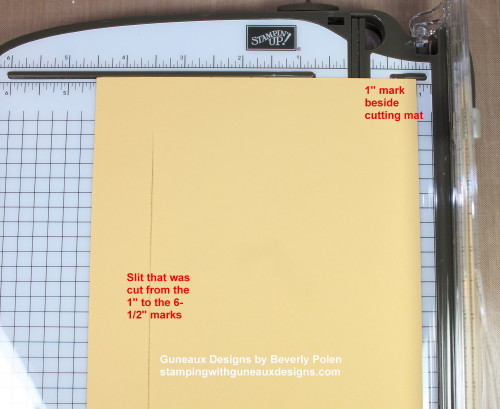
STEP 4:  Cut from the 1″ mark on the cutting arm ruler down to the 6-1/2″ mark.  This provides a 5-1/2″ slit on the card stock.

how-to-make-a-center-step-card-happy-birthday/

STEP 5:  Turn the card stock over with the 5-1/2″ slit on the left side.  Place the card stock at the 1″ mark that is to the right of the cutting mat.

http://stampingwithguneauxdesigns.com/how-to-make-a-center-step-card-happy-birthday/

STEP 6:  Before cutting, move the cutting blade on the cutting arm down to the 1″ mark (same as STEP 3).

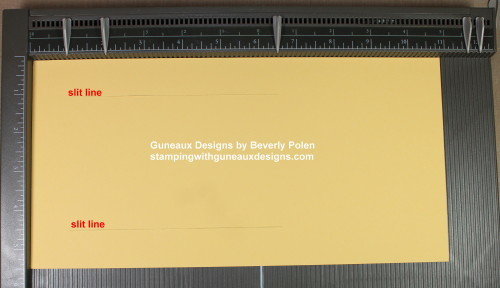
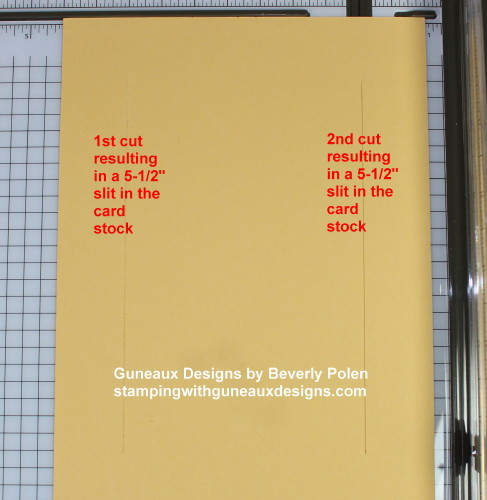
STEP 7:  Cut from the 1″ mark down to the 6-1/2″ mark.  This provides a second 5-1/2″ slit on the card stock.

http://stampingwithguneauxdesigns.com/how-to-make-a-center-step-card-happy-birthday/

STEP 8:  Put the trimmer away and get out your paper scoring tool to score the piece of card stock.

STEP 9:  Place the card stock onto the scoring tool with the 5-1/2″ side and slits to the far left on the tool.

http://stampingwithguneauxdesigns.com/how-to-make-a-center-step-card-happy-birthday/

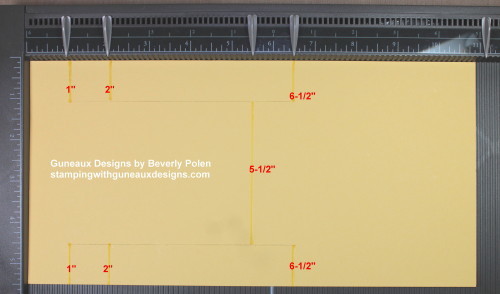
STEP 10:  Score at the 1″, 2″, and 6-1/2″ marks, but ONLY from the top of the card stock down to the slit at the top, and from the slit at the bottom to the edge of the card stock. Your score lines will be 1″ long at the top and bottom, avoiding the area where the two slits are located (see picture below STEP 11).

STEP 11.  Score at the 5-1/2″ mark beginning at the first slit down to the second slit.

http://stampingwithguneauxdesigns.com/how-to-make-a-center-step-card-happy-birthday/

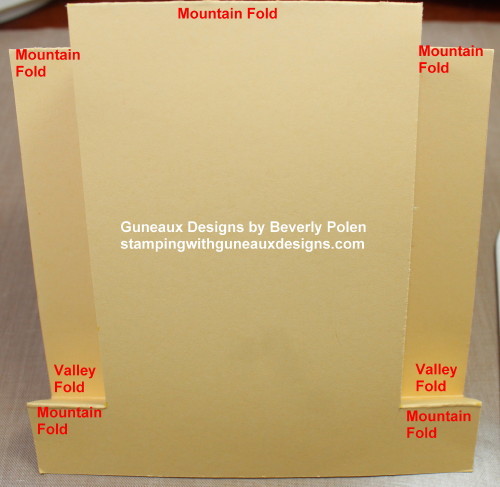
STEP 13:  Remove your card stock from the scoring tool and fold it according to the following:

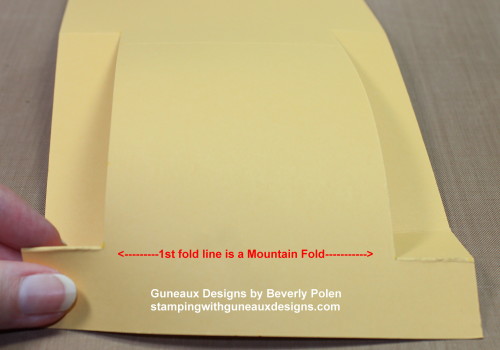
  • Fold at the first score marks (i.e., the 1″ score line on both sides) into a mountain fold (i.e. the folded crease is facing up).

How to Make a Center Step Card

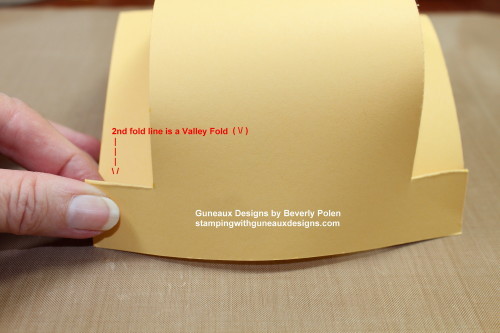
  • Fold at the second score line (i.e., the 2″ score line on both sides) into a valley fold (i.e., the folded crease is facing down).

How to Make a Center Step Card

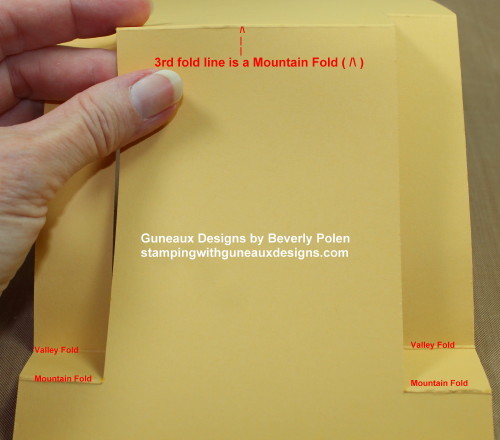
  • Fold  the 5-1/2″ score line into a mountain fold.

How to Make a Center Step Card

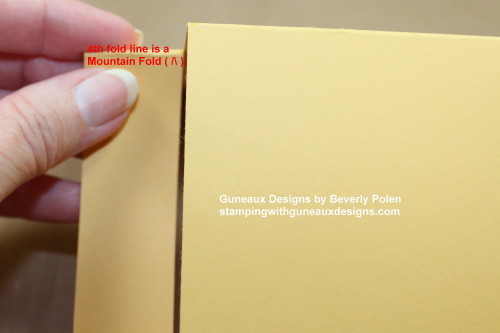
  • Fold the 6″ score line into a mountain fold.

How to Make a Center Step Card

How to Make a Center Step Card

STEP 14:  Now you can create a center step card base and decorate it according to your desires.

Hopefully my tutorial is easy to follow.  If you have any questions or comments, please feel free to leave them in the comment area (i.e., either at the end of this post or at the conversation bubble to the right of this post title).


Swallowtail Butterfly

God’s Blessings!

Stamping With Guneaux Designs by Beverly Polen
How to make a Center Step Card

HOW TO MAKE A CENTER STEP CARD

Stampin Up Deco Labels Framelits and Morning Meadow Card

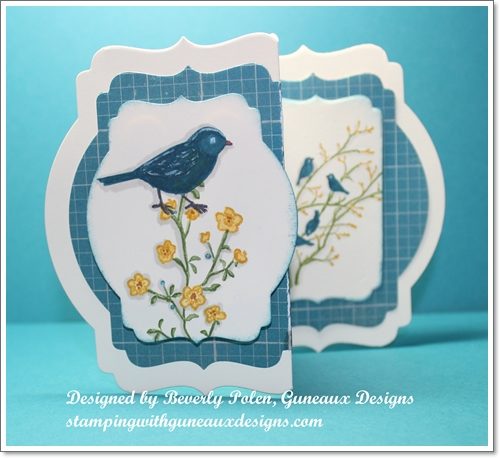
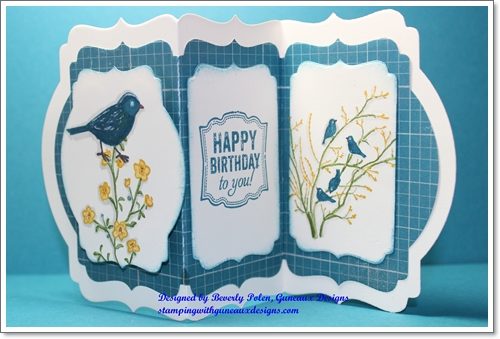
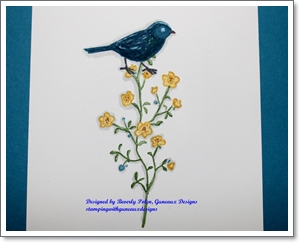
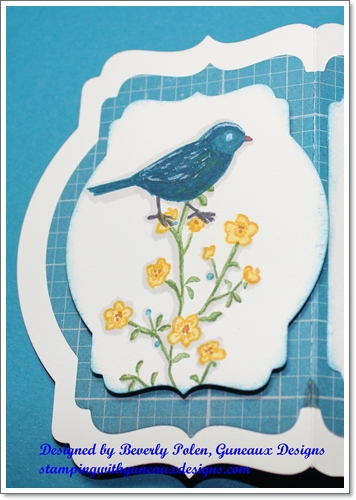
I love the new Stampin Up Deco Labels Framelits, don’t you? I keep thinking of things to make with them as I did with this Stampin Up Deco Labels Framelits and Morning Meadow Card.  The framelits, Stampin Up Morning Meadow Stamp SetStampin Up Label Love Stamp Set, and Stampin Up Serene Silhouettes Stamp Set are highlighted on the card.  A tutorial for making the card can be found below.

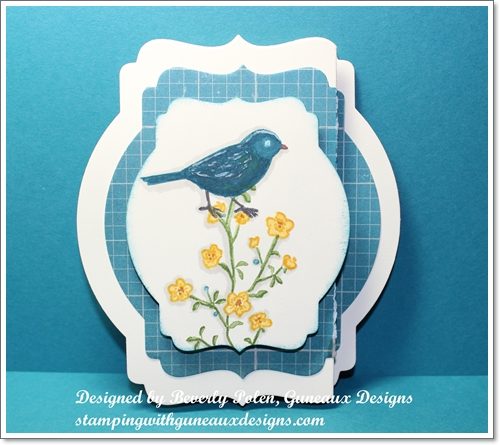
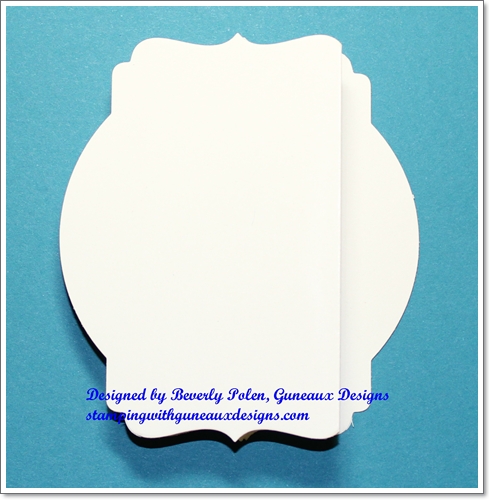
This picture shows the closed card.  If anyone has a trick to prevent Designer Series Paper from “cracking” when folded, please leave me a comment to share your trick.  Thank You!

This picture is of the card completely open.

I love using the Stampin Up Framelits to create unique cards.  If you haven’t seen my previous posts of cards made with other framelits, you can see one HERE and another one HERE.

SUPPLIES USED FOR THE STAMPIN UP DECO LABELS FRAMELITS CARD:

Paper: Soho Subway Designer Series Paper (130140), Very Vanilla Card Stock (101650)

Stamps: Morning Meadow Hostess Stamp Set (129678), Stampin Up Label Love Stamp Set (130622), and Serene Silhouettes Stamp Set (127324)

Ink: Island Indigo Classic Ink (126986), Crushed Curry Stampin’ Write Marker (131901), Gumball Green Stampin’ Write Marker (126856 – package), White Pigment Ink (105021 -Gel Pen), Basic Gray Stampin’ Write Marker (131261 – package)

(NOTE: These are the inks I used. The stamp image(s) you select obviously will dictate the inks you use.)

Accessories: Big Shot Die Cutting Machine (113439), Deco Labels Framelits (130102), Stampin’ Dimensionals (104430), and Adhesive

TUTORIAL TO MAKE THE STAMPIN UP DECO LABELS FRAMELITS BIRTHDAY CARD:

Step 1. Cut an 11″ x 4-1/2″ piece of Very Vanilla Card Stock.

Step 2. Score at the 4-1/2″ and 6-1.2″ marks.

Step 3. Make a mountain fold at the 4-1/2″ score line and a valley fold at the 6-1/2″ score line.

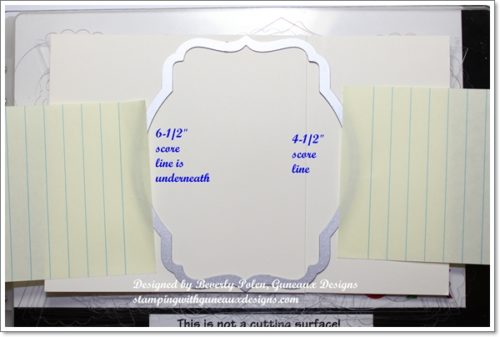
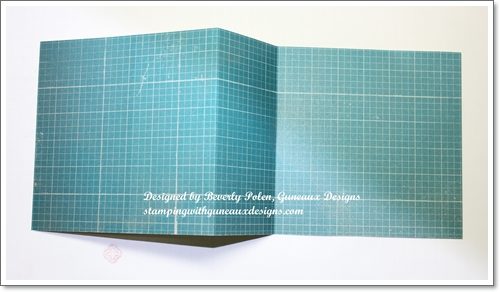
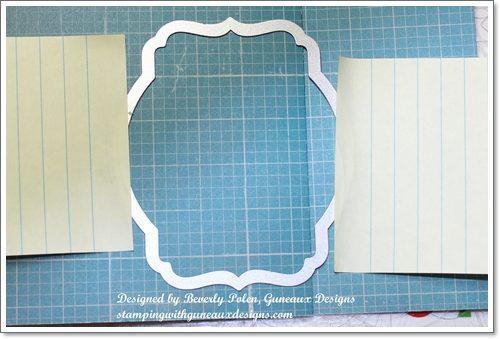
Step 4. Lay the folded card stock on top of a Big Shot Cutting Board and center the largest framelit from the Deco Labels Framelits over the folds. You’ll need to slightly lift the left side of the card stock to see the 6-1/2″ fold in order to center the framelit.

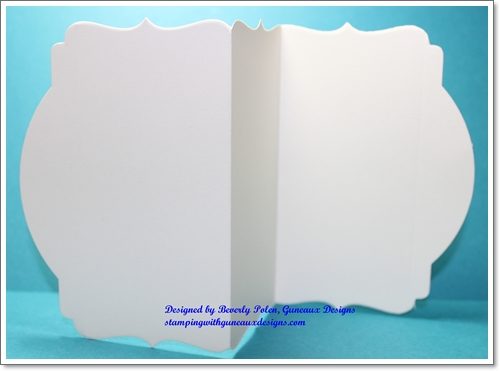
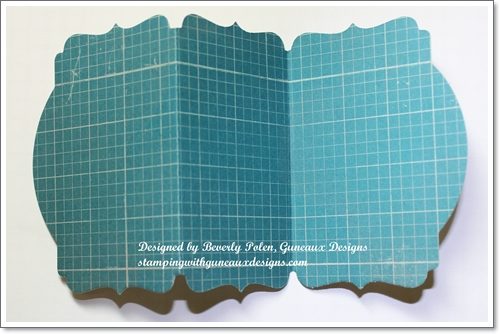
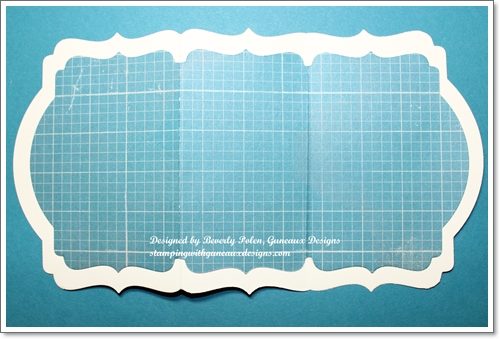
Step 5. Finish building the Big Shot sandwich and run it through your Big Shot Die Cutting Machine.  The following pictures show the results. 

Step 6. Repeat Steps 1 – 5, using the Island Indigo and Very Vanilla design from the Soho Subway Designer Series Paper and the next to the largest framelit from the Stampin Up Deco Labels Framelits.

Step 7. Using adhesive, attach the Island Indigo piece to the Very Vanilla Card Stock. If you use liquid glue, allow the piece to dry while lying flat and then crease the folds.

Step 8. Ink and stamp on Very Vanilla Card Stock the floral and bird stamps images from the Morning Meadow Hostess Stamp Set (or use another stamp set for your images).

Step 9. Place the next to the largest Stampin Up Deco Labels Framelit over your image(s) that you stamped in Step 8 and run it through the Big Shot Die Cutting Machine.

Step 10. Sponge Island Indigo Classic Ink around the stamped label and adhere it to the left side of the card.  When attaching this label, it will hang over the crease slightly.  Not to worry!

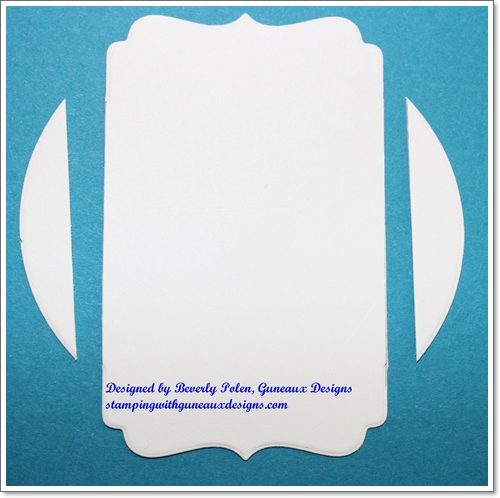
Step 11. Using the same framelit, cut another label from Very Vanilla Card Stock. This label is too large to fit onto the center. Therefore, you’ll need to cut the sides off as is shown in the below picture.  This piece is for the sentiment or a personal note.  Attach it onto the center of the card.  I stamped onto this piece the “Happy Birthday to you!” image from the Stampin’ Up! Label Love Stamp Set.

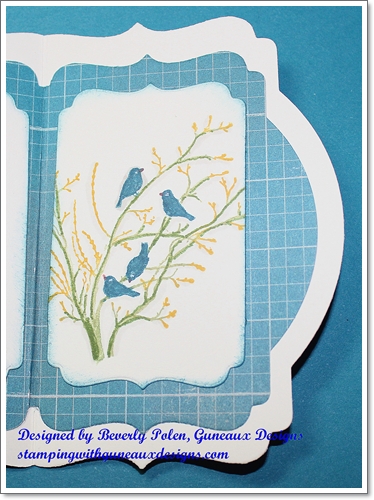
Step 12. Ink and stamp onto Very Vanilla Card Stock the image of birds in a tree from the Serene Silhouettes Stamp Set.  Use the same framelit and cut out this label.  It too is too large for the right side of the card, so bear that in mind when cutting the label.  Cut off the sides as done in Step 11.  If you don’t cut off the right side of the label, the card will not look correct when closed.

Step 13. Attach the stamped and modified Very Vanilla label to the right side of the card.

Step 14.  Finished!  Enjoy the Stampin Up Deco Labels Framelits Card!

God’s Blessings!
Stamping With Guneaux Designs
by
Beverly Polen
STAMPIN UP DECO LABELS FRAMELITS AND MORNING MEADOW CARD

MOJO Monday Sketch Challenge MOJO307 Birthday Card

Today’s project share is a card I created for the MOJO Monday Sketch Challenge MOJO307 for the week of August 19, 2013.   It isn’t a Monday, but I’m sure a MOJO Thursday is just fine (lol).  This is the MOJO Monday Sketch that was designed by Julee Tilman. 

This is the card I created for the challenge.  It features the Stampin’ Up! Gingham Garden Designer Series Paper.MOJO Monday Sketch Challenge MOJO307

Yesterday was my birthday so I made the card for myself (lol)!  It was my birthday but I made the card for a good friend of mine.

MOJO Monday Sketch Challenge MOJO307

SUPPLIES USED FOR THE MOJO MONDAY SKETCH CHALLENGE MOJO307:

Paper:  Stampin’ Up! Gingham Garden Designer Series Paper (129310), Strawberry Slush Card Stock (131295), Daffodil Delight Card Stock (119683), Island Indigo Card Stock (122923), and Whisper White Card Stock (100730)

Stamps:  Create A Cupcake (121982) and Fabulous Phrases (120501) [both used for the sentiments]

Ink:  Island Indigo Classic Ink (126986) and VersaMark Ink (102283)

Accessories:  White Embossing Powder (109132), Dazzling Diamonds Stampin’ Glitter (102023), 1-3/4″ Scallop Circle Punch (119854), Boho Blossoms Punch (119858), Perfect Polka Dots Embossing Folder (117335 – can’t see this well in the pictures), Daffodil Delight Brad (retired), and Spellbinders Splendid Circles Templates

This is my first time participating in the MOJO Monday Sketch Challenges, and I hope you are inspired! 

MOJO Monday Sketch Challenge MOJO307


God’s Blessings!
Stamping With Guneaux Designs
by
Beverly Polen 
MOJO Monday Sketch Challenge MOJO307

MOJO MONDAY SKETCH CHALLENGE MOJO307