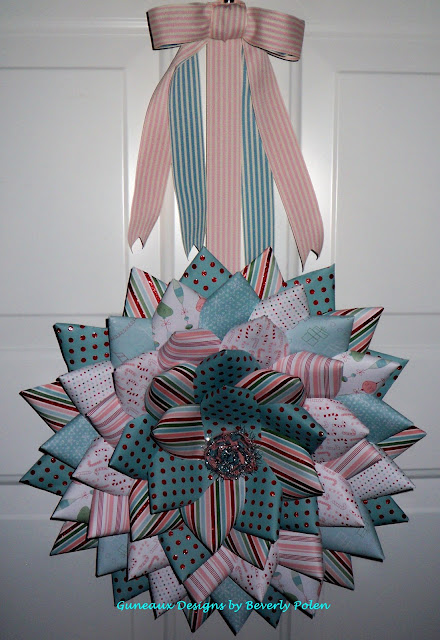
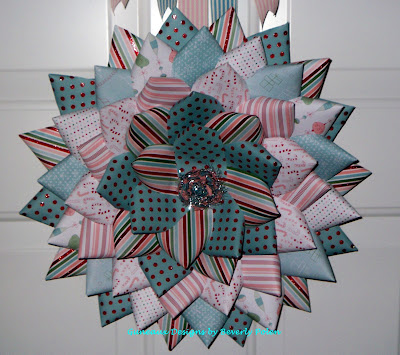
Here is a Candy Cane Christmas Wreath, which is my last creation using the beautiful Candy Cane Christmas Designer Series Paper (DSP).
Do you ever reach back to your teenage years and think of the art that you created then? No matter how simple it was, I still remember a piece of art that I created in my high school “shorthand” class. (Art and shorthand….[scratching head]…somehow they went together then – LOL.) Well, this Candy Cane Christmas Wreath is a re-creation of that piece of art that I created in high school. Wow! Such a long time ago, but pleasant memories!
The Candy Cane Christmas Wreath looks more difficult to create than it is. I cut strips of the Candy Cane Christmas DSP at approximately 5″ x 2-3/4″, glued together one of the long ends on each strip (creating a triangle), and began developing the wreath by adhering the first row to the outer edge of a piece of cardboard in the shape of a 12″ circle. I repeated the pattern until I had adhered all of the pieces that I needed to fill in the wreath. I cut the paper strips to about 4″ for the last two rows. I think the Candy Cane Christmas DSP makes the Candy Cane Christmas Wreath beautiful! What do you think?
I used the fabulous Pretty in Pink and Marina Mist Stampin’ Up! 1-1/4″ Striped Grosgrain Ribbon to form a bow. I used a strip of the Pretty in Pink Stampin’ Up! 1-1/4″ Striped Grosgrain Ribbon to create my “hanger”, adhered it to the back of the wreath and attached the bow at the top. You must buy this ribbon if you haven’t already. It is super to work with and so beautiful. You will not be disappointed!
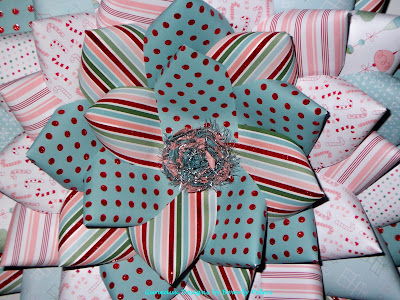
The center of the Candy Cane Christmas Wreath is an eight-layer flower that I created using the Stampin’ Up! Fancy Flower Punch. I wove Stampin’ Up! Silver Tinsel Trim within the flower to give it a little glitz.
This is a closeup of the center of the Candy Cane Christmas Wreath.
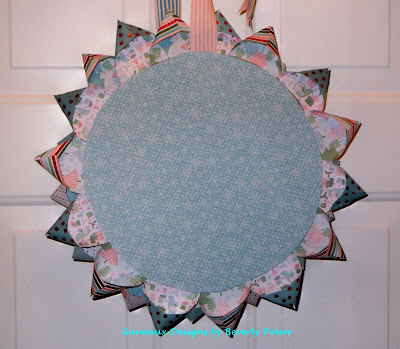
This is the back side of the Candy Cane Christmas Wreath.
Now it’s your turn. Make this easy wreath (using DSP of your choice) and send me pictures of your creation! Don’t disappoint me! I want to see your creations; you still have time before Christmas arrives!
Jesus Christ is the reason for the Season!
Merry Christmas to All who believe in Him!


Wow this is just beautiful!!! WOW!!
Thanks so much for visiting my blog and leaving a comment!!
Merry Christmas
December 16, 2010 9:31 AM
Thanks for your wonderful comments!! Bev
December 15, 2010 12:12 AM
Bev said…
Thank you very much, Connie and Carol!!
December 15, 2010 12:09 PM
Fabulous – this paper is really wonderful and really pops! Thanks for your directions and Happy Holidays!
December 15, 2010 12:03 PM
Wow! Definitely gorgeous wreath! Yes, I had wonderful art teachers when I was growing up and have frequently used ideas from those instructions! I remember doing this wreath on a smaller scale. I have lots of Deck the Halls paper left…will give it a try!
December 15, 2010 9:07 AM
L.O.V.E this!!!! Thank you so much for sharing it… I would love to make one! I wondered if you might have a picture of the backside?
It’s too bad that wonderful paper is already gone, isn’t it??? I was dumb, and didn’t get any of it….
Thanks, again!
December 14, 2010 8:35 PM
WOW, WOW, WOW absolutely gorgeous!!! Thanks for sharing!!!
December 14, 2010 8:30 PM
wow… this is just amazing and gorgeous! thanks for the instructions!!! 🙂
Patty
December 14, 2010 8:07 PM
This is toooo funny. We used to make these out of the old IBM punch cards and spray paint them! Too cute. TFS
PS that was really a long time ago
December 14, 2010 7:49 PM
Bev, this is absolutely gorgeous!! Thanks so much for sharing the directions. I think I made an ornament like this when I was a kid and had completely forgotten how fun and easy these were 🙂
December 14, 2010 7:47 PM