Stampin Up Secret Garden & Tea for Two DSP

What thoughts does your mind conjure up when you think of a Secret Garden?  I think of drifting through paths of beautiful flowers and floral trees and bushes as I daydream and push the stresses of life into the background.  I hear Irish music that carries me from Stampin Up Secret Gardenplace to place within the Secret Garden.  I enjoy beautiful butterflies, hummingbirds, bees, and other forms of nature as the aroma of many floral scents rush past my nostrils.  I sit on a bench, laying my head back and watching the sunshine peeking down through the tree branches as I drift off into a dream of floating from flower to flower.
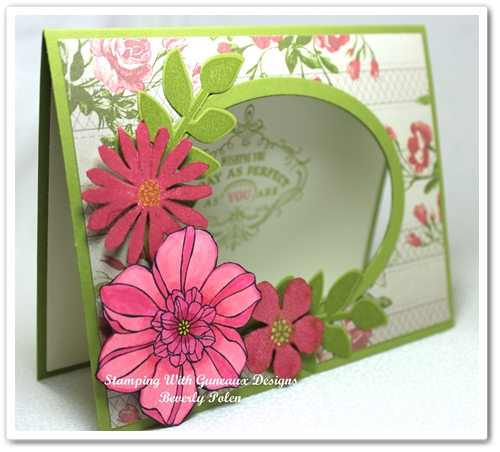
Stampin Up Secret GardenThen I hear, “Bevvverrrly”!  I quickly awake and realize I’m in my crafting room creating a beautiful card with the Stampin Up Secret Garden Stamp Set.  Gee, I like my daydream! (LOL)  Here is the card I developed during this daydream.
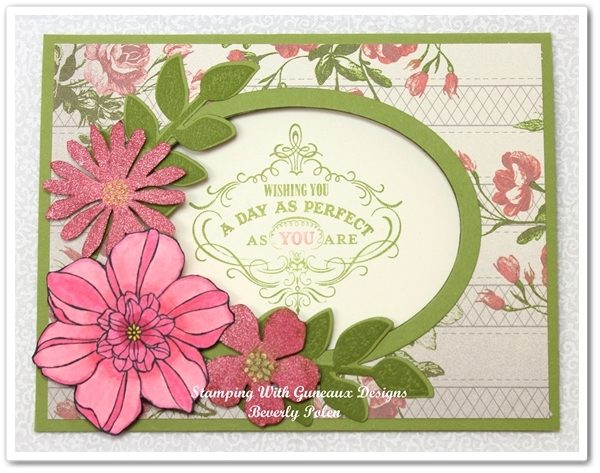
I tend to be attracted to pink or pinkish flowers.  My gardens have basically floral bushes of various sorts that bloom in shades of pink.  I venture to guess that is what controlled my creation as I developed this card with pinkish flowers.
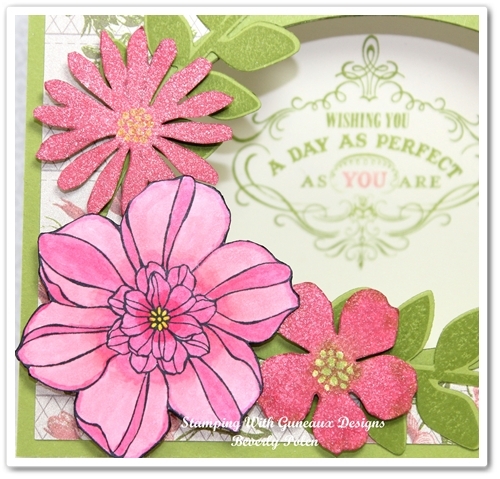
Yes, I know that the floral design I used from the Tea for Two DSP is supposed to be Calypso Coral in color.  However, I just don’t see it.  When I place a piece of Calypso Carol Card Stock next to the flowers in this floral design, I am NOT convinced that the color is Calypso Coral.  It lends itself more toward a pinkish color.  If you disagree, please feel free to set me straight!

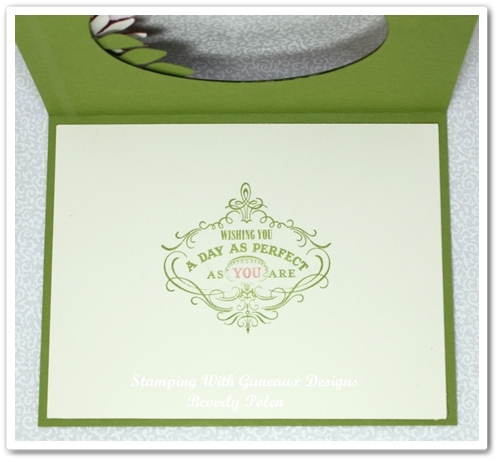
This picture is the inside of the card. The sentiment, Wishing You A Day As Perfect As YOU Are, is from the Stampin Up Vintage Verses Stamp Set.
SUPPLIES USED TO CREATE THIS STAMPIN UP SECRET GARDEN CARD:

Stamps:  Stampin Up Secret Garden Stamp Set (129144 – c) and Vintage Verses (129636 – c – Sale-a-bration stamp set)

Paper:  Tea for Two Designer Series Paper (129311), Lucky Limeade Card Stock, Very Vanilla Card Stock, and Primrose Card Stock

Ink:  Lucky Limeade Classic Ink, Primrose Petals Classic Ink, and non-Stampin Up Markers

Accessories:  Ovals Collection Framelits (129381) and Secret Garden Framelits (129372)


God’s Blessings!
Stamping With Guneaux Designs
by
Beverly Polen

Stampin Up Secret Garden

Stampin Up Madison Avenue & Sycamore Street DSP

I have another Stampin Up Madison Avenue stamp set greeting card for you today, and this one features the beautiful Sycamore Street Designer Series Paper.  Both products become available on January 22.

 Stampin Up Madison Avenue


SUPPLIES USED FOR THE STAMPIN UP MADISON AVENUE & SYCAMORE STREET CARD:

Stamps:  Stampin Up Madison Avenue Stamp Set (129660, You Are Loved Stamp Set (1237779)

Paper:  Rich Razzleberry Card Stock, Pool Party Card Stock, Whisper White Card Stock (100730), and Sycamore Street Designer Series Paper (127540 – Sale-a-bration)

Ink:  Stampin Up Pool Party, Summer Starfruit, and Rich Razzleberry Classic Ink

Accessories:  Retired Rich Razzleberry Grosgrain Ribbon, Sycamore Street Ribbon and Button Pack (130812 – Sale-a-bration), and Basic Rhinestones (119246)

INSTRUCTIONS FOR MAKING THE CARD:

Cut an 8-1/2″ x 5-1/2″ piece of Rich Razzleberry Card Stock (for card base), a 4″ x 5-1/4″ piece of Pool Party Card Stock, and a 3-3/4″ x 4″ piece of Sycamore Street Designer Series Paper

Sycamore Street Designer Series Paper

Adhere a piece of ribbon around the center of the Sycamore Street DSP (I used the retired Rich Razzleberry Ribbon as that is one of the colors within the DSP.

Sycamore Street DSP

Adhere the DSP to the Pool Party Card Stock and then to the Rich Razzleberry card base.

Sytcamore Street DSP

Using the Stampin Up Madison Avenue Stamp Set and Pool Party and Summer Starfruit Classic Ink, stamp the images onto a scrap of Whisper White Card Stock.

 Madison Avenue Stamp Set

Cover the “Thinking of You” sentiment stamp image with Rich Razzleberry Classic Ink and stamp it below the flowers.

Stampin Up Madison Avenue

Mat the above with Pool Party Card Stock and Rich Razzleberry Card Stock.

Stampin Up Madison Avenue

Add Basic Rhinestones to the flowers and tie a small bow with the Sycamore Street Ribbon (Pool Party) and attach it to the lower-right corner.

Madison Ave Stamp Set

Adhere the matted sentiment to the center of the Sycamore Street DSP and enjoy!

 Stampin Up Madison Avenue

 Stamping With Guneaux Designs

God’s Blessings!
Stamping With Guneaux Designs
by
Beverly Polen

Stampin Up Madison Avenue and Sycamore Street DSP

Stampin Up Madison Avenue Sale-a-bration Stamp Set

Stampin Up Madison Avenue

Simple isn’t easy for me; however, today I have a VERY simple card for you that features one of the Sale-a-bration stamp sets – the Stampin Up Madison Avenue, which is free when you purchase $50 of Stampin’ Up! products.Stampin Up Madison Avenue

This is such an easy card to make and is perfect if you need to a quick card.  In case you haven’t noticed, I slightly tilted the stem and leaves of the flowers, and that was on purpose.   No instructions on how to make this card is necessary; wouldn’t you agree?  It is the “simple” of simple!

Stampin Up Madison Avenue


SUPPLIES USED TO MAKE THIS SIMPLE CARD:

Stamps:  Stampin Up Madison Avenue Stamp Set (129660), You Are Loved Stamp Set (123779 – the sentiment), and Papillon Potpourri (123759)

You Are Loved Clear-Mount Stamp Set - by Stampin' Up!

You Are Loved Clear-Mount Stamp Set – by Stampin’ Up!

Papillon Potpourri Clear-Mount Stamp Set

Papillon Potpourri Clear-Mount Stamp Set


Paper:  Whisper White Card Stock (100730)

Ink:  Gumball Green Classic Ink, Midnight Muse Classic Ink, Bashful Blue Classic Ink, and Summer Starfruit Classic Ink

Accessories:  Basic Pearls (119247)

 Stamping With Guneaux Designs

God’s Blessings!
Stamping With Guneaux Designs
by
Beverly Polen

Stampin Up Madison Avenue Stamp Set 

Tea for Two Designer Series Paper

A new Stampin’ Up! Tea for Two Designer Series Paper is featured on today’s card.  The hexagon patterned paper, which is one of the designs in this DSP, was used to create this very simple card made with So Saffron Card Stock.

Tea for Two Designer Series Paper

In the new Stampin Up Spring 2013 Catalog, there is a new Honeycomb Textured Impressions Embossing Folder (129378) that gives a similar affect as the one I have on this card front.  Instead of the embossing folder, I decided to print this hexagon pattern onto the front of the 4″ x 5-1/4″ card.  The design is from a digital download for My Digital Studio.  It is a background stamp (#2) from the Twitterpated Designer Kit Digital Download.  I printed it onto the card front with the color Island Indigo to match the ribbon in the center.  The ribbon is from the Sycamore Street Ribbon and Buttons Pack that becomes available when Sale-a-bration begins on January 21, 2013.

I cut seven hexagons from the hexagon design of the Tea for Two Designer Series Paper.  I positioned the hexagons within the hexagon pattern to form a flower. 

Tea for Two Designer Series Paper

The “Thinking of You” sentiment is a stamp image from the Curly Cute Stamp Set.  It is stamped on a piece of Very Vanilla Card Stock that is embossed with the hearts embossing folder from the Adorning Accents Embossing Folders.  It is stamped with Island Indigo Classic Ink and matted with Island Indigo Card Stock.

Tea for Two Designer Series Paper

Supplies:

Stamp Set:  Curly Cute Stamp Set (120510 – c)

Paper:  Tea for Two Designer Series Paper (129311), So Saffron Card Stock (105118), Very Vanilla Card Stock (101650), and Island Indigo Card Stock (122974)

Ink:  Island Indigo Classic Ink (126986)

Accessories:  Sycamore Street Ribbon and Button Pack (130812), Adorning Accents Embossing Folders (125601), My Digital Studio Twitterpated Designer Kit (129332), and Paper Snips (103579)

 
God’s Blessings!
Stamping With Guneaux Designs
by
Beverly Polen
  Tea for Two Designer Series Paper

Stampin’ Up! Tea for Two Designer Series Paper


Blending Inks Technique – Stampin’ Up! Flowering Flourishes

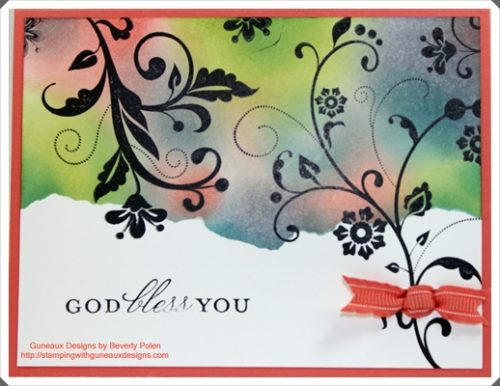
I absolutely love the blending inks technique using Stampin’ Up! classic inks!  There are so many beautiful color combinations that can be created by blending these inks.  I’ve created a card for you today that highlights the blending inks technique and the Stampin’ Up! 2011-2013 In Color inks.

When using the blending inks technique, I typically use only three ink colors.  Today, I decided to use four.  Personally, I think the card is beautiful!

TIP:  If you need help with selecting inks to blend, rely on the Stampin’ Up! Color Coach (120148)

SUPPLIES:

Stamps SetsCrosses of Hope (120567) and Flowering Flourishes (126367)

Paper:  Whisper White Card Stock (100730), Calypso Carol Card Stock (122925)

Ink:  Calypso Carol Classic Pad (122939), Wisteria Wonder Classic Pad (122936), Lucky Limeade  Classic Pad (122935), Island Indigo Classic Pad (122937), and StazOn Jet Black Ink Pad (101406),

Accessories:  Calypso Coral Ruffled Ribbon (122976), Stamp-A-Ma-Jig (101049), Sponge Daubers (102892), and Retired Double Rectangle Punch or a tool to cut slits into cardstock.

INSTRUCTIONS For MAKING THIS CARD FEATURING THE BLENDING INKS TECHNIQUE

  • Cut an 8-1/2″ x 5-1/2″ piece of Calypso Carol Card Stock and fold it in the middle to create the card base.
  • Cut a 5-1/4″ x 4″ piece of Whisper White Card Stock.
  • Tear a piece of paper (e.g., Post It Note, scrap card stock, etc.) and lay it on the bottom 1/3″ of the Whisper White Card Stock.
  • Cover a Sponge Dauber with Lucky Limeade Classic Ink and sponge it in a circular motion onto the Whisper White Card Stock above the piece of paper and in a random manner (see card picture).
  • Cover another Sponge Dauber with Wisteria Wonder Classic Ink and sponge it in a circular motion onto the Whisper White Card Stock in a random manner.
  • Cover another Sponge Dauber with Calypso Carol Classic Ink and sponge it in a circular motion onto the Whisper White Card Stock in a random manner.
  • Cover another Sponge Dauber with Island Indigo Classic Ink and sponge it onto the Whisper White Card Stock in a random manner.
  • Remove the piece of paper from the bottom 1/3″ of the card stock.
  • Cover with StazOn Jet Black Ink the large floral stamp from the Flowering Flourishes Stamp Set.
  • Stamp the image on the right side of the card stock.
  • Cover with StazOn Jet Black Ink the second to the largest floural stamp from the Flowering Flourishes Stamp Set.
  • Stamp the image upside down on the upper left side of the card stock.
  • If desired, cover with StazOn Jet Black Ink the smallest floural stamp and stamp the image a couple of times on the card stock.
  • Using the Double Rectangle Punch (if you have one) or another tool to cut two slits into the card stock, one slit on the left side of the stem and one slit on the right side of the stem of the largest floural stamp image.
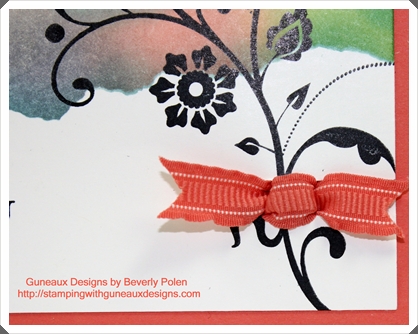
  • Cut a small piece of Calypso Carol Ruffled Ribbon and insert it into the slits from the front to the back.
  • Turn over the card stock and re-insert the ribbon ends back through the slits.  This creates a faux knot.
  • Cover with StazOn Jet Black Ink the sentiment “God Bless You” from the Crosses of Hope Stamp Set and stamp the sentiment onto the bottom left of the card stock.
  • Adhere the decorated Whisper White Card Stock to the Calypso Carol card base.
God’s Blessings!
Stamping With Guneaux Designs
by
Beverly Polen

Enjoy making cards using the blending inks techniques. 

Stampin Up Paper Flowers – Thinking of You

Recall recently that I shared a post on how to make Stampin Up Paper Flowers?  Well, today I am sharing a card I made with the paper flowers that I featured in that post.  

Stampin Up Paper Flowers Card

Stampin Up Paper Flowers

Stampin Up Paper Flowers

(I’m not sure, but I’m thinking that this card featuring Stampin Up Paper Flowers is too busy.  What do you think?) 


STAMPIN UP PRODUCTS (see previous post for products used for making the Stampin Up Paper Flowers):

Stamps Sets:  Four Frames (123442) and Silhouette Sentiments (retired)
Paper (card stock):  Midnight Muse (126843), Summer Starfruit (126839), Whisper White (100730), Raspberry Ripple (126842), and Gumball Green (126840)
Ink:  Midnight Muse Classic Pad (126860), Raspberry Ripple Classic Pad (126859), and Blue Permanent Marker
Accessories:  Fancy Fan Embossing Folder (127751), Flourish Designer Frames (127835), Finishing Touches Edgelits (127010), Big Shot Die-Cutting Machine, Raspberry Ripple 3/8″ Stitched Satin Ribbon, and Bird W/Leaves & Flower Bigz Die (retired)


INSTRUCTIONS:  (The instructions do not include how to make the Stampin Up Paper Flowers.  Refer to this post for that information.)

1.  Cut an 8-1/2″ x 5-1/2″ piece of Midnight Muse card stock and fold in half to create card base.

2.  Cut a 4″ x 5-1/4″ piece of Summer Starfruit card stock, place it inside the Fancy Fan Embossing Folder, and run through the Big Shot.

3.  Finish the right side of the Fancy Fun embossed Summer Starfruit card stock with the Finishing Touches Edgelit (see picture).

 4.  Cut out stems and leaves with a Stampin Up die or punch.  I used the retired Bird W/Leaves and Flowers Bigz Die.

 5.  Stamp the image from the Four Frames Stamp Set onto Whisper White card stock using Raspberry Ripple ink.

6.  Stamp a sentiment in the center of the Frame.

7.  Color a Flourish Designer Frame blue (or shade thereof) with a permanent marker.

8.  Tie a piece of Raspberry Ripple Stitched Satin Ribbon into a bow.

9.  Assemble the card according to the picture.

10.  Enjoy your masterpiece!

 Buy Stampin Up Products

God’s Blessings!
Stamping With Guneaux Designs
by
Beverly Polen