Dry Embossing With A Stencil Technique

Yesterday’s card challenge at Splitcoaststampers was to create a card featuring the dry embossing with a stencil technique.  It has been many years since I’ve used a stencil to dry emboss card stock.  Regardless, I found the challenge to be fun.  When was the last time you dry embossed with a stencil?

Dry Embossing With A Stencil Technique

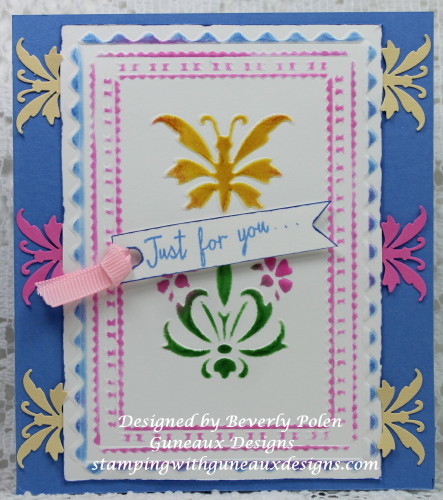
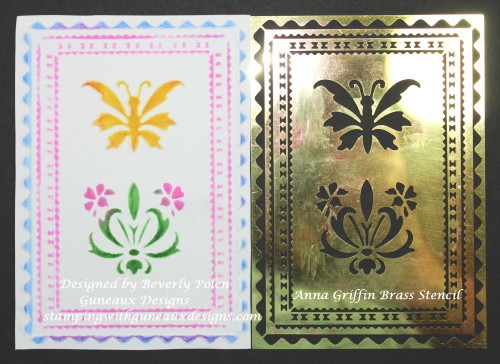
To create this card, I used an Anna Griffin Brass Stencil and Whisper White Card Stock.  With a correct die-cutting sandwich, I ran the paper and stencil through my die-cutting machine, which created an embossed piece of card stock.  Turning the embossed card stock face up, I placed the stencil over the embossed areas and used three different colors of ink to color the paper.  Because the embossed areas are raised, it was easy to color over the stencil onto the card stock.

Dry Embossing With A Stencil Technique

I have a matching butterfly punch that I used to punch out yellow and pink butterflies. These butterflies were adhered underneath and down the sides of  the embossed and colored card stock.  I adhered this piece to a Ballet Blue card base and created the sentiment with a ribbon attached.

It is just that simply!!!  If you’ve not tried this in a while, give it a try.  It’s easy and fun.

Thanks for stopping in and I hope you return soon!

BlogDivider_zpsed339ea1

SUPPLIES

Stamps:  SU Watercolor Wings (sentiment) and Rose Wonder (inside of card)

Paper: SU Whisper White, Pixie Pink, and Ballet Blue Card Stock

Paper Size: 4-1/2″ x 5-1/4″

Ink: SU Daffodil Delight, Pixie Pink, Ballet Blue, and Cucumber Crush

Accessories: Anna Griffin Brass Stencil, Anna Griffin Butterfly Punch, and Pink Ribbon

Techniques: Dry Embossing With A Stencil Technique

BlogDivider_zpsed339ea1

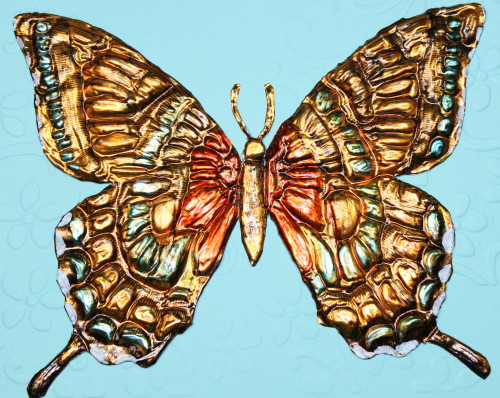
Swallowtail Butterfly

God’s Blessings!

Stamping With Guneaux Designs by Beverly Polen

DRY EMBOSSING WITH A STENCIL TECHNIQUE

Sunset Scene with Happy Scenes Stamp Set

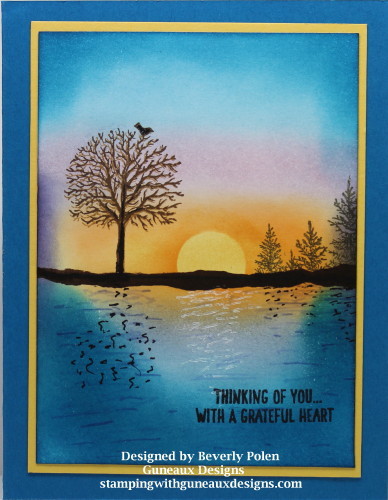
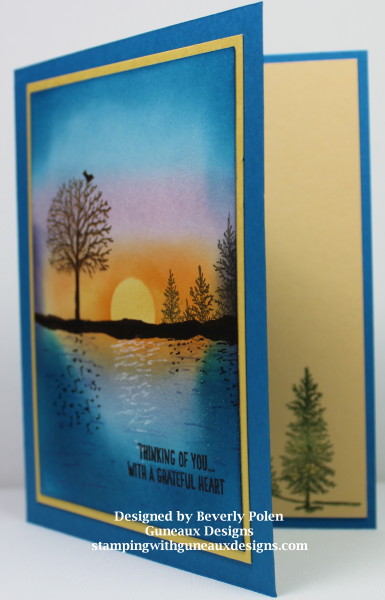
I have for you today a Sunset Scene featuring the Stampin’ Up! Happy Scenes Stamp Set.  I used the sponging technique to create my “Happy Scene”.

Happy Scenes Stampin Up


UPDATE:  This card was chosen as one of Splitcoaststampers’ FAVORITES for the week ending on November 8, 2015!  Splitcoaststamper’s comment:   

“Congratulations! In the General Stamping forum, you’re in the FAVORITES for the week ending November 8, 2015.”


Using the sponging technique, I created the sunset scene first before using the two stamps from the Stampin’ Up! Happy Scenes Stamp Set to complete the scene.  I love using the Stampin’ Up! Sponges for “sponging”.  I have tried other brands of sponges and I do not get the same result.

What is the sponging technique, you ask?  For the purpose of a greeting card, it is the art Sof using a small portion of a sponge to apply ink in a circular motion onto a piece of card stock.  Sponging is used to achieve a scene, background, or other art form.  When applying the sponging technique for my card, I used several Stampin’ Up! Classic Ink Pads.  The inks I used are: So Saffron, Pumpkin Pie, Wisteria Wonder, Pink Pirouette, Concord Crush (old ink pad), Marina Mist, Pacific Point, and Early Espresso (used in this order – hope you can read the light text :-)).

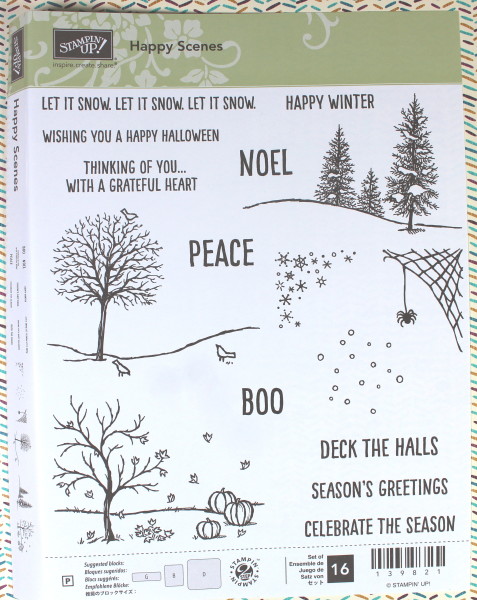
After achieving my scene, I applied ink to two of the stamps from the Stampin’ Up! Happy Scenes Stamp Set and strategically stamped them onto the scene.  The two stamps are of trees.

Stampin' Up! Happy Scenes Stamp Set

If you have used the Stampin’ Up! Happy Scenes Stamp Set, what do you think about the birds on the tree stamp that is shown on the left of my card?  Personally, I think whoever designed the stamp did not have a good sense of proportions.  When I stamped the image onto the card, I covered my stamp to prevent the two birds at the bottom from showing.  Just my spin on the stamp!!!

Stampin Up Happy Scenes Stamp Set

Stampin’ Up! Happy Scenes Stamp Set Item #139821

I hope you enjoy my card!  Make my day and give me feedback or ask questions on this card or other Guneaux Designs artwork!

ButterflyGod’s Blessings!

Stamping With Guneaux Designs

By

Beverly Polen

Stampin’ Up! Happy Scenes Stamp Set

Thinking of You Greeting Card – Spellbinders Tranquil Moments

Hello stampers!  Yes, it has been a long time (i.e., two years) since I posted any of my artwork.  Life’s events can get in our way sometimes and we have to adapt and decide on our priorities.  Posting on my site had fallen to the bottom of my priority list.  Now that time allows, I want to share with you a Thinking of You greeting card that I made recently for someone very special.

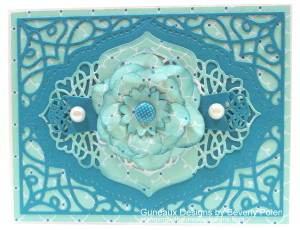
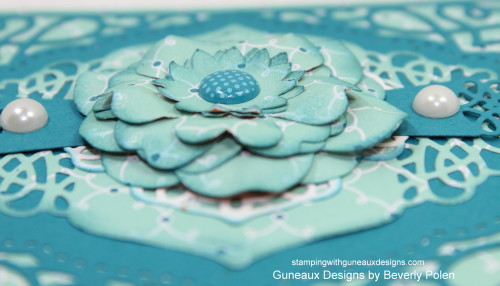
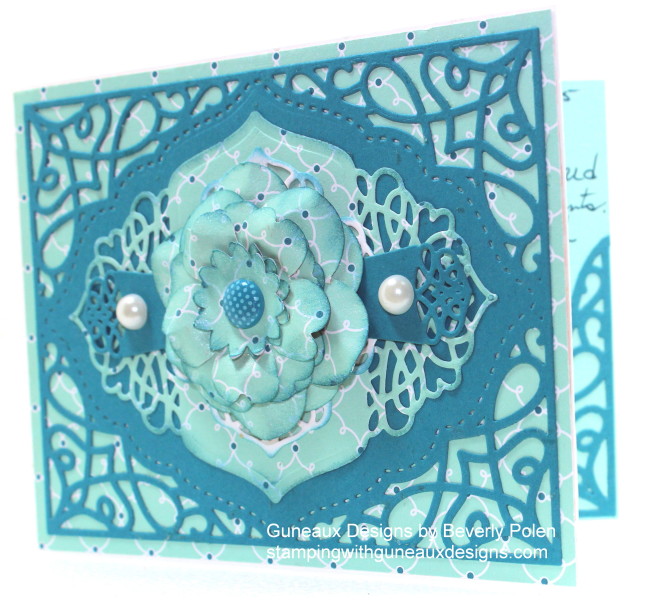
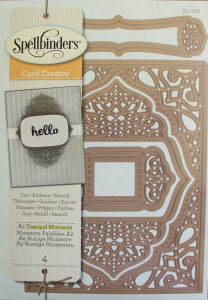
The card features the retired Stampin’ Up! Quatrefancy Specialty Designer Series Paper and Spellbinders A2 Tranquil Moments Die Set (S5-216), or Card Creator dies. The Spellbinders dies cut so perfectly and are so intricate.  They do the job for which they were intended…Card Creator!

Thinking of You Greeting Card & Spellbinders Tranquil_MomentsI used three retired Stampin’ Up! punches to build the center flower that is attached with a retired Stampin’ Up! brad.  Beside the flower are two Stampin’ Up! Basic Pearls.  The Tranquil Moments frame is made with  Stampin’ Up! Island Indigo Card Stock (122923).

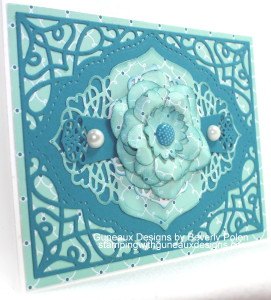
Thinking of You Greeting Card Spellbinders Tranquil MomentsI think this card is beautiful and I created it without using any rubber stamps!  Below is somewhat of a side view of the Thinking of You Greeting Card that provides a peek into the inside of the card.  I can’t give you a better peek or you could see my private message! LOL

Thinking of You Greeting Card Spellbinders Tranquil Moments

This is a picture of the Spellbinders A2 Tranquil Moments Dies that I used to create the beautiful card.

Spellbinders A2 Tranquil Moments

 God’s Blessings!
Stamping With Guneaux Designs
By
Beverly Polen

Thinking of You Greeting Card Spellbinders Tanquil Moments

Thinking Of You Greeting Card Featuring Spellbinders A2 Tanquil Moments

Loving Thoughts – Stamping With Guneaux Designs

Loving ThoughtsAn easy card for a Monday sounds good; don’t you agree?  This “Wonderful You” card featuring the Loving Thoughts Stamp Set fits the “easy” requirement!

Just slap some Stampin’ Up! Washi Tape on a card front, punch a pansy flower, and add it to the top left corner. Loving Thoughts

Are you thinking, “Why a spring-type card for this time of the year”?  Yes, it does seem like a spring-type card.  However, one of the beauties of living in South-Central Florida is flowers are still blooming!  Most stamping artists are posting fall- and winter-related cards, but I still have flowers blooming in my gardens.  Yes, I’ll post fall/winter cards soon, but not today.

I made this card for my wonderful daughter.  She is so good to me and I wanted her to know how wonderful she is.  She is always bringing me gifts of gratitude, buying me groceries without me asking, and showing her deep love for me in other ways.  Every mother should have a daughter like her!  I am so blessed!

Loving Thoughts

 Supplies Used:

Stamps:  Stampin’ Up! Loving Thoughts Stamp Set (125845 -c)

Paper:  Stampin’ Up! Card Stock:  Whisper White, Strawberry Slush, and Daffodil Delight

Ink:  Stampin’ Up! Strawberry Slush

Accessories:  Pansy Punch, Gingham Garden Designer Washi Tape

Stamping With Guneaux Designs

 God’s Blessings!
Stamping With Guneaux Designs
by
Beverly Polen

Loving Thoughts

 STAMPIN’ UP LOVING THOUGHTS STAMP SET

Flower Shop Stamp Set – MOJO Monday MOJO308

Today’s 5″ x 5″ card was created for a special sister whom I think of often and love very much.  The card features the Stampin’ Up! Flower Shop Stamp Set.  The design of the card was inspired by MOJO Monday Sketch Challenges, namely number 308 or MOJO308.   Also featured on this card is the beautiful Gingham Garden Designer Series Paper.

Flower Shop Stamp Set

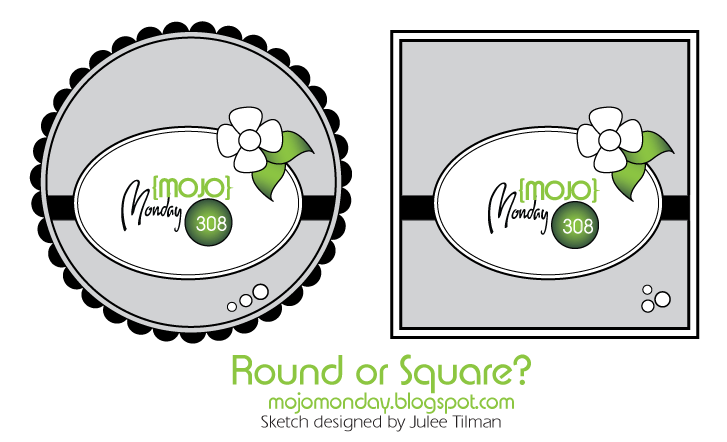
The round and square sketches below are for this week’s MOJO Monday.  Isn’t it nice to have a sketch to follow when creating a card?  I started participating last week in the MOJO Monday challenges, and I’m finding I enjoy it. 

I love the color combination of pink and yellow, which are the colors for one of the designs of the Stampin’ Up! Gingham Garden Designer Series Paper.  I also love bold colors, as you may have noticed, which are spotlighted on the Flower Shop Stamp Set greeting card.

Notice in the square design at the bottom right there is a spot for three elements.  I chose three Stampin’ Up! Basic Pearls and colored them with permanent markers.  Also the sketch requires a flower at the top left.  I used the Flower Shop Stamp Set and the Stampin’ Up! Pansy Punch to create the required flower.  The flower actually is two-dimensional.  I like the leaves that I made; what do you think?  I tried to replicate pansy flower leaves.

Flower Shop Stamp Set - MOJO308 Flower Shop Stamp Set - MOJO 308

Flower Shop Stamp Set - MOJO308

I really like the embossing folder I used on the Daffodil Delight Card Stock.  It is an Anna Griffin embossing folder called Wildflower Gate.  The embossing shows better in the first picture above and the last picture at the bottom.

Flower Shop Stamp Set - MOJO308

SUPPLIES USED TO CREATE THE FLOWER SHOP STAMP SET THOUGHTS OF YOU CARD (with catalog numbers):

Paper:   Gingham Garden Designer Series Paper (129310), Strawberry Slush Card Stock (131295 – card base), Daffodil Delight Card Stock (119683), Island Indigo Card Stock (122923), and Whisper White Card Stock (100730)

Stamps:  Flower Shop Stamp Set (130942), Loving Thoughts Stamp Set (125845), and Field Flowers Stamp Set (122762)

InkIsland Indigo Classic Ink (126986)

Accessories:  Stampin’ Up! Ovals Collection Framelits (129381), Stampin’ Up! Pansy Punch (130698), Basic Pearl Jewels and Large Basic Pearl Jewels (119247 and 125577, respectively), and an Anna Griffin Embossing Folder


God’s Blessings!
Stamping With Guneaux Designs
By
Beverly Polen 


Flower Shop Stamp Set

 FLOWER SHOP STAMP SET

Betsy’s Blossoms Thinking of You Card

Betsy's Blossoms

Although I have not used Stampin’ Up!’s Betsy’s Blossoms Stamp Set but a few times, it is one of my favorite stamp sets.  Betsy’s Blossoms is featured on my card share for you today.

I love shades of brown and blue together, which was the driving force for selecting the colors for this card.  I used Stampin’ Up!’s Early Express Card Stock and ink for the brown, and the Pool Party Card Stock, embossing powder, and ribbon for the blue.  I know that Pool Party is not an absolute blue, but it is close enough that I think it looks great with the Early Expresso.  Betsy's Blossoms

What do you think about my Pool Party ribbon flower?  I like the way it turned out.  I simply folded the ribbon one loop over another one for eight loops, inserted a brad, and spread the ribbon loops to form a circle. 

As you can see, I used two brads on the ribbon flower, both of which are retired.  The large brad is a Designer Builder Brad and the brad on top of the Designer Builder Brade is an Everyday Enchantment Brad.  I removed the legs from this brad and attached it with hot wax. 

Betsy's Blossoms

I used Pool Party card stock on the inside of the card.  I stamped with Early Expresso Classic Ink on the card stock the bird and floral images from Betsy’s Blossom.

 If you look closely at the above picture you can see the Glimmer Mist that I sprayed on the embossed card stock.


SUPPLIES FOR THE BETSY’S BLOSSOMS THINKING OF YOU CARD:

Paper:  Stampin’ Up! Early Expresso Card Stock and Pool Party Card Stock

Stamps:  Stampin’ Up! Betsy’s Blossoms Stamp Set and Loving Thoughts Stamp Set (sentiment)

Ink:  Stampin’ Up! Early Expresso Classic Ink and VersaMark Ink

Accessories:  Stampin’ Up! Pool  Party Embossing Powder, Pool Party Seam Binding Ribbon, Everyday Enchantment Brad, Designer Builder Brad, and Photo Corner Punch (last three accessories are retired)

Betsy's Blossoms


 God’s Blessings!
Stamping With Guneaux Designs
by
Beverly Polen

  Betsy's Blossoms

 STAMPIN’ UP! BETSY’S BLOSSOMS STAMP SET