Color on Color Emboss Resist Technique

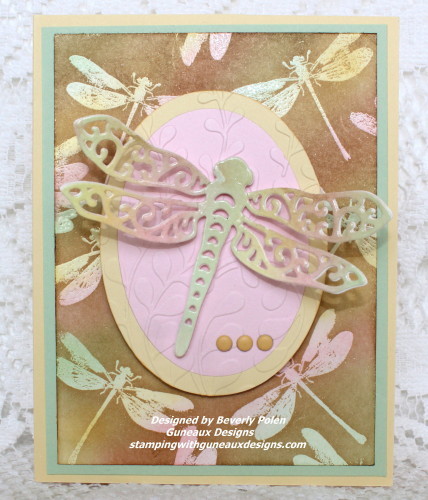
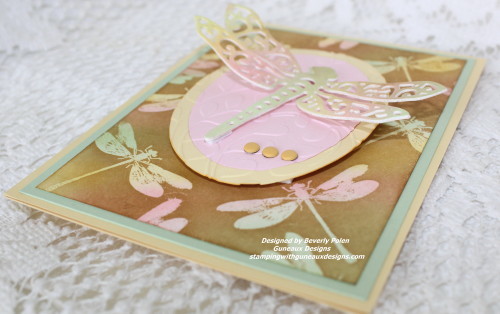
Sponging and blending inks onto card stock is one of my favorite forms of art.  I have made many cards in this manner; however, I have only used the Color on Color Emboss Resist Technique for very few cards.  This technique requires sponging and blending inks as well.

Color-On-Color-Emboss-Resist-Technique-2

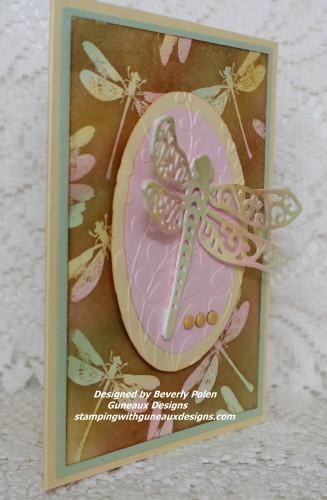
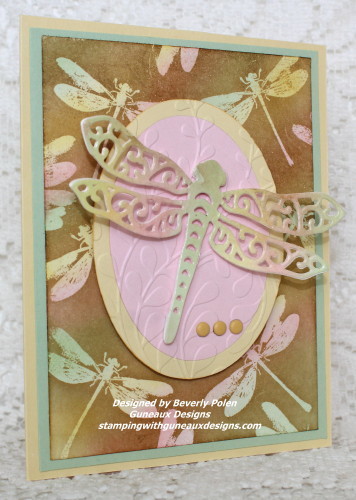
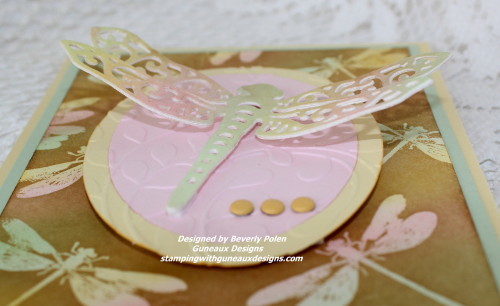
I have been thinking for a while that I wanted to create a card featuring the Color on Color Emboss Resist Technique.  Splitcoaststamper.com gave me the nudge to do so as it posted today a Technique Challenge for using the emboss resist technique.  I have included a tutorial in this post if you should want to try it too.  Here are additional pictures of my card.

Color-on-Color-Emboss-Resist-Technique_8_1Color-on-Color-Emboss-Resist-Technique-2Color-on-Color-Emboss-Resist-TechniqueColor-on-Color-Emboss-Resist-Technique

I did not add a sentiment on the card, but I will when an occasion arises that will dictate the type of sentiment needed. It will most likely be a “Thinking Of You” or “For You” sentiment.

BlogDivider_zpsed339ea1

SUPPLIES USED FOR THIS COLOR ON COLOR RESIST TECHNIQUE CARD:  

Stamps:  Stampin’ Up! Awesomely Artistic Stamp Set

Paper:  Stampin’ Up! Whisper White, Pink Pirouette, Barely Banana (retired), and Pistachio Pudding (retired) Card Stock

Ink: Stampin’ Up! Pistachio Pudding (retired), Barely Banana (retired), Pink Pirouette, and Baked Brown Sugar Classic Inks, and a VersaMark Watermark Stamp Pad

Accessories:  Stampin’ Up! Embossing Buddy, Clear Embossing PowderSponge Daubers, a heat gun, Stampin’ Up! Subtles Candy Dots, and Spellbinders Dragonfly Die – S2-157

Card Size: A2 – 5-1/2″ x 4-1/4″

I hope you enjoyed the card and plan to use the technique.  Now on to the tutorial.


BlogDivider_zpsed339ea1

COLOR ON COLOR RESIST TECHNIQUE TUTORIAL

A.  SUPPLIES NEEDED FOR USING THE COLOR ON COLOR EMBOSS RESIST TECHNIQUE:

Stamp:  Select a solid stamp that you want featured as the primary element.

Paper:  A white piece of card stock for sponging on ink and other card stock of your choice for your card.

Ink: You will need three light colors and one darker color and a watermark stamp pad

Accessories:  Talcum powder for rubbing across card stock before applying embossing powder; clear embossing powder, sponge daubers or sponges, and heat gun

B.  INSTRUCTIONS FOR THE COLOR ON COLOR EMBOSS RESIST TECHNIQUE:

1. Cut card stock accordingly:

  • 8-1/2″ x 5-1/2″ for card base
  • 5-1/4″ x 4″ for 1st layer
  • 5″ x 3-3/4″ for white card stock

2. Select a stamp that you want to be the main feature of the card.

3. Select three colors of ink that are light shades.

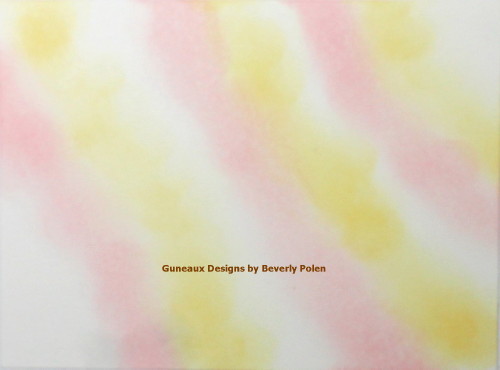
4. Using a sponge dauber, swirl your first light color onto the white card stock.
Color-on-Color-Emboss-Resist-Technique
5. Swirl your second light color onto the Whisper White Card Stock, and don’t worry about overlapping the colors.

Color-on-Color-Emboss-Resist-Technique

6. Swirl your third light color onto the Whisper White Card Stock, and then look for places where you want to blend the colors and do that with the daubers. Don’t worry about the look too much as it will completely change when you add the darker color.

Color-on-Color-Emboss-Resist-Technique

7. AFTER the ink dries (make sure the ink is dry), rub the talcum powder over the complete piece of card stock.

8. Cover your selected stamp with a watermark ink and stamp the image randomly on the card stock.

9. Cover with the clear embossing powder and heat set. Let it cool.Color-on-Color-Emboss-Resist-Technique
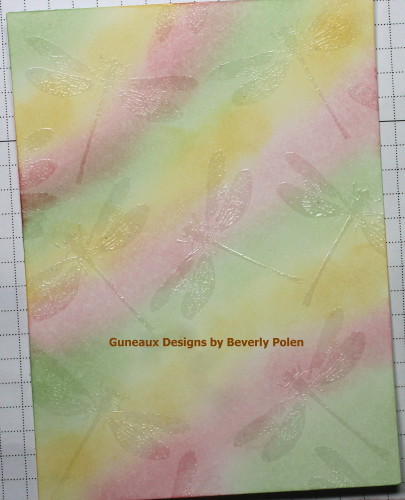
10. Swirl you dark color of ink all over the piece of card stock. You may need to do this a couple times or more.Color-on-Color-Emboss-Resist-Technique
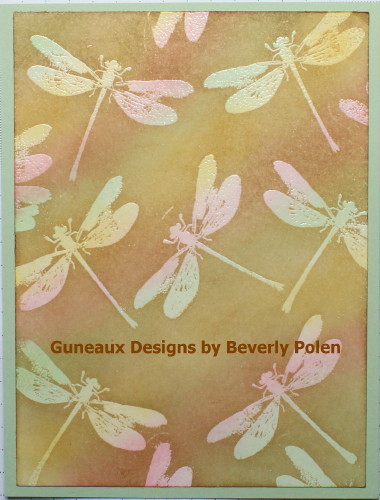
11. Using a paper towel, rub the excess dark ink from the embossed images. Isn’t it cool how the clear embossing takes on the colors?

12. After reaching the desired colors on the colored piece of card stock, use a stamp image (can be the same that was used for the embossing) to create a center piece for the card.

13. Adhere the pieces together and add your desired embellishments.

14. If desired, add a sentiment to the card.

Enjoy!!

BlogDivider_zpsed339ea1Swallowtail Butterfly
God’s Blessings!

Stamping With Guneaux Designs

by

Beverly Polen

SU Sky is the Limit

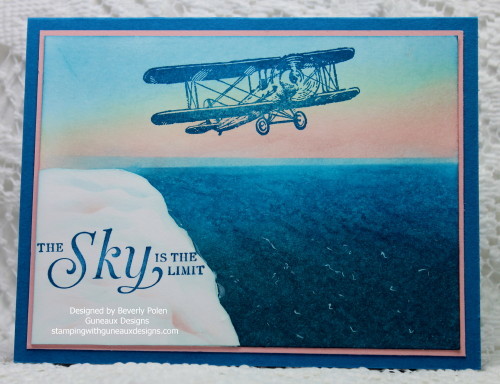
For today’s Inspiration Challenge (IC) on Splitcoaststampers, I chose to use the SU Sky is the Limit stamp set to create my card.  This Sale-a-bration stamp set is available until February 15. As for the Inspiration Challenge, the hostess selected a fantastic web page of 100 brilliant color combinations from which to choose for making a card.  This page is a great reference for future color combinations projects if you are looking for inspiration for making cards.

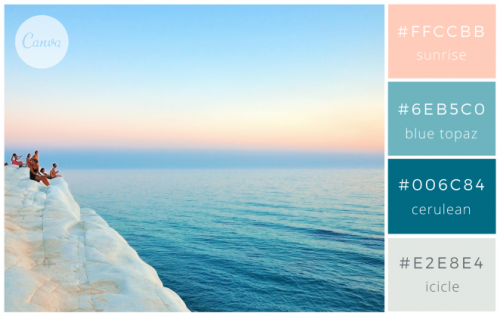
I chose #70, Arctic Sunrise, as my guide for making my card.  This is the picture of #70:

SU Sky is the Limit

I love the color choices for #70, and I love the scene that reflects the colors. I, therefore, decided to try and recreate the scene using similar colors. I tried to match the colors with Stampin’ Up! ink as closely as I could, and I added a small amount of yellow. This is the card I created.

SU Sky is the Limit

After creating the scene, which has an iceberg on the left, I stamped the image and sentiment.  I made the card for my son-in-law who is soaring high in his career. I’m very proud of him!!

How did I do with my creation using the #70 Arctic Sunrise as my guide?

BlogDivider_zpsed339ea1

SUPPLIES USED TO CREATE MY SU SKY IS THE LIMIT CARD:

Stamps: SU Sky is the Limit

Paper: SU Whisper White, Blushing Bride, and Pacific Point

Card Size: A2

Ink: White Gel Pen, SU Marina Mist, Blushing Bride, Barely Banana, Pacific Point, Island Indigo, and a Light Gray Copic

Accessories: SU Sponges

Techniques: Sponging

BlogDivider_zpsed339ea1Thanks so much for viewing and leaving comments!
Swallowtail Butterfly

God’s Blessings!

Stamping With Guneaux Designs By Beverly Polen

Splitcoaststampers Pretty In Pink, Field Flowers

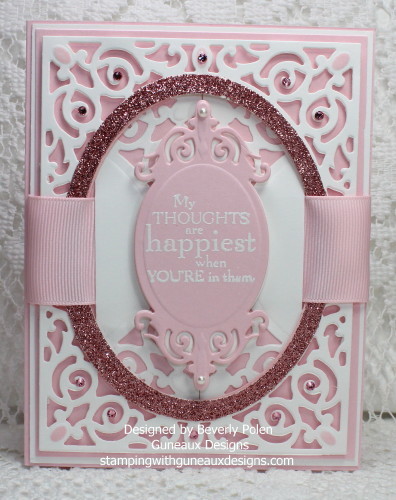
Today’s card share is a card I made in response to today’s Splitcoaststampers’ Pretty In Pink, Free For All Challenge, F4A.  The challenge is to make a card with pink in it. Pretty easy, right?  I made this Pretty In Pink card as my submission for the the challenge.

Splitcoaststampers Pretty in Pink Field Flowers


UPDATE:  Congratulations! In the General Stamping forum, you’re in the FAVORITES for the week ending February 14. (From Splitcoaststampers).


To create the card, I used a Stampin’ Up! Pink Pirouette card base, covered with a piece of Whisper White card stock.  I then added a small piece of Pink Pirouette card stock upon which I added the Whisper White die cut.  The die that I used for the die cut is from the Spellbinders A 2 Filigree Delight Dies.

You will note that there is another Whisper White die cut behind the sentiment that a Pink Pirouette ribbon weaves through.  This die cut is the same as the main one; however, I cut it into two pieces, cutting each piece to fit, and reversed them when adhering to the card (the top and bottom of the die cut are touching each other in the center of the card).

I added the sentiment from the retired Stampin’ Up! Field Flowers stamp set, “My Thoughts Are Happiest When You’re In Them.”  I think that sentiment is a very positive one and I love using it when I make cards for my children and grandchildren.  I placed the sentiment, created with VersaMark Ink and White Embossing Powder, onto a Pink Pirouette die cut.  This die is from the same Spellbinders Die set.

For embellishments, I die cut an oval from the Stampin’ Up! Pink Pirouette Glimmer Paper and placed it over the oval portion of the main die cut.  I added several Swarovski Pink Crystals and two Stampin’ Up! Basic Pearls to give the card some bling.

Enjoy and thanks for stopping by.  You may leave a comment in the comments section.  Comments are greatly appreciated!

BlogDivider_zpsed339ea1

SUPPLIES USED:

Stamps: SU Field Flowers

Paper: SU Whisper White and Pink Pirouette CS and SU Pink Pirouette Glimmer Paper

Card Size: A2

Ink: VersaMark

Accessories: Spellbinders Filigree Delight Dies, SU Pink Pirouette Ribbon, White Embossing Powder, SU Basic Pearls, Swarovski Pink Crystals

 BlogDivider_zpsed339ea1

Swallowtail Butterfly

God’s Blessings!

Stamping With Guneaux Designs By Beverly Polen

“God so loved the world that He gave His one and only Son, that whoever believes in Him shall not perish but have eternal life.”  John 3:16

SU Thoughts and Prayers

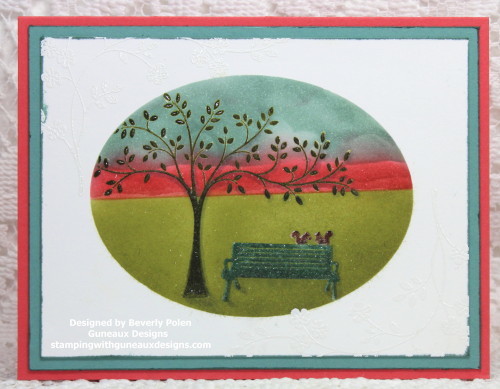
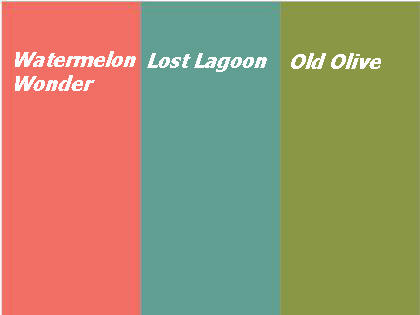
What is your opinion about a Stampin’ Up! color combination of SU Watermelon Wonder, Old Olive, and Lost Lagoon?  I think they are beautiful together.  I used the SU Thoughts and Prayers and Pendant Park to create a scene with these colors.

SCS Color Challenge 2-9-16

Splitcoaststampers had these colors as its Color Challenge for today (CC569).  Here is the card I submitted for the challenge.

SU Thoughts and Prayers


UPDATE:  My card was selected as one of the favorites for the week ending February 14, 2016


The scene is of squirrels enjoying the park bench (lol), and it’s in the shape of an oval (which gave one extra points if an oval was used). I added a floral image on the top left and bottom right that I embossed with white embossing powder.  It’s quite difficult to see that.

I covered the two image stamps with VersaMark and ink and embossed them with clear embossing powder. This was to prevent mixing inks while sponging for the background. I have to say that I’m disappointed with a couple of products I used as the ink I added to the Whisper White card stock edges bled onto the front of the card stock. Then forgetting about the SU ink serving as a base for embossing, I got white embossing powder on the scene while embossing the floral images on the white portion of the card. My mistake.

BlogDivider_zpsed339ea1

SUPPLIES USED:

Stamps: SU Thoughts and Prayers and Pendant Park Stamp Sets

Paper: SU Whisper White, Watermelon Wonder, and Lost Lagoon Card Stock

Card Size: A2

Ink: SU Watermelon Wonder, Old Olive, and Lost Lagoon Inks

Accessories: SU Sponges and Daubers, VersaMark, and White and Clear Embossing Powders

Techniques: Sponging BlogDivider_zpsed339ea1

Swallowtail Butterfly

God’s Blessings!

Stamping With Guneaux Designs By Beverly Polen

Pleated Skirt Fold Technique Tutorial

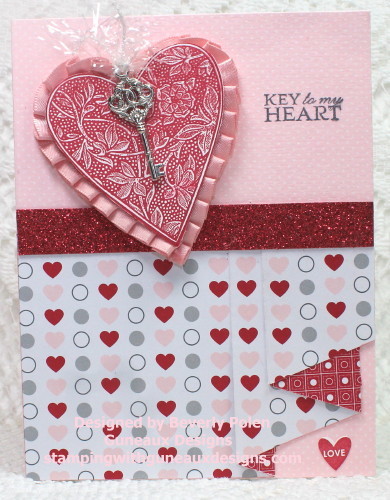
Hello, and thanks for stopping by!  I hope you had a great weekend!  It’s Monday, and I have for you a tutorial for the Pleated Skirt Fold Technique.  The card I prepared for this tutorial is a response to the two challenges on Splitcoaststamper.com (SCS) as described below.

  1. Technique Lovers Challenge (TLC572) – create a card using the Pleated Skirt Fold Technique, and
  2. Clean and Simple Challenge (CAS362 – Won’t You Call Me Sweetheart) – create a card that includes a heart.

I combined the two challenges and this is the result:

Pleated Skirt Fold Technique

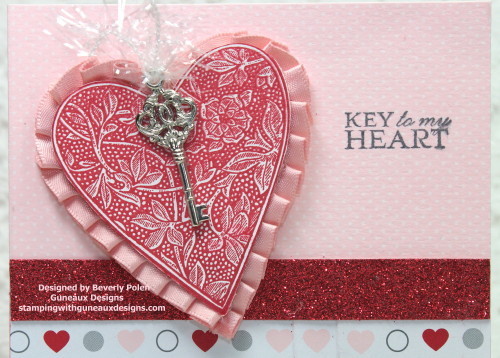
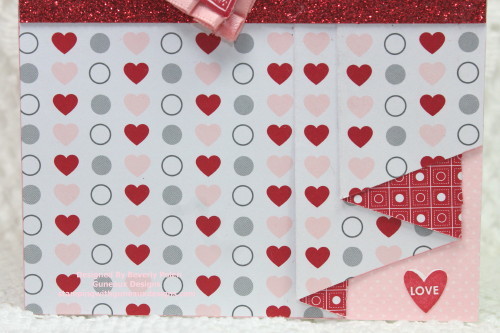
The following two photos provide a closeup of the upper and bottom portions of the card.

Pleated Skirt Fold Technique Tutorial

Pleated Skirt Fold Technique Tutorial

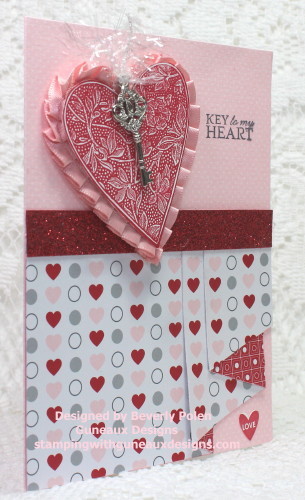
This photo is a side view of the card.

Pleated Skirt Fold Technique Tutorial

Becky Roberts, a long-time Stampin’ Up! Demonstrator, provided a tutorial for the first challenge, Pleated Skirt Fold Technique, on SCS.  However, I am not sure if there is access to the tutorial if you are not a member of the Splitcoaststampers.com site.  I just don’t know.  Therefore, I decided to include a tutorial for you today.

BlogDivider_zpsed339ea1

PLEATED SKIRT FOLD TECHNIQUE TUTORIAL

General Supplies Needed:

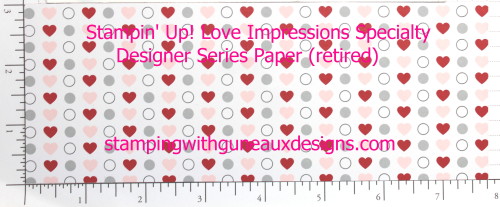
  • Two-sided paper (I used Stampin’ Up! Love Impressions Specialty Designer Series Paper);
  • Stamp(s) ( I used Stampin’ Up! Gentler Times, I {Heart} Hearts, and You’re A Gem Stamp Sets);
  • Paper Trimmer;
  • Scissors;
  • Adhesive; and
  • Additional supplies needed to decorate a card.  I used:
    • Red Glimmer Paper;
    • Stampin’ Up! Real Red and Basic Gray Classic Ink;
    • Stampin’ Up! Blushing Bride Satin Pleated Ribbon and Clear Trim Tinsel; and
    • Stampin’ Up! Key Trinket.

INSTRUCTIONS:

1.  Cut a 7-3/4″ x 3″ piece of two-sided designer paper.

Pleated Skirt Fold Technique Tutorial

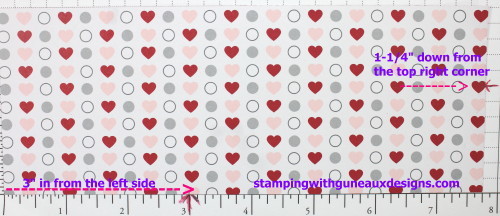
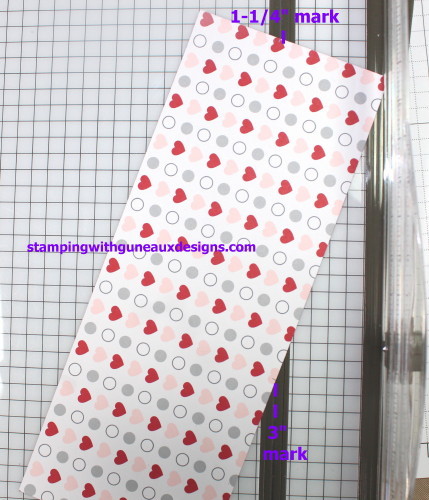
2.  Measure at the top of the upper-right corner of the paper down to the 1-1/4″ point and make a mark.

3.  Measure from the bottom-left side of the paper over to the 3″ point and make a mark.

Pleated Skirt Fold Technique Tutorial

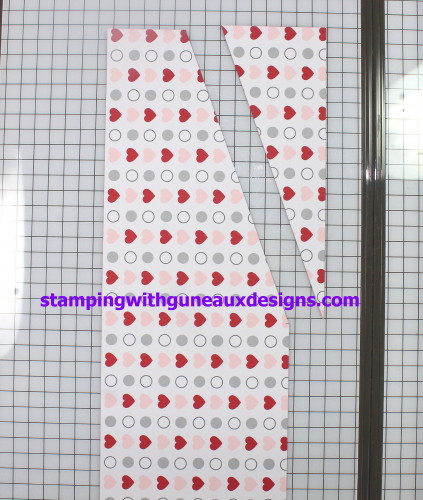
4.  Align these marks in the cutting channel of your paper trimmer

Pleated Skirt Fold Technique Tutorial

5.  Trim this piece off and put to the side.

Pleated Skirt Fold Technique Tutorial

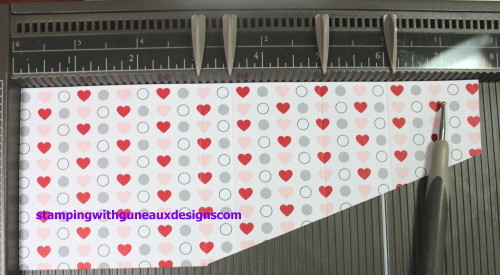
6.  Place the other piece onto your scoring tool, and score at the 3″, 3-1/2″, 5″, and 6-1/8″ marks.

Pleated Skirt Fold Technique Tutorial

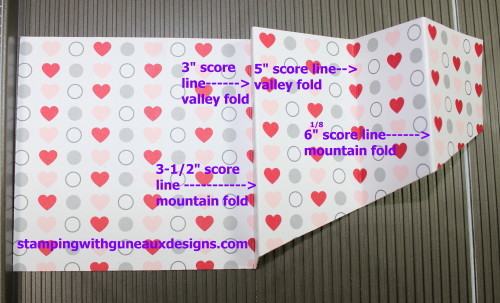
7.  Fold a valley fold at the 3″ score line, mountain fold at the 3-1/2″ score line, valley fold at the 5″, and mountain at 6-1/8″.

Pleated Skirt Fold Technique

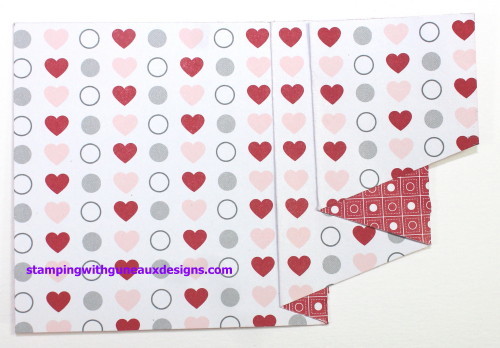
8.  Crease the fold lines with a bone folder.  Add adhesive to the back of the pleats so they will remain flat.  The piece of paper will look like this after folding and adhering it together.
Pleated Skirt Fold Technique Tutorial

9.  Adhere this to the bottom portion of a 5-1/2″ x 4-1/4″ card base.  You’ll need to use scissors to trim off a small piece of the pleated skirt that will overhang on the right side of the card base.

10.  Decorate the remaining portion of your card as desired.

ENJOY!

BlogDivider_zpsed339ea1

Swallowtail Butterfly

God’s Blessings!

Stamping With Guneaux Designs By Beverly Polen

Nail Art Inspiration – SU Botanical Builder Framelits

Have you ever been inspired by NAIL ART in your paper crafting creations?  I would have never thought of that until today.  On Splitcoaststamper.com today, the Inspiration Challenge, IC531, is to view this NAIL ART Pinterest board, select a photo that inspires you, and create paper art.

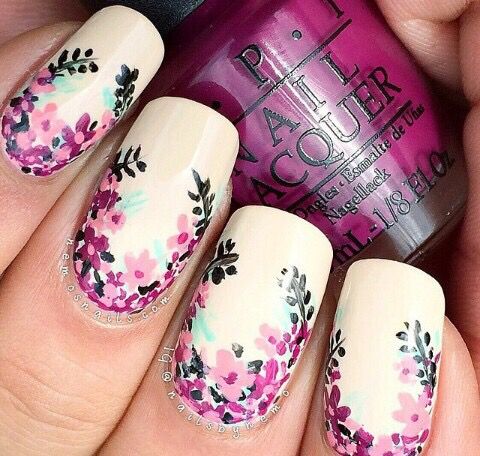
There are so many photos of beautiful nail art that inspired me, and it was difficult to pick just one.  However, I chose this one as my focal point for my card share today.

Nail Art Inspiration SU Botanical Builder Framelits

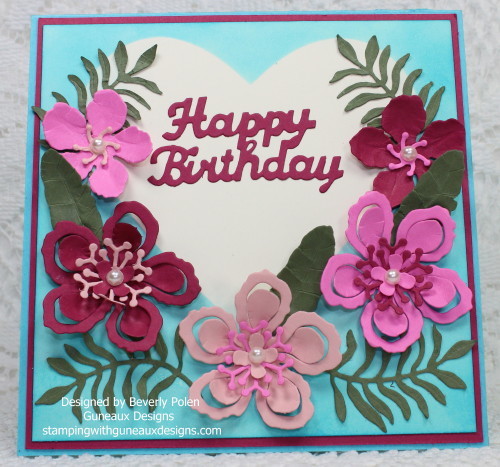
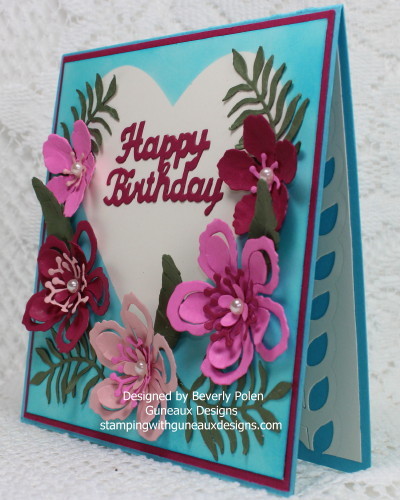
The nail art inspired me to create this Happy Birthday Card.  Please share with me how you think I did with the inspiration!

http://stampingwithguneauxdesigns.com/nail-art-inspiration-su-botanical-builder-framelits/

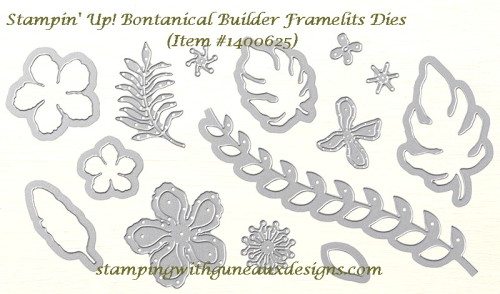
When I saw the photo of the nail art above, I knew right away how I would create my card.  The Stampin’ Up! (SU) Botanical Builder Framelits immediately came to mind. Therefore, the floral elements you see on the card were created with the Framelits. To create more realistic 3D floral elements, I used the Sizzix Susan’s Garden Tool Kit.  (If interested in learning about this kit, here is a YouTube video about the kit, and here is a YouTube video that shows how to use it.)

Nail Art Inspiration - SU Botanical Builder Framelits

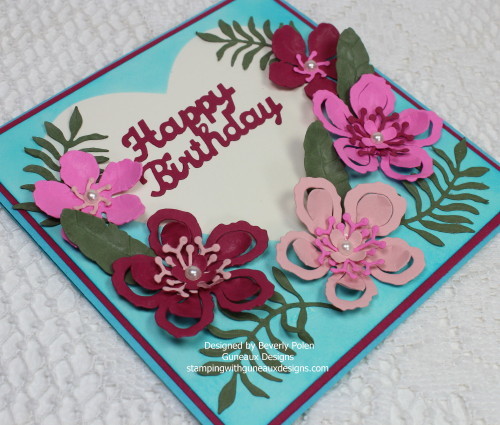
Did you notice the specks of turquoise on the nails in the above nail-art photo?  To incorporate that color on my first card layer, I cut a heart frame, laid it onto the SU Very Vanilla Card Stock, and sponged around it with SU Tempting Turquoise Ink. Afterwards, I adhered the floral pieces onto the card stock and added SU Basic Pearls in the center of each flower.

Nail Art Inspiration - SU Botanical Builder Framelits

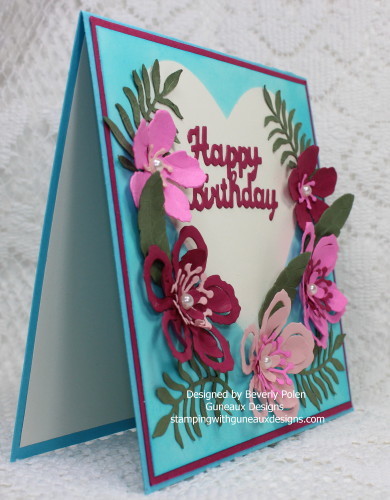
You can see that I used the largest leaf framelit on the inside of the card in the above photo.  I hope you enjoy my beautiful card as much as I did making it!

IF YOU HAVE QUESTIONS OR COMMENTS, PLEASE LEAVE THEM IN THE COMMENTS SECTION.

BlogDivider_zpsed339ea1 SUPPLIES USED

Stamps:  None

Paper:  Stampin’ Up! Very Vanilla, Purely Pomegranate (retired), and Tempting Turquoise Card Stock

Ink:  Stampin’ Up! Tempting Turquoise Classic Ink (126952)

Accessories:  Stampin’ Up! (SU) Botanical Builder Framelits (140625), SU Basic Pearls, North Coast Creations Happy Birthday DieSizzix Susan’s Garden Tool Kit (no longer available at Sizzix), and SU Stamping Sponge

Nail Art Inspiration - SU Botanical Builder Framelits nail art inspirationtbotanical Builder framelits

Sizzix Accessory - Tool Kit inspired by Susan Tierney-Cockburn

BlogDivider_zpsed339ea1

Swallowtail Butterfly

God’s Blessings!

Stamping With Guneaux Designs By Beverly Polen

Nail Art Inspiration - SU Botanical Builder Framelits