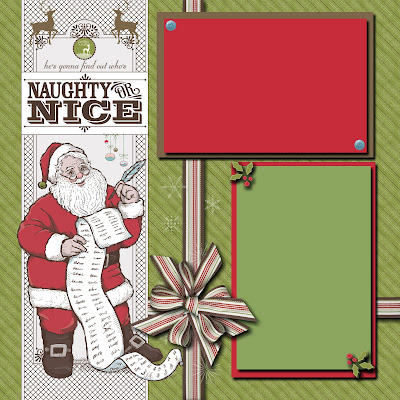
My Digital Studio Scrapbook Page

Yesterday I shared a greeting card made with printed card stock that I made with My Digital Studio.  Today I’m sharing a My Digital Studio Scrapbook Page that is almost the same as the card.  This page was made with the same digital download as the card was made with.  

My Digital Studio Scrapbook Page

What do you think?  I really like the page!  I featured on the page a picture of my youngest daughter, who always showers me with love, and me.  Isn’t she beautiful!!  She has good genes that she got from her Mother (lol)! 


 SUPPLIES USED TO MAKE THE MY DIGITAL STUDIO SCRAPBOOK PAGE:

Accessories:  Stampin Up’s My Digital Studio (MDS – 130646) and the Stacks of Millions Digital Collection Disc (130675) on Page 39 of the Stampin Up 2013 Spring Catalog

Information on the Stacks of Millions Digital Collection Disc:

  • It can be purchased with Hostess Dollars for $9.00.
  • The disc included the following:
    • Cards for every season, every occasion—and millions of ways to customize.
    • Five-piece SVG Stacks of Wishes Stamp Brush Set,
    • Nine-piece SVG Million Dollar Moments Stamp Brush Set,
    • Twelve Designer Series Papers, and
    • Forty-two embellishments.

 Stamping With Guneaux Designs

God’s Blessings!
Stamping With Guneaux Designs
by
Beverly Polen

  MY DIGITAL STUDIO SCRAPBOOK PAGE 

My Digital Studio Valentine Scrapbook Page

I really like this My Digital Studio Valentine Scrapbook Page that I developed to share with you today.  Among other items, the page features a Valentine Card that I made in 2011.

My Digital Studio Valentine Scrapbook Page

 I have said it many times before, but I have to say it again, I LOVE My Digital Studio! There are so many benefits to having and using it, as you can see on this Scrapbook Page. Remember the Stampin’ Up! Love Impressions Designer Series Paper that was one of Stampin’ Up!’s releases in the January 4 – April 30 2011 Occasions Mini Catalog?  That paper is featured on this scrapbook page, but in a digital form.  Thus, because of having Stampin Up’s My Digital Studio, I still can use my favorite Valetine Designer Series Paper, the Love Impressions.

Actually, you can still purchase a digital download of the Love Impressions Designer Series Paper (121821).  Also, the Love Impressions Designer Series Paper (non-digital) is still available on Stampin’ Up!’s Clearance Rack, and it’s only $4.79.  The original price in 2011 was $11.95.

I also want to point out that My Digital Studio Valentine Scrapbook Page features a current digital DSP, which is a Hostess Gift.  That is the Stacks of Millions Digital Collection Disc (130675) that is on page 39 of the Spring Catalog.  This digital DSP includes designs for every season.  The gray diamond DSP  that shows on My Digital Studio Valentine Scrapbook Page is from this disc.


Condensed Instructions for My Digital Studio Valentine Scrapbook Page:

  • Within My Digital Studio, select and name a new project,
  • Select Basic Gray Card Stock and OK,
  • Slide the Opacity Bar to the left tot 34 to lighten the Basic Gray Card Stock,
  • Select Love Impressions Designer Series Paper (DSP)-Pattern 2 , “Add as a Layer”, double click on the paper, resize to 9″ x 12″, and move it to the left,
  • Select Stacks a Millions DSP 9,  “Add as a Layer”, double click on the paper, re-size it to 3″ x 12″, and move to the right, lining it up with the Love Impressions DSP.
  • Select the Eyelet Border Punch, rotate it vertically, resize it to a desired size, add a gray mat, and place it according to above picture,
  • Select the Square Punch, re-size to size it to a 6″ x 6″ square, and fill with Stacks a Million DSP 9,
  • Select a photo to insert over the 6″ x 6″ square,
  • Select the square punch, expand the length and decrease the height, add a mat and/or shadow, and insert a title,
  • Repeat and place on top of the Eyelet Border and insert “I Love You”,
  • Select the heart punch, fill it as desired, and copy and paste so there are three hearts,
  • If desired, include text to be placed onto the hearts,
  • Select the Large Corner Punch to insert four corner pieces at each corner of the page and fill two with the Stacks A Million DSP 9 and two the the Love Impressions DSP-pattern 2.

 ENJOY YOUR MY DIGITAL STUDIO VALENTINE SCRAPBOOK PAGE

Stamping With Guneaux Designs

God’s Blessings!
Stamping With Guneaux Designs
by
Beverly Polen

Stampin Up Christmas Scrapbook Pages

It is that time of the year when we need to get our Stampin Up Christmas Scrapbook pages ready to slip in our photos from our Christmas celebrations.  To help you with that task, I’ve created for you a page featuring the very cute Snow Festival Designer Series Paper (126908).  Using this DSP makes it so easy to make a scrapbook page as there are so many pictures on the paper that all one needs to do is cut out and glue the pictures to a page.

Snow Festival DSP

Below is the Stampin Up Christmas scrapbook page I made for you.  It is easy, uses multiple embellishments, and has various dimensions.

I hope this page will assist those who shared with me their struggles related to being new to scrapbooking and creating dimensions and layers to your pages.  If not, I would greatly appreciate your letting me know!  I an in the process of composing a related article, Scrapbooking 101.  You will be informed when published.

The following picture for the Stampin Up Christmas Scrapbook Page is intentionally large so you can better see the details.

Stampin Up Christmas Scrapbook Pages

SUPPLIES NEEDED TO MAKE THIS STAMPIN UP CHRISTMAS SCRAPBOOK PAGE:

Stamp Sets:  NONE

 Paper:

  1. Snow Festival Designer Series Paper (126908),

  2. Cherry Cobbler (12″ x 12″ – 124272),

  3. Whisper White Card Stock (100730),

  4. Baja Breeze Card Stock (111352),

  5. Gumball Green Card Stock (122924), and

  6. Soft Suede Card Stock (115318).

Ink:

  1. Gumball Green Stampin Write Marker (comes in a pack – 126856),

  2. Baja Breeze Stampin Write Marker (comes in a pack – 119700), and

  3. Soft Suede Stampin Write Marker (comes in a pack – 119703).

Accessories:

  1. Scallop Edge Border Punch (119882),

  2. Ex. L. 2-3/8″ Scallop Circle Punch (118874),

  3. 1-3/4″ Scallop Circle Punch (119854),

  4. 2-1/2″ Circle Punch (120906),

  5. Decorative Label Punch (120907),

  6. 3/16″ Corner Punch (119871),

  7. Bigz Clear Large Scallop Square Die (115950),

  8. White Embossing Powder (109132),

  9. Crystal Effects (101055),

  10. Baja Breeze 1/2″ Seam Binding Ribbon (122331),

  11. Gumball Green 3/8″ Stitched Satin Ribbon (126848),

  12. Whisper White Ribbon (your choice),

  13. Dimensionals (194430) and Sticky Strip (104294 – or other forms of adhesive),

  14. Cherry Cobbler Dazzling Details (125585),

  15. Whisper White Embossing Powder (109132),

  16. VersaMarker Watermark Pen,

  17. Heat Gun of your choice, and

  18. Paper Trimmer (your choice).

INSTRUCTIONS FOR MAKING THIS STAMPIN UP CHRISTMAS SCRAPBOOK PAGE (on the 12″ x 12″ Cherry Cobbler Card Stock):

  •  Cut a 12″ x 2-1/8″ piece of the Christmas tree design from the Snow Festival DSP (the Baja Breeze and Whisper White snowflake design is on the other side of the paper).
  • Using the Scallop Edge Border Punch, cut scallops down both of the 12″ sides of the paper.
  • Attach Sticky Strip (or other adhesive) to the scalloped strip and adhere it 7/16″ from the left side of the 12″ x 12″ Cherry Cobbler Card Stock.
  • Using the Bigz Clear Large Scallop Square Die, cut a large scallop from 1) the ornament design , 2) the Gumball Green stars design, and 3) the Cherry Cobbler floral design from  the Snow Festival DSP.
  • Cut one 3-1/2″ square from Baja Breeze Card Stock, and two from Whisper White Card Stock.
  • Adhere the Baja Breeze square to the ornament design large scallop and a Whisper White square to the Gumball Green stars large scallop and Cherry Cobbler floral design large scallop.  These form the mats for your photos.
  • Adhere the photo mats to the 12″ x 12″ Cherry Cobbler Card Stock as shown in the above picture.
  • Cut out the following owl from the DSP (on the paper with 16 3″ squares of pictures) with the  Ex. L. 2-3/8″ Scallop Circle Punch.  Using the Soft Suede Stampin Write Marker, apply ink around the edge of the scallop.  Add Crystal Effects to the owl’s eyes and let dry.  After drying, attach the scallop to the upper left of the card stock with dimensionals (see picture above).

Snow Festival DSP

  • Tie a double bow with the Baja Breeze Seam Binding Ribbon and attach it to the top of the 12″ x 12″ card stock (see above large picture for placement).

Stampin Up Christmas Scrapbook Page

  • Using the 2-1/2″ Large Circle Punch, cut out the “Merry Christmas” sentiment from the page with the 16 3″ squares (see below picture).  Using the Gumball Green Stampin Write Marker, apply ink around the edges of the circle.  Apply Crystal Effects to the owl’s eyes and let dry.  After drying, adhere this piece with dimensionals onto the card stock (see large picture above for placement).

Snow Festival DSP

  • Cut out a Baja Breeze decorative label using the Decorative Label Punch.  Apply Baja Breeze ink around the label with the Stampin Write Marker.  Using a VersaMarker Watermark Pen, write 2012 onto the label.  Cover with White Embossing Powder and set with a heat gun. Attach a double bow made from Whisper White ribbon and attach to the top of the label.  Use dimensionals to attach to the Cherry Cobbler card stock (see above large picture for placement.

Stampin Up Christmas Scrapbook Pages

  • From the little houses design of the Snow Festival DSP, cut out a Soft Suede house with the 1-3/4″ Scallop Circle Punch.  Apply Soft Suede around the edge of the scallop circle with the Stampin Write Marker.  Add Crystal Effects tot he windows of the house and set aside to dry.
  • Cut a Soft Suede scallop circle with the 2-3/8″ Scallop Circle Punch.  Apply the Cherry Cobbler Dazzling Details around the edge of the scallop circle and let dry.
  • After drying, attach the “house” small scallop circle with dimensionals onto the Sofe Suede scallop circle.  Use Sticky Strip to attach to the Cherry Cobbler card stock (see large picture for placement).

Snow Festival DSP

  • Cut a Gumball Green circle with the 2-1/2″ Circle Punch.  Apply Gumball Green ink around the edge of the circle with the Stampin Write Marker.
  • Cut a 2-3/8″ scallop from the Snow Festival DSP design with multiple owls using the 2-3/8″ Ex. L. Scallop Circle Punch.  Punch two holes near the center of the scallop (depends on how the owls are located in your scallop as to where you punch the holes) and thread through the holes a small piece of Gumball Green Satin Stitched Ribbon.  Tie into a knot.  Add Crystal Effects to the owls’ eyes and let dry.
  • After drying, use dimensionals to attach the owls scallop to the Gumball Green large circle.  Attach it with Sticky Strip to the bottom left of the Cherry Cobbler card stock (see large picture for placement).

Snow Festival DSP

  •  Cut a Whisper White circle with the 2-1/2″ Large Circle punch.  Draw lines on this piece for journaling.  Attach with Sticky Strip onto the Cherry Cobbler Card Stock.

You are finished making your Stampin Up Christmas Scrapbook Page and it is now ready for you to attach your photos!

I would love feedback from all of you, especially those who shared with me their struggle with scrapbooking.

God’s Blessings!
Stamping With Guneaux Designs
by
Beverly Polen

My Digital Studio Christmas Scrapbook Pages

I decided today to re-post two of my favorite My Digital Studio Christmas Scrapbook Pages that I previously created with the Stampin’ Up! My Digital Studio.  I had so much fun designing these 12″ x 12″ pages that I couldn’t stop adding elements to the pages, especially the Christmas tree on the first page.

My Digital Studio Christmas Scrapbook Pages

Can you see all the punches, stamp sets, and embellishments that I added to the tree as well as to the second page? That’s what is so great about Stampin’ Up!’s My Digital Studio; you can use its contents for unintended purposes. Wow, does it ever make creating scrapbook pages faster!

The primary element for these pages is the background paper.  It is from the My Digital Studio’s digital download,  Letters to Santa Designer Series Paper, which is only $4.95!  You cannot beat that price for 12 different Designer Series Paper patterns!

Did you notice the black cat sitting under the Christmas Tree? The cat represents my daughter’s sweet black cat, Bottecelli. I love this cat! He is so lovely and wants to be held and loved on all the time. I’ve never seen a cat like him.

I hope you enjoy these pages as much as I enjoyed designing them.  And if you’ve not tried Stampin’ Up!’s My Digital Studio, you are missing out on a great trend of digital scrapbooking.

God’s Blessings!
Stamping With Guneaux Designs
by
Beverly Polen

My Digital Studio Christmas Scrapbook Pages

Fall Scrapbook Page

This one-page fall scrapbook page features one of my favorite designer series paper, the Autumn Spice, which retired  a while back.  However, if you have Stampin’ Up!’s My Digital Studio (MDS) and have download the Autumn Spice Digital Kit, you can create this page with no problem.

Fall Scrapbook Page

SUPPLIES:

My Digital Studio (MDS) and its Autumn Spice Digital Kit (122175)

Autumn Spice Digital Kit -- Digital Download

Stamp Sets: Day of Gratitude (121148 – c), Lovely Letters Alphabet (127796 – c)

Ink (classic and markers): Cajun Craze, More Mustard, Old Olive, and Early Espresso

Paper: More Mustard Card Stock (100946), Cajun Craze Card Stock (119684), Old Olive Card Stock (100702), and Early Espresso Card Stock (119686)

Accessories: Big Shot Die-Cutting Machine (113439), Tasteful Trim Bigz XL Die 120893), Petite Pennants Builders Punch (122361), Petite Pennants Builder Punch (122361), Early Espresso Baker’s Twine (123124), and Brads of your choice

INSTRUCTIONS FOR MAKING THE FALL SCRAPBOOK PAGE:

  • Cut an 8″ x 8″ piece of More Mustard Card Stock.
  • Print onto Very Vanilla Card Stock one copy of the following design from the MDS Autumn Spice Digital Kit:

Autumn Spice Digital Kit

  • Cut two 8″ x 1″ pieces of the design that you just printed, ensuring the cut has the leaves flowing from top to bottom. (Obviously, if you have the original card stock you won’t need MDS to print a copy.)
  • Lay one piece of the design onto the scallop side of the Tasteful Trim die and run through the Big Shot. (Insure the card stock is oriented correctly so the scallops will be on the right side.)
  • Lay the second piece of the design onto the scallop side of the Tasteful Trim die and run through the Big Shot. (Insure the card stock is oriented correctly so the scallops will be on the left side.)
  • Attach one of the scallop pieces onto the right side of the 8″ square piece of More Mustard Card Stock, and the other on the left. (Insure correct orientation.)
  • Punch a small hole in the two corners at the top of the card stock.
  • Insert a piece of Early Espresso Baker’s Twine through the holes, allowing the twine to hand down slightly. Tie knots in the ends of the twine.
  • Using the Petite Pennants Builder Punch, punch out one set of pennants each from the printed Autumn Spice Card Stock, Cajun Craze Card Stock, Old Olive Card Stock, and Early Espresso Card Stock.

Petite Pennants Builder Punch - by Stampin' Up!

  • Adhere these pieces together (see picture).
  • Using the Broadsheet Alphabet Stamp Set (or other), stamp the letters F A L Lonto Very Vanilla Card Stock using Cajun Craze, Old Olive, More Mustard, and/or Early Espresso Ink.
  • Cut out the letters and attached them in order onto the pennants.

Lovely Letters Alphabet Clear-Mount Stamp Set

  • Punch a small hole at the top-center of each pennant.
  • Insert a brad (your choice).
  • Wrap a small piece of Early Espresso Baker’s Twine around each brad and tie into a bow.
  • Adhere each pennant along the Early Espresso Baker’s Twine that was inserted at the top.
  • Cut a photo mat to fit the size of your photo and adhere to the page.
  • Cover with a matching ink the leaf stamp from the Day of Gratitude stamp set (see picture), stamp the image onto Very Vanilla Card Stock, and cut out the leaf.
  • Repeat for a second leaf.
  • Using dimensionals, adhere the leaves onto the two corners of the photo mat.
  • Cover with ink the acorn stamp from the same stamp set, stamp the image onto Very Vanilla Card Stock, and cut it out.
  • Repeat for a second acorn.
  • Adhere the acorns adjacent to the leaves.

Day of Gratitude - Clear-Mount Stamp Set - by Stampin' Up!

NOTE: This scrapbook page can very easily be expanded to a 12″ x 12″ page. You may want to give that a try as well.

Fall Scrapbook Page

Fall Scrapbook PageFall Scrapbook Page

 Fall Scrapbook Page

 Click to Buy Stampin' Up! Products

God’s Blessings!
Stamping With Guneaux Designs
by
Beverly Polen


Enjoy making your fall scrapbook page!