Card Sketch Challenge

Yesterday, Splitcoaststampers had a great card sketch challenge as seen below.  The sketch challenge was so much fun that folks added more than one card to the Card Sketch Challenge, SC586, gallery.

Card Sketch Challenge

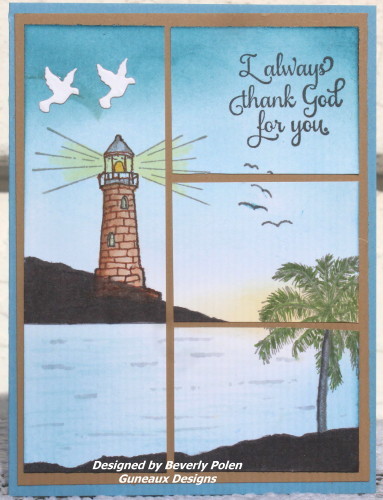
I decided to create a scene and cut it to fit the sketch.  Here is my response to the challenge:

Card Sketch Challenge

The majority of the card was sponged, except for the stamped images.   I used copic markers for portions of the images.   I love the technique of sponging so it was fun to participate in the challenge.  I think that when responding to a sketch challenge, one has more freedom to create than challenges with specific requirements.  I hope you enjoy the card, and any feedback is welcomed!

(Update:  This card was selected as a favorite on Splitcoaststampers!!)

BlogDivider_zpsed339ea1

The following supplies were used to create the card:

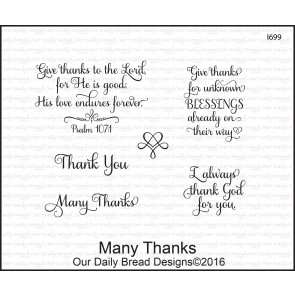
Stamps: ODBD Many Thanks, SU Plant Hope, and Rubber Stampede Thy Word is a Lamp

Paper: SU Whisper White, Crumb Cake, and Marina Mist

Paper Size: A2

Ink: SU Inks and Copics

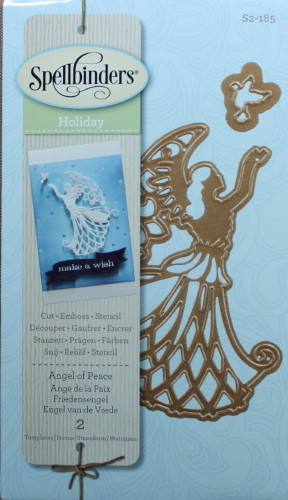
Accessories: Copics Markers, SU Sponges, and Spellbinders Angel of Peace

ODBD Many ThanksSpellbinders Holiday Angel of Peace_1

BlogDivider_zpsed339ea1

Swallowtail Butterfly

God’s Blessings!

Stamping With Guneaux Designs By Beverly Polen

“Do not conform to the pattern of this world, but be transformed by the renewing of your mind.  Then you will be able to test and approve what God’s will is — His good, pleasing and perfect will.”  Romans 12:2

Splitcoaststampers Color Challenge, CC576

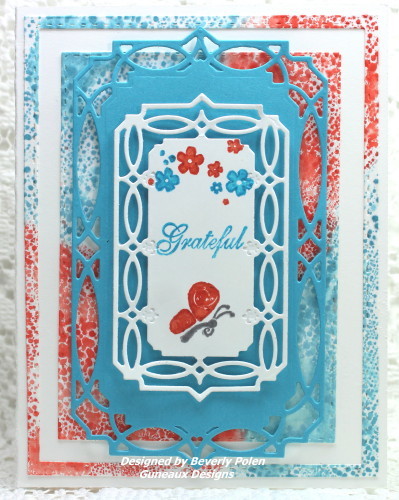
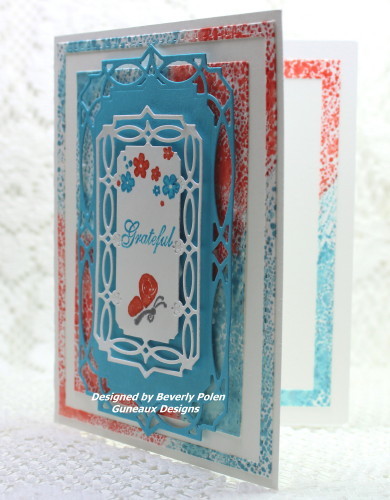
Splitcoaststampers has a Color Challenge, CC576, posted here today, and the colors being featured are Tempting Turquoise, Tangelo Twist, and Whisper White.  What do you think about Tempting Turquoise and Tangelo Twist together?  At first I was hesitant about the colors, but after I began creating, I realized how well they go together.  BTW,  I do not have any Tangelo Twist, so I substituted Tangerine Tango.

This is the card I made for the Splitcoaststampers Color Challenge, CC576:

Splitcoaststampers Color Challenge, CC576

(Update:  This card was chosen as a Splitcoaststampers’ favorite.)

These are the steps I took to make the card:

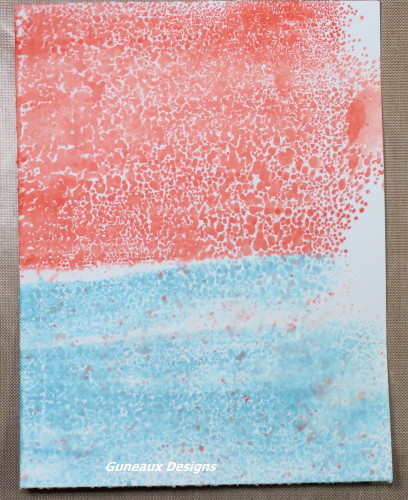
  • I began the card by spreading Tim Holtz’s Distress Ink – Broken China and Ripe Persimmon – (close to Tempting Turquoise and Tangerine Tango) onto my Rangerink non-stick craft sheet, being careful to not blend the colors.
  • Then I spritzed the craft sheet with water mist until bubbles formed.
  • I cut a 4″ x 5-1/4″ piece of Whisper White card stock and laid it, front side down, onto the ink.
  • I slightly, very slightly, touched the back of the card stock in several places to ensure ink transferred to the card stock.
  • I used the heat gun to ensure it was dry.

This photo is my first try.  Somehow, I don’t know how, I got the orange mixed into the blue.  Needless to say, that piece went into the trash and I started over following the above steps.

Splitcoaststampers Color Challenge CC576

  • After achieving the color mixture I wanted, I used Our Daily Bread Designs (ODBD) two largest Double Stitched Rectangles Dies (CBD123) to cut out three die cuts.
  • I only used the largest and smallest die cuts to adhered to the front of a Whisper White (thick) card stock, as shown in the following photo.

Splitcoaststampers Color Challenge, CC576

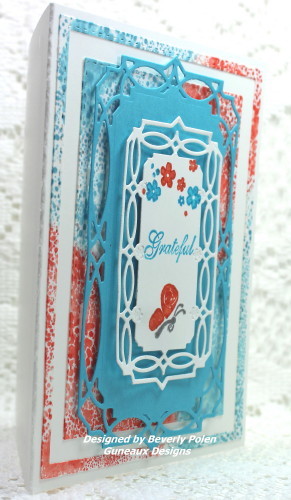
  • Next, I added adhesive foam to two frames, Tempting Turquoise and Whisper White, made with the Spellbinders Nestabilities Astoria Decorative Element Dies (S5-254)
  • Before adding the Whisper White frame, I stamped the images onto the frame.
  • I adhered the third frame die cut that I mentioned above to the inside of the card as shown in the below photo.

Splitcoaststampers Color Challenge, CC576

Enjoy and thanks for stopping by!

BlogDivider_zpsed339ea1

SUPPLIES USED:

Stamps:  Studio g Blessed
Paper:  SU Whisper White, Tempting Turquoise, and Tangerine Tango Card Stock
Card Size: A2
Ink:  Tim Holtz Distress Ink and SU Tempting Turquoise and Tangerine Tango
Accessories:  Double Stitched Rectangles Dies (CBD123), Spellbinders Nestabilities Astoria Decorative Element Dies (S5-254), and Rangerink Non-Stick Craft Sheet

BlogDivider_zpsed339ea1

Swallowtail Butterfly

God’s Blessings!
Stamping With Guneaux Designs by Beverly Polen

“Come to me, all you who are weary and burdened, and I will give you rest.” Matthew 11:28

SU Secret Garden & Splitcoaststampers

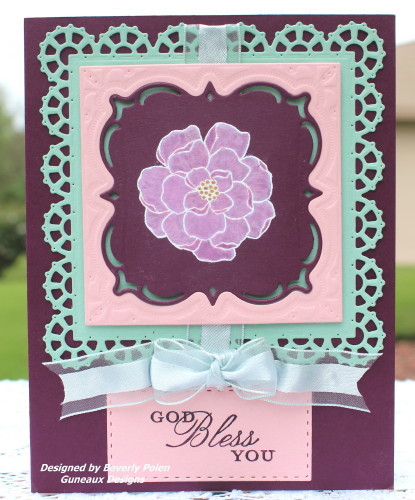
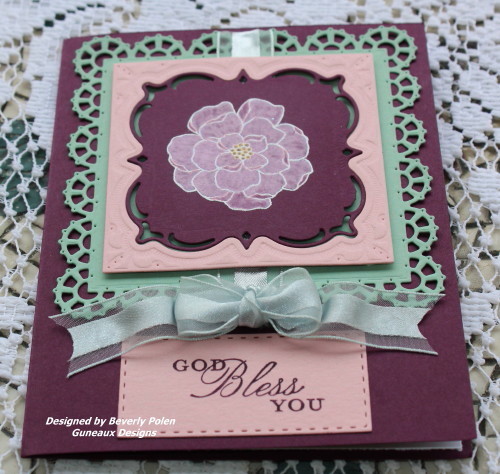
Hello, stampers!  Are you having a good Wednesday?  I’m in my craft room creating and having fun.  Today’s card share features the Stampin’ Up! (SU) Secret Garden and Splitcoaststampers Color Challenge, CC575,  Blushing Blissful Brides ~ DO THE MACARON-A!  

SU-Secret-Garden-Splitcoaststampers

(Update:  This card was included in Splitcoaststampers Favorites for the week ending on March 27, 2016.)

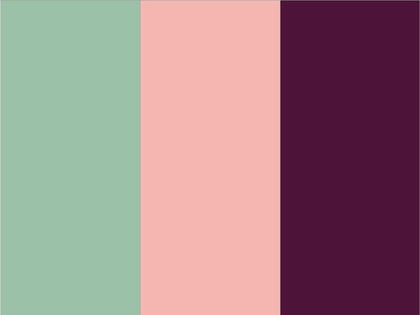
The SU colors selected for the Color Challenge are Mint Macaron, Blushing Bride, and Blackberry Bliss

SU Secret Garden and Splitcoaststampers

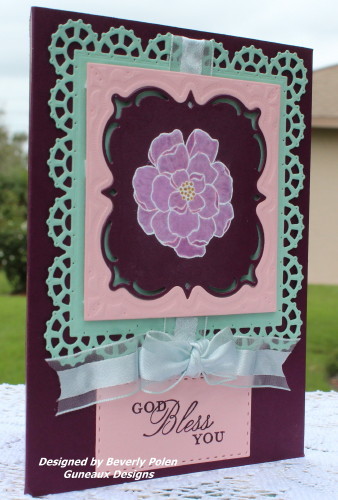
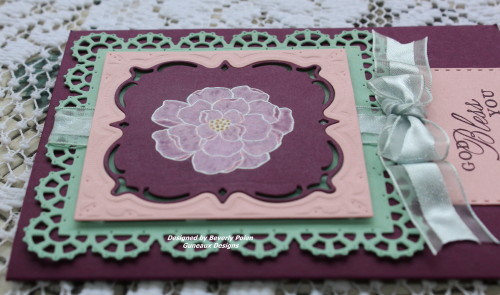
Creating this card took some time as it involves using SU’s White Craft Ink as the initial layer of ink for the flower in the center.  This flower is from the SU Secret Garden Stamp Set.

I am not sure of the name for this technique, but I’ll explain how I did it. Normally this technique is not used on a dark piece of card stock like Blackberry Bliss.  A craft color of card stock (i.e., Crumb Cake) is typically used.  However, I decided that I wanted to use the technique on a die cutout (i.e., ODBD Layered Lacey Squares) from Blackberry Bliss card stock.

To use the technique, I first covered the floral stamp with VersaMark Watermark Ink, added SU White Embossing Powder, and heat set it.  Using a dry Aqua Painter, I applied SU Whisper White Craft Ink over each petal, being careful to stay inside the embossed petals lines.  I allowed the Whisper White Craft Ink to dry before I used the SU Blushing Bride Marker to color the petals of the flower.  It took several layers of ink, and it’s still not what I wanted.  However, I did the best I could.  That’s all, folks – it’s that simple, but time consuming!

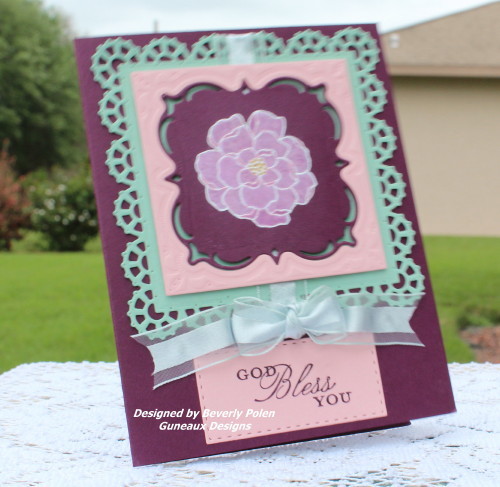
Here are more photos:

SU Secret Garden and SplitcoaststampersSU Secret Garden & Splitcoaststampers

SU Secret Garden & Splitcoaststampers

I had to include this poor quality photo below.  I was outside taking photos of the card when a breeze whipped up and blew my card over just as I was snapping the photo.  I caught the card just as it was falling.  A flying card makes a blurred photo.  LOL

SU Secret Garden & Splitcoaststampers

Enjoy and come back soon!

BlogDivider_zpsed339ea1

SUPPLIES:

Stamps:  SU Secret Garden and Trust God (sentiment)

Paper:  SU Mint Macaron, Blushing Bride, and Blackberry Bliss

Card Size:  A2

Ink:  VersaMark Watermark Ink, SU Whisper White Craft Ink, SU Blushing Bride Marker, SU Mint Macaron Reinker

Accessories:  SU White Embossing Powder, Heat Gun, ODBD Layered Lacey Squares, ODBD Double Stitched Rectangles,  SU Organza Ribbon (dyed Mint Macaron), and a dry Aqua Painter

BlogDivider_zpsed339ea1

Swallowtail Butterfly

God’s Blessings!

Stamping With Guneaux Designs by Beverly Polen

“Blessed is the one who perseveres under trial because, having stood the test, that person will receive the crown of life that the Lord has promised to those who love him”  James 1:12


Smackin’ Acetate Technique

Splitcoaststampers’ Try A New Technique Challenge, TLC577, Smackin’ Acetate Technique

On Monday, Splitcoaststampers’ Try A New Technique Challenge, TLC577, is to create using the “Smackin’ Acetate” Technique.  This technique is similar to that of coloring on acrylic blocks and transferring the color to paper.  Have you tried the Smackin’ Acetate Technique before?  I had not heard of it until Monday.  LOL

Splitcoaststamper’ Clean and Simple Challenge, CAS368, Spring Critters

Also on Monday, Splitcoastampers’ Clean and Simple Challenge,  CAS368, Spring Critters, is to create in celebration of spring!  Seeing more signs that spring is here and to celebrate the springing forward of our clocks, the challenge is to bring out our spring critters.

I combined the challenges and created this card.

(Update:  This card was in the Splitcoaststampers favorites for the week ending on March 20, 2016.)

(Update #2:  I am so honored that this card was picked today, March 31, 2016 as the Customer Card of the Day by Our Daily Bread Designs (ODBD)!  I am so blessed and grateful for this recognition!  You can read about it on ODBD Blog.)
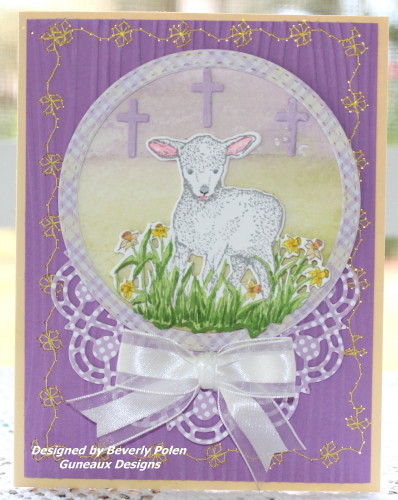
Smackin' Acetate Technique

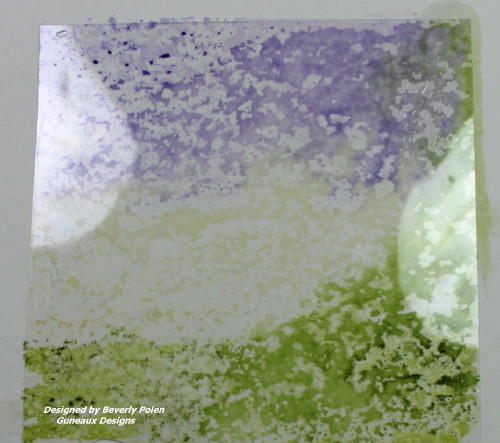
I used the Smackin’ Acetate Technique for the land behind the lamb.  The following explains the technique.

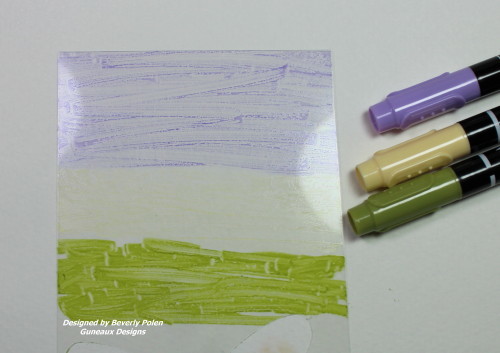
  1.  I used the Stampin’ Up! Lavender Lace Marker to color the top of the acetate, Barely Banana to color the middle, and Old Olive to color the bottom.
Smackin' Acetate Technique

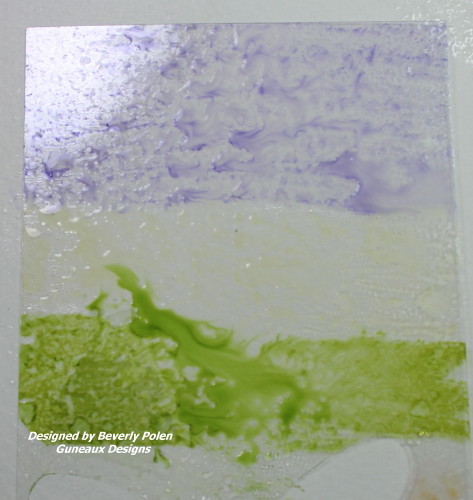
2.  I spritzed water on the acetate next.  The water moves the ink around.
Smackin' Acetate Technique

3.  I placed the inked and spritzed side of the acetate down onto watercolor paper and used my fingers to push the ink on the paper.
Smackin' Acetate Technique

4.  I removed the acetate and used a slightly wet watercolor brush to spread the inks.

Clean and Simple Challenge, CAS368, Spring Critters

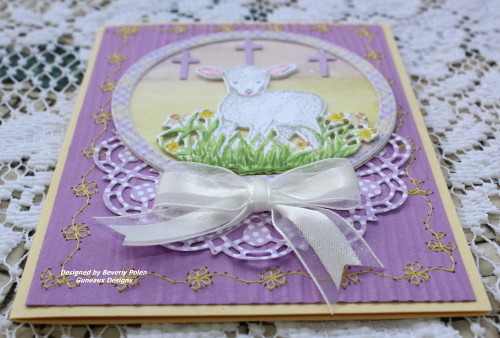
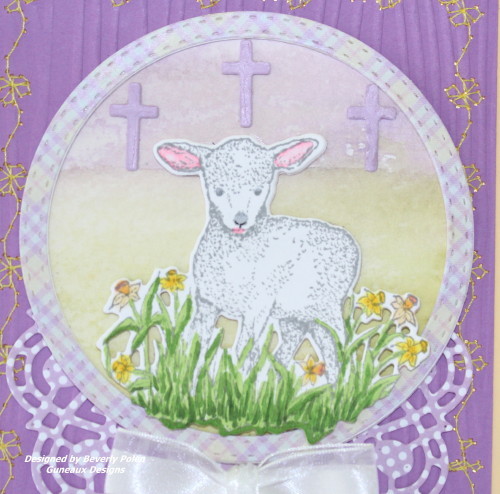
The part of my card that incorporates the CAS368, Spring Critters, is the Lamb.  Having been raised on a small farm, every spring we looked forward to the births our little “spring critters”; lambs, chicks, calves, piglets, foals, etc.

Also Easter is in the spring time.  Therefore, my Lamb represents more than a critter.  It is the Lamb of God, Jesus.  The three crosses in the background represent the cross upon which Jesus was hung, and the crosses upon which the prisoners hung beside Jesus.
Smackin' Acetate Technique

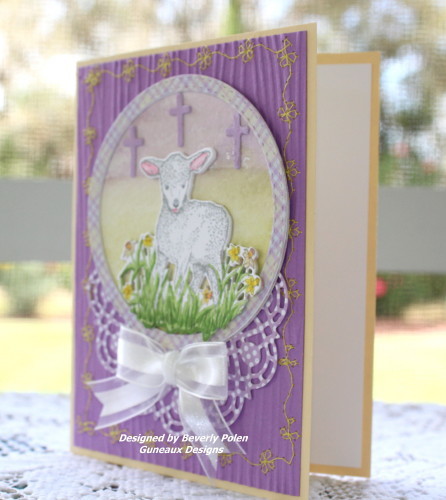
As for the rest of the design, I sewed (or tried to) yellow flowers around the border of the card to replicate the yellow flowers around the lamb, which I colored with copics.  I embossed the lavender paper with a wood grain embossing folder which represents the wooden cross upon which Jesus hung.  I added a cut out from Our Daily Bread Designs (ODBD) doily die that lies underneath the lamb and topped it off with a white bow made with Stampin’ Up! Whisper White Organza Ribbon.  The circle encompassing the lamb and the doily were made with ODBD Pastel Paper, ODBD Double Stitched Circles Dies, and ODBD Doily Die .  Here are additional photos:
Smackin Acetate Technique Smackin' Acetate Technique

I hope you try the technique and join in on the Splitcoaststampers.com challenges!
CCOD Button

BlogDivider_zpsed339ea1

SUPPLIES:

STAMPS:  ODBD Sheep

PAPER:  Watercolor Paper, ODBD Pastel Paper, and Stampin’ Up! Barely Banana and a Lavender Card Stock

INK:  Stampin’ Up! Lavender Lace, Barely Banana, and Old Olive Markers, and Copics

ACCESSORIES:  ODBD Little Lamb Die, ODBD Ornamental Crosses Dies, ODBD Doily Dies, ODBD Double Stitched Circles Dies, Stampin’ Up! Whisper White Organza Ribbonand Stampin’ Up Wood Grain Embossing Folder

CARD SIZE: A2 

TECHNIQUES: Smackin’ Acetate Technique

BlogDivider_zpsed339ea1

Swallowtail Butterfly

GOD’S BLESSINGS!

STAMPING WITH GUNEAUX DESIGNS BY BEVERLY POLEN

“Be anxious for nothing, but in everything by prayer and supplication, with thanksgiving, let your requests be made known to God; and the peace of God, which surpasses all understanding, will guard your hearts and minds through Christ Jesus”.  Philippians 4:6 

Guneaux Designs Artwork Gallery

Gallery

This gallery contains 5 photos.

Time flies by and I’ve not posted some cards that I made.  So today I want to quickly share those few cards with limited information. Enjoy! STAMPING WITH GUNEAUX DESIGNS BY BEVERLY POLEN “What good is it for you to … Continue reading

ODBD Christmas Candles Christmas Card

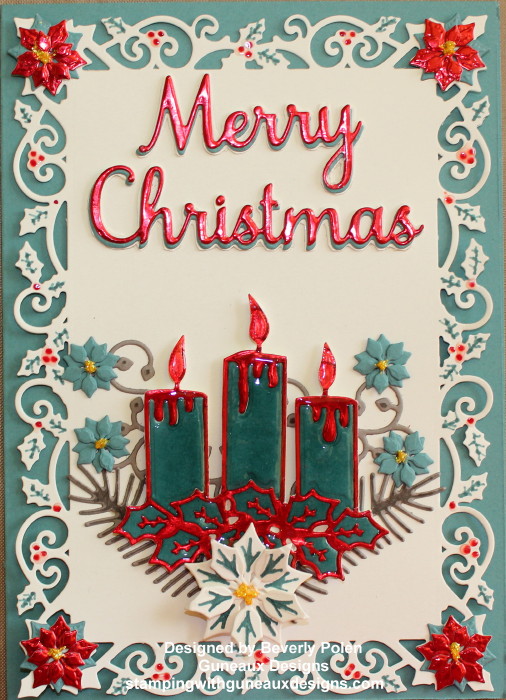
This ODBD Christmas Candles Christmas Card is my last Christmas card for 2015. Among other items, it features Our Daily Bread Designs Christmas Candles Dies, which I think are rather striking.

ODBD Christmas Candles Christmas Card

I used the ODBD Lovely Leaves Dies to enhance the candles.  I placed the vines and pine needles behind the candles and added poinsettias onto the vines.  I made the poinsettias on the vines, four corners, and bottom of the candles with the Spellbinders Holiday 5×7 Holly Frame Dies (S6-040).    I used the same die to make the Very Vanilla holly and berries frame upon which the candles sit.  (By the way, the Spellbinders Holiday Collection Dies are 50% off while they last.  Use discount code HOLIDAY50 when ordering.)   Lastly, I used ODBD Merry Christmas Dies for my sentiment.

Other supplies used: 

Stampin’ Up! Lost Lagoon Card Stock (item #133679)
Stampin’ Up! Very Vanilla Card Stock (item #101650)
Stampin’ Up! Tip Top Taupe Card Stock (item # 138336)
Stamping Up! Red Foil Sheets ( item #139607)
Stampin’ Up! Crystal Effects (item #101055)
Stampin’ Up! Lost Lagoon Marker (item #138333 – 2015-2017 In Color package of five)
Stampin’ Up! Real Red Marker (item #100052)
Stampin’ Up! Tip Top Taupe Marker (item #138333 – 2015-2017 In Color package of five)

 I hope you find inspiration through my ODBD Christmas Candles Christmas Card!


Swallowtail ButterflyGod’s Blessings!

Stamping With Guneaux Designs by Beverly Polen