Polished Stone Technique

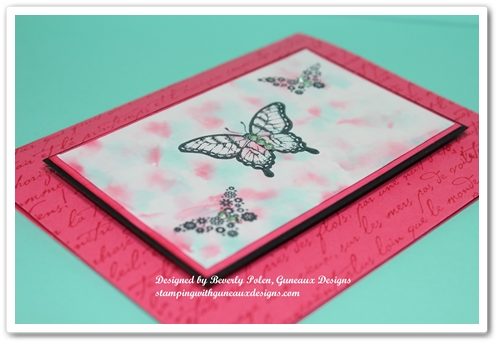
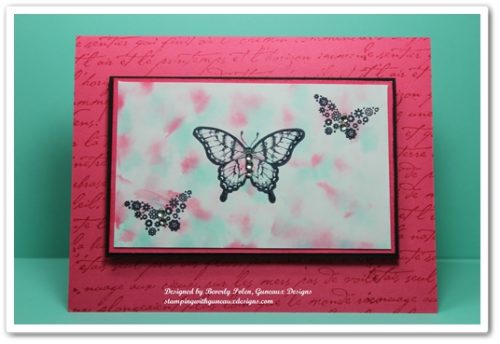
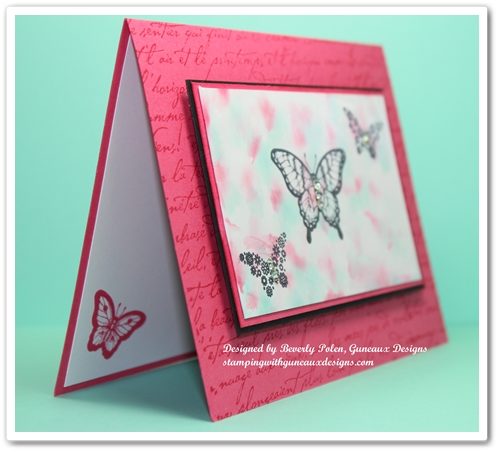
I suspect most crafters have tried the Polished Stone Technique.  However, this is my first time although the technique has been around for some time.  Polished Stone is a rich background technique that looks like rich marble.  It is an excellent background for both feminine and masculine cards.
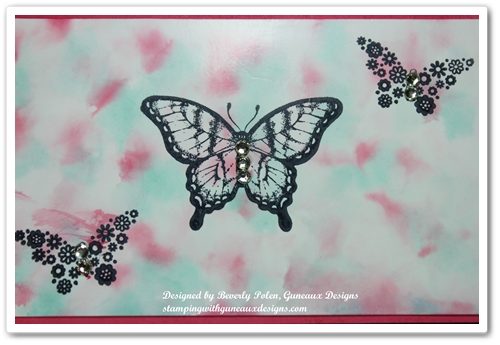
After looking closely at the above picture, can you tell that I left out one key product that most, but not all, crafters use for the Polished Stone Technique?   It is the metallic ink.  I have seen examples of this technique where the metallic ink was used and examples where it was not used.  Well, I left it out because I did not have any metallic ink.  However, I’ll provide you with the instructions that include the ink.


SUPPLIES USED FOR THE POLISHED STONE TECHNIQUE:

Paper:  Glossy White Card Stock (I used Stampin’ Up!’s), Strawberry Slush Card Stock (131295), and Basic Black Card Stock (121045)

Stamps:  Papillon Potpourri Stamp Set (123759) and Stampin’ Up!’s old French Script Background Stamp

Ink:  Coastal Cabana Classic Ink Re-Inker (131164), Strawberry Slush Classic Ink Re-Inker (131167), and Stazon Ink

Accessories:  Cotton Ball, Rubbing Alcohol, and Basic Rhinestones (119246)


INSTRUCTIONS FOR THE POLISHED STONE TECHNIQUE:

  • Add a few drops of metallic re-inker randomly onto glossy card stock.
  • Add rubbing alcohol onto a cotton ball.
  • Add two or three drops of each classic re-inker color onto the cotton ball.
  • Dab the cotton ball over the glossy card stock, continuing until you achieve the desired look.  The rubbing alcohol will cause the re-inker colors to blend together, and the metallic re-inker will sit on top of the re-inker colors to give a marble look.
  • Allow the card stock to dry, and if desired, seal it with an acrylic sealer.
  • Stamp the desired image onto the “marbled” card stock with Stazon Ink.
  • Create your card!

This card can be a Happy Birthday, Happy Anniversary, Thinking of You, Thank You, or any type of card.


 God’s Blessings!
Stamping With Guneaux Designs
by
Beverly Polen
POLISHED STONE TECHNIQUE

Stampin Up Soho Subway Designer Series Paper – Itty Bitty Banners

Stampin Up Soho Subway Designer Series Paper - Itty Bitty BannersThe Stampin Up Soho Subway Designer Series Paper has one design that I really like, and it is the one on this Happy Birthday Card. I think the new In Color Crisp Cantaloupe is beautiful, and it is almost identical to the 2008 Groovy Guava color.  The Crisp Cantaloupe is just slightly ligher than the Groovy Guava.

If you have not purchased the new Crisp Cantaloupe ribbon, you can substitute the 2008 Groovy Guava Double Stitched Ribbon.  It matches the Crisp Cantaloupe perfectly.

Here are additional pictures of the Stampin Up Soho Subway Designer Series Paper, Happy Birthday Card:

Stampin Up Soho Subway Designer Series Paper - Itty Bitty Banners

Stampin Up Soho Subway Designer Series Paper - Itty Bitty Banners

 SUPPLIES USED FOR THE CARD:

Stamps: Itty Bitty Banners Stamp Set (126257)

Paper:  Stampin Up Soho Subway Designer Series Paper (130140), Baked Brown Sugar Card Stock (131296), Crisp Cantaloupe Card Stock (131298), 2013-2015 In Color Designer Series Paper Stack (130136), and Very Vanilla Card Stock (101650)

Ink:  Baked Brown Sugar Classic Ink (131174) and Crisp Cantaloupe Classic Ink  (131176)

Accessories:  Big Shot Die-Cutting Machine (113439), Paper-Piercing Pack Essentials (126187), Paper-Piercer Tool, Border Edge Punch (I used a Martha Steward punch), Bitty Banners Framelits (129267), Fancy Fan Textured Embossing Folder (127751),  Crisp Cantaloupe Ribbon (130021 – or a matching color [the 2008 Groovy Guava Double Stitched Ribbon matches perfectly]), Very Vintage Button (129327), Linen Thread (104199), Mini Glue Dots (103683), and Stampin’ Dimensionals (104430)

INSTRUCTIONS:

  1. Cut an 8-1/2″ x 5-1/2″ piece of Baked Brown Sugar Card Stock, fold in half with the fold on the left side, and pierce around the edges of the card front.  I used one of the guides from the Paper-Piercing Pack Essentials (126187) to complete the piercing.
  2. Cut a 5″ x 3-3/4″ piece of the Crisp Cantaloupe design from the Stampin Up Soho Subway Designer Series Paper.  Sponge the edges with Crisp Cantaloupe Classic Ink and attach to the card front inside the piercing.
  3. Cut a 5″ x 2-1/2″ piece of Crisp Cantaloupe Card Stock and punch around the left and right sides with a border punch of your choice.  Sponge the edges with Crisp Cantaloupe Classic Ink.
  4. Cut a 5″ x 1-1/4″ piece of Baked Brown Sugar Designer Series Paper from the 2013-2015 In Color Designer Series Paper Stack.  Sponge the edges with Crisp Cantaloupe Classic Ink.  Attach to the border-punched piece of Crisp Cantaloupe Card Stock.
  5. Vertically attach a piece of Crisp Cantaloupe Ribbon onto the above.Stampin Up Soho Subway Designer Series Paper - Itty Bitty BannersStampin Up Soho Subway Designer Series Paper - Itty Bitty Banners
  6. Attach this piece onto the front of the Stampin Up Soho Subway Designer Series Paper with Stampin’ Dimensionals at approximately 1/4″ from the left side.
  7. Use a framelit, die cut, or punch to cut out a 2-1/2″ circle from Crisp Cantaloupe Card Stock.  (I used a Spellbinders Splendid Circles template.)  Place the circle into the Fancy Fan Textured Embossing Folder and run it through the Big Shot Die-Cutting Machine.  Sponge around the edges with Crisp Cantaloupe Classic Ink.  (NOTE:  The Fancy Fan Embossing Folder matches the design in the Baked Brown Sugar Designer Series Paper.)
  8. Cover the “Happy Birthday” stamp from the Itty Bitty Banners Stamp Set with Baked Brown Sugar Classic Ink.  Stamp the image onto Very Vanilla Card Stock.  Use the matching Bitty Banners Framelit to cut out the banner.  Sponge around the banner with Baked Brown Sugar Classic Ink.
  9. Trace along the edge of the framelit used in step 7 onto a piece of Baked Brown Sugar Card Stock.  Cut out the banner and sponge the edges with Baked Brown Sugar Classic Ink.  Attach it to the back of the Happy Birthday banner, the sentiment.
  10. Attach the sentiment in the middle of the circle and to the right (see picture).
  11. Double Stampin’ Dimensionals and place onto the back of the circle.  Attach this onto the card as shown in the above picture.
  12. Thread a Very Vintage Button with Linen Thread and attach to the sentiment with Mini Glue Dots. 
God’s Blessings!
Stamping With Guneaux Designs
by
Beverly Polen  Stampin Up Soho Subway Designer Series Paper - Itty Bitty Banners STAMPIN UP SOHO SUBWAY DESIGNER SERIES PAPER – HAPPY BIRTHDAY CARD


Papillon Potpourri Stamp Set – Stampin’ Up!

Papillon Potpourri Stamp Set – Stampin’ Up!

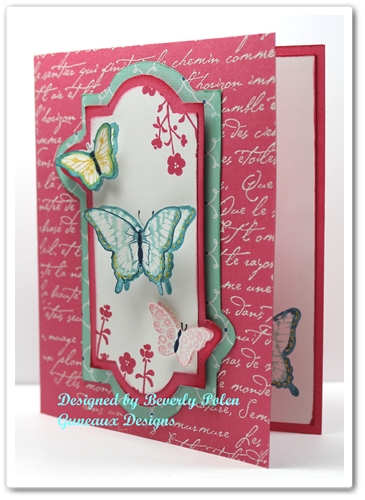
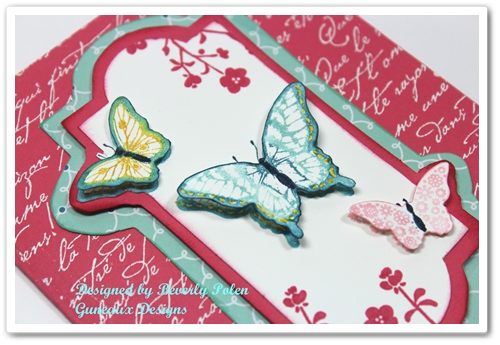
Today’s greeting card features the Papillon Potpourri Stamp Set – Stampin’ Up!(123759 – catalog item number – clear mount).  I love butterflies, so the Papillon Potpourri is one of my favorite stamp sets.

The card base is made with a piece of the new In-Color Strawberry Slush Card Stock.  Using VersaMark Ink (102283), I stamped a background stamp onto the card front.  It was  covered with White Embossing Powder  (109132 – catalog item number) and heat set. (I love any kind of embossing).

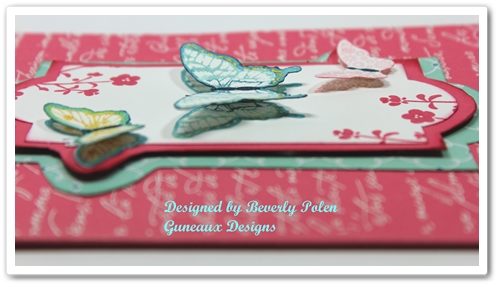
I think the butterflies in the above picture of the card appear to be hovering over the card with their shadow showing underneath.  I have to give the credit for the effect to my camera (lol).  Oh, wait….maybe it was the person behind the camera creating the effect.  Regardless, I think those wonderful Stampin’  Dimensionals (104430 – catalog item number) played a role as well!  Don’t you just love the 3-D effect on greeting cards?

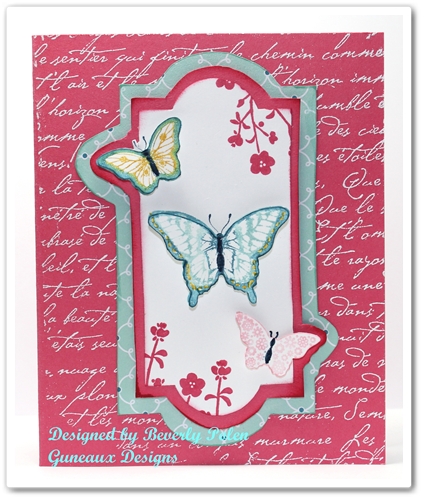
Look closely at the layers on the card.  You also may want to look at the card front in the picture below.  It appears as though I cut out the pieces using a framelit from the Apothecary Accents Framelits (127003 – catalog item number).  Well, my framelit doesn’t have the two “bump outs” on it, does yours?

I did use the framelit from the Apothecary Accents, but I did not use it to cut out the paper that forms the layers.

How often do you start making a card with one intent and then the card ends up being completely different?  That’s what happened on my card.

I first stamped the butterflies from the Papillon Potpourri Stamp Set onto a 3-1/2″ x 4-3/4″ piece of Whisper White Card Stock.  I had planned to add some other elements to that piece of card stock, but then I wasn’t happy with it.

I wondered if I had a framelit that would fit around the butterflies, and if so, I would use that to cut out the piece.  Well, the framelits that I have are either too big or small.  As usual, I didn’t let that defeat me.  I wanted to use the Apothecary Accents framelit, so I decided to lay it around the butterflies and trace around the inside with a pencil.  I couldn’t trace across the two small butterflies, so I decided to go around them.  I “fussy cut” out the framelit, which resulted in the two bump outs.  You needed to know all of this, right?

I then traced the outside of the framelit onto a piece of Strawberry Slush Card Stock, allowing for the bump outs.  As for the bottom layer that is the Pool Party design from the Quatrefancy Specialty Designer Series Paper (130141), I free-handed it.

Notice the little flowers at the top right and bottom left of the Whisper White Card Stock.  They are from a stamp in the Hostess Morning Meadow Stamp Set.

I hope you enjoyed the card and my rambling.  You can leave a comment by clicking on the “chat bubble” at the right of the post’s title.  I love to get comments! 


God’s Blessings!
Stamping With Guneaux Designs
by
Beverly Polen

 PAPILLON POTPOURRI STAMP SET – STAMPIN’ UP!

Soho Subway Designer Series Paper – Happy Birthday Card

Soho Subway Designer Series PaperThe new Stampin’ Up! Soho Subway Designer Series Paper  (DSP)  (130140) is featured on this Happy Birthday card. 

Soho Subway Designer Series Paper

The design used on the card is my favorite of the designs within the DSP.  The colors for the Soho Subway Designer Series Paper are Crisp Cantaloupe (a new color), Early Express, Island Indigo, Summer Starfruit, and Very Vanilla.

The card base is a piece of the new Crisp Cantaloupe Card Stock (In Color – 131298), and the second layer is a piece of the new Baked Brown Sugar Card Stock (In Color – 131296).  The third layer is the Subway Designer Series Paper design.

I made this card for a very special friend, Lin, for her recent birthday.  The sentiment, “Happy Birthday to you!” is from the new Label Love Stamp Set (130622 – clear).  Label Love Stamp SetThis stamp set matches a new punch, the Artisan Label (130920).

 Artisan Label Punch


The top portion of the card spotlights a butterfly from the Papillon Potpourri Stamp Set (123759 – clear).  You will note that the butterfly is two different ink colors; Crisp Papillon Potpourri Clear-Mount Stamp SetCantaloupe Classic Ink (a new In Color – 131176) and Baked Brown Sugar Classic Ink (another new In Color -131174).  I used the Rock and Roll Technique with the stamp image before stamping it onto Very Vanilla Card Stock.

The mats for the image were made with the Window Frames Collection Framelits (129021), using the Crisp Cantaloupe Card Stock and the design from the Soho Subway Designer Series Paper.  This picture is a closeup of the butterfly and mats.

Soho Subway Designer Series Paper

As stated above, the sentiment is from the Label Love stamp set.  It is matted with Baked Brown Sugar Card Stock.  The bow that rests above the sentiment is an old Stampin’ Up! ribbon that matches perfectly with the Crisp Cantaloupe Card Stock.  It is the old Groovy Guava Double Stitched Ribbon.   This picture is a closeup of the ribbon and sentiment.

 Soho Subway Designer Series Paper

 This is a picture of the card’s inside, which features the Papillon Potpourri Stamp Set. 

 Papillon Potpourri Stamp Set

ENJOY!
 
Stamping With Guneaux Designs 
 
God’s Blessings!
Stamping With Guneaux Designs
by
Beverly Polen 

Soho Subway Designer Series Paper

Stampin’ Up! Soho Subway Designer Series Paper

Happy Birthday Card for Him – Brayer Project – Guneaux Designs

Happy Birthday to my brother!!  I made this Happy Birthday card for him using a brayer.  I don’t create many brayered projects; but when I do, I love the process!

Happy Birthday Card for Him - Brayer Project 

The Happy Birthday card features some of Stampin’ Up!’s new and upcoming Annual Catalog products.  The card base was made with the new 2013-2015 In Color, Pistachio Pudding Card Stock (131294).  The second layer is the new card stock in the Subtles Collection, Soft Sky (131203). The sky was brayered with Soft Sky Classic Ink (131181) and Marina Mist Classic Ink (126962).  The field was brayered with the new 2013-2015 In Color, Pistachio Pudding Classic Ink (131177), Old Olive Classic Ink (126953), Always Artichoke Classic Ink (126972), and another new 2013-2015 In Color, Baked Brown Sugar (131174). 

The stamp image of the mare and her foal is not a Stampin’ Up! product.  However, I love the stamp, and my brother loves horses.  They have always been of big part of his life. The “Happy Birthday” sentiment is from an upcoming Hostess set, Morning Meadow (129678). 


 REMINDER:  There are 18 days left to purchase the Stampin’ Up! retiring stamp sets and retiring accessories.

Stamping With Guneaux Designs

 God’s Blessings!
Stamping With Guneaux Designs
Beverly PolenHappy Birthday Card for Him - Brayer Project

 Happy Birthday Card for Him – Brayer Project

Stained Glass Technique – Stamping With Guneaux Designs

Was the sun shinning in your area this weekend?  It was a beautiful, sunny weekend in central Florida.  Speaking of the sun shinning reminds me of light – the light that shines through a window, especially a stained glass window.  Thus, today I am sharing a card I made featuring the Stained Glass Technique.  When I think of the Stained Glass Technique, I am reminded of the beautiful stained glass windows often seen in cathedrals.  They are so awesome when the sun shines through them creating many spectrums of color.

Stained Glass Technique

The Stampin’ Up! Secret Garden Stamp Set is highlighted in this card.  Using the largest floral image from the set, I stamped it with VersaMark Ink onto an oval piece of Vellum.

Stained Glass Technique

I covered the image with the Pewter Stampin’ Embossing Powder and heat set it.  With the image face down, I colored it using a Bermuda Bay Stampin’ Write Marker (I have one from the time that Bermuda Bay was a Stampin’ Up! color).  On selected sections of the image, I recolored after the ink dried, repeating this step until I got the shades I wanted.

Stained Glass Technique

To create the look of solder joining other pieces of glass, I used a Basic Gray Stampin’ Write Marker and drew lines randomly onto the back side of the Vellum.

The Stampin’ Up! Ovals Collection Framelits were used for the two oval mats that encase the stained glass image.  The pink mat was pierced  with two ovals from the Occasions Paper-Piercing Pack.

SUPPLIES USED FOR THE CARD FEATURING THE STAINED GLASS TECHNIQUE

Stamp Sets:  Stampin’ Up! Secret Garden Stamp Set (129144 – c) and Itty Bitty Banners (126257 – c – sentiment)

Paper:  Bermuda Bay Card Stock, Pink Pirouette Card Stock, and Vellum

Ink:  Bermuda Bay Classic Ink, VersaMark Ink, Bermuda Bay Stampin’ Write Marker, and Basic Gray Stampin’ Write Marker

Accessories:  Ovals Collection Framelits (129381), Occasions Paper-Piercing Pack (129387), Pewter Stampin’ Embossing Powder (124114), and Retired Pink Pirouette Ribbon 

Stamping With Guneaux Designs

 God’s Blessings!
Stamping With Guneaux Designs

Stained Glass Technique

STAINED GLASS TECHNIQUE