Afternoon Picnic DSP – MOJO309

I am SO excited (doing the happy dance)!  My best friend from Northern Virginia arrives in a few hours for a visit.  I have not seen her for about three years, so I am so excited and looking forward to her visit here in Florida.  I made this card for her from the Stampin’ Up! Afternoon Picnic DSP to tell her “welcome, best friend”. Afternoon Picnic DSP - MOJO309

Would you agree with me that the color combination of Coastal Cabana and Wisteria Wonder is beautiful?  I think they are striking together.  These are the colors in all of the Afternoon Picnic DSP design patterns that I selected for this card.

Afternoon Picnic DSP - MOJO309

The card’s “best friend” sentiment is from the Stampin’ Up! Fabulous Phrases Stamp Set.  The sentiment was stamped onto a Coastal Cabana Card Stock Spellbinders Splendid Circle.  It rests upon a 1-3/4″ Crushed Curry Card Stock circle.  The flower resting on the sentiment is quite easy to make.  I simply cut a 1-3/4″ circle from Wisteria Wonder Card Stock and “fussy cut” it in a circular fashion.  I then rolled it around a wooden skewer and glued it together.  Then I used the Stampin’ Up! Boho Blossoms Punch to punch out a Crushed Curry Card Stock flower that I glued into the center.  Although you cannot see it too well, there is a tiny Basic Pearl in the center of the flower. 

Afternoon Picnic DSP - MOJO309

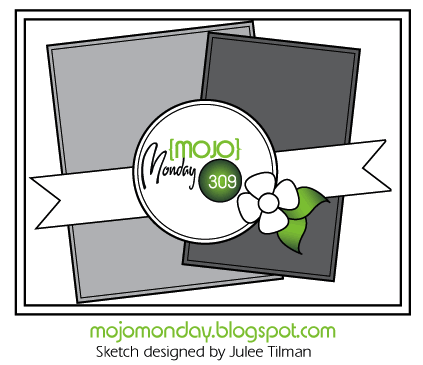
I used the MOJO Monday Sketch Challenge MOJO309 design as my guide to create the card.  This is the MOJO309 design. 

 Afternoon Picnic DSP - MOJO309

IN ADDITION TO THE STAMPIN’ UP! AFTERNOON PICNIC DSP, OTHER SUPPLIES USED:

Stamps:  Stampin’ Up! Fabulous Phrases Stamp Set (120501)

Paper:  Afternoon Picnic DSP (131390), Coastal Cabana Card Stock (131297), Wisteria Wonder Card Stock (122922), and Crushed Curry Card Stock (131199)

Ink:  Wisteria Wonder Classic Ink (126985)

AccessoriesStampin’ Up! 1-3/4″ Circle Punch (119850), Basic Pearls (119247), Boho Blossoms Punch (119858), and Spellbinders Splendid Circle Template Afternoon Picnic DSP - MOJO309


 God’s Blessings!
Stamping With Guneaux Designs
By
Beverly Polen 

Afternoon Picnic DSP - MOJO309

STAMPIN’ UP! AFTERNOON PICNIC DSP – MOJO309

Everything Eleanor Stamp Set

Everything Eleanor Stamp Set

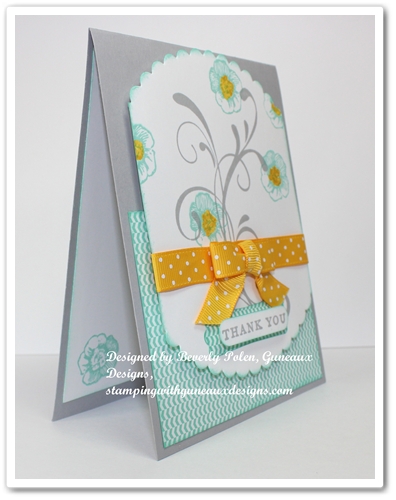
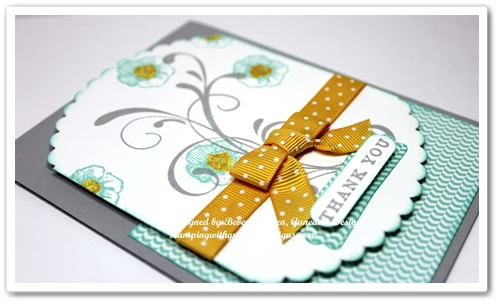
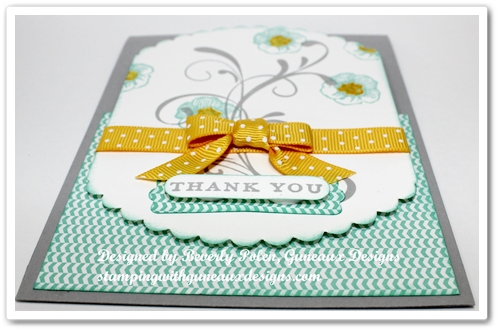
Thanks for stopping by for a Monday rubber stamping fix! (lol)  My card share for you today features the beautiful Everything Eleanor Stamp Set and two new Stampin’ Up! colors.  It is such a simple card to make, as you will see in the below instructions.

Also featured on the card is a sentiment from the hostess Morning Meadow Stamp Set.


SUPPLIES USED FOR THE CARD FEATURING THE EVERYTHING ELEANOR STAMP SET:

Stamp Sets:  Everything Eleanor Stamp Set (124164 – c) and Morning Meadow Stamp Set (129675 -c)

Paper:  Designer Series Paper Stack (Coastal Cabana – 2013-2015 In Colors – 130136), Smoky Slate Card Stock (new Neutrals color – 131203), and Whisper White Card Stock (100730)

Ink:  Coastal Cabana Classic Ink (new In Color – 131175), Smoky Slate Classic Ink (new Neutrals color – 131181), and Daffodil Delight Marker (119677)

Accessories:  Stampin’ Up! Circles Collection Framelits (130911), Word Window Punch (119857), Modern Label Punch (119849), and retired Daffodil Delight Ribbon


INSTRUCTIONS:

  • Cut an 11″ x 4-1/4″ piece of Smoky Slate Card Stock.  Fold in the center for a card base with the fold at the top.
  • Cut a 4″ x 3″ piece of Coastal Cabana Designer Series Paper from the 2013-2015 In-Color Designer Series Paper Stack.  Use a sponge to apply Costal Cabana Classic Ink around the piece.
  • Using the largest circle from the Circles Collection Framelits, cut a piece of Whisper White Card Stock.
  • Cut both sides of the circle to make the piece 3-5/8″ wide.  Use a sponge to apply Costal Cabana Classic Ink around the piece.
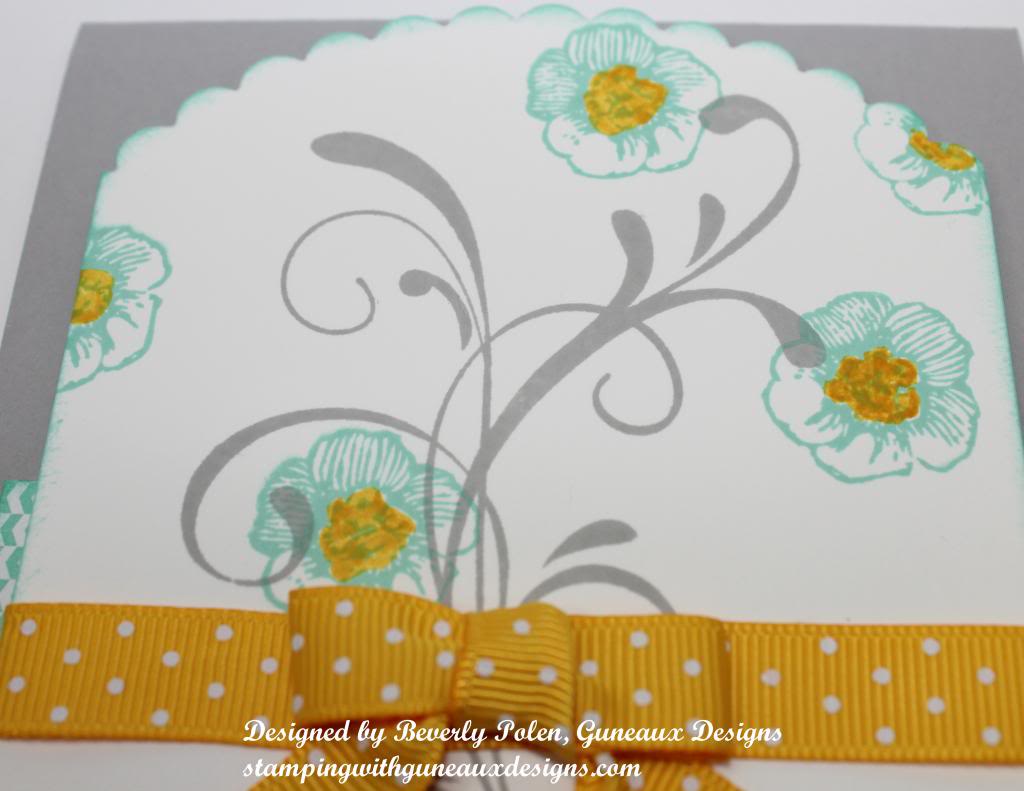
  • Cover the flourish image from the Everything Eleanor Stamp Set with Smoky Slate Classic Ink.  Stamp the image on the Whisper White modified circle.
  • Cover the small flower image from the Everything Eleanor Stamp Set with Coastal Cabana Classic Ink and randomly stamp the image around the stamped flourish.
  • Color the center of the flowers with the Daffodil Delight Marker.
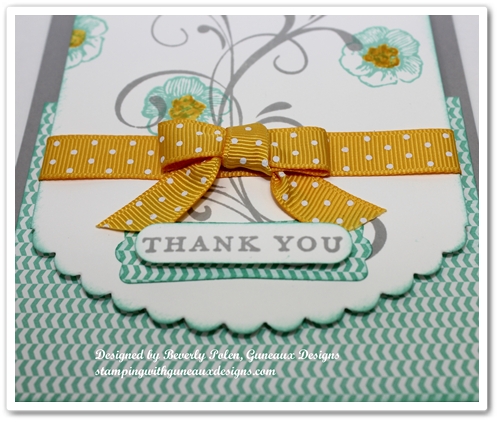
  • Stamp the “Thank You” sentiment from the Morning Meadow Stamp Set onto a piece of Whisper White Card Stock with Smoky Slate Classic Ink.
  • Cut out the sentiment with the Word Window Punch.
  • Cut out a label using the Modern Label Punch from the Coastal Cabana Designer Series Paper.
  • Attach the sentiment onto the modern label using foam adhesive.
  • Attach this piece to the bottom of the stamped Whisper White Card Stock.
  • Add Daffodil Delight ribbon around the piece.
  • Attach the 4″ x 3″ piece of Coastal Cabana Designer Series Paper to the bottom of the Smoky Slate card base.
  • Using foam adhesive, attach the modified circle piece over the Coastal Cabana paper.
  • Finished – enjoy your card!

God’s Blessings!
Stamping With Guneaux Designs
by
Beverly Polen

 EVERYTHING ELEANOR STAMP SET

Papillon Potpourri Stamp Set – Stampin’ Up!

Papillon Potpourri Stamp Set – Stampin’ Up!

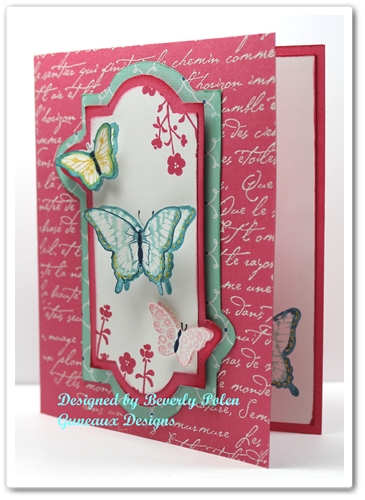
Today’s greeting card features the Papillon Potpourri Stamp Set – Stampin’ Up!(123759 – catalog item number – clear mount).  I love butterflies, so the Papillon Potpourri is one of my favorite stamp sets.

The card base is made with a piece of the new In-Color Strawberry Slush Card Stock.  Using VersaMark Ink (102283), I stamped a background stamp onto the card front.  It was  covered with White Embossing Powder  (109132 – catalog item number) and heat set. (I love any kind of embossing).

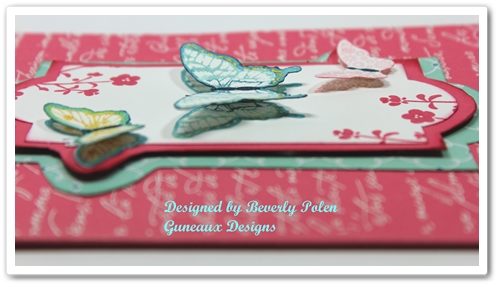
I think the butterflies in the above picture of the card appear to be hovering over the card with their shadow showing underneath.  I have to give the credit for the effect to my camera (lol).  Oh, wait….maybe it was the person behind the camera creating the effect.  Regardless, I think those wonderful Stampin’  Dimensionals (104430 – catalog item number) played a role as well!  Don’t you just love the 3-D effect on greeting cards?

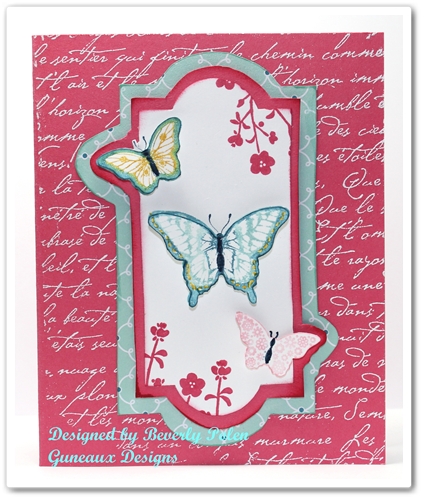
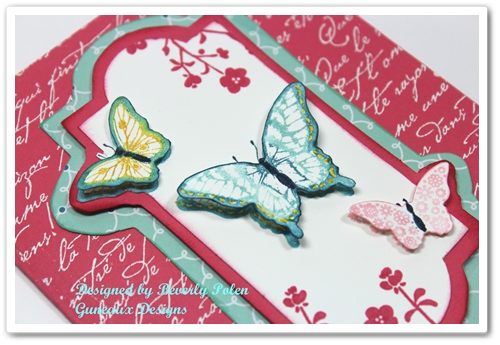
Look closely at the layers on the card.  You also may want to look at the card front in the picture below.  It appears as though I cut out the pieces using a framelit from the Apothecary Accents Framelits (127003 – catalog item number).  Well, my framelit doesn’t have the two “bump outs” on it, does yours?

I did use the framelit from the Apothecary Accents, but I did not use it to cut out the paper that forms the layers.

How often do you start making a card with one intent and then the card ends up being completely different?  That’s what happened on my card.

I first stamped the butterflies from the Papillon Potpourri Stamp Set onto a 3-1/2″ x 4-3/4″ piece of Whisper White Card Stock.  I had planned to add some other elements to that piece of card stock, but then I wasn’t happy with it.

I wondered if I had a framelit that would fit around the butterflies, and if so, I would use that to cut out the piece.  Well, the framelits that I have are either too big or small.  As usual, I didn’t let that defeat me.  I wanted to use the Apothecary Accents framelit, so I decided to lay it around the butterflies and trace around the inside with a pencil.  I couldn’t trace across the two small butterflies, so I decided to go around them.  I “fussy cut” out the framelit, which resulted in the two bump outs.  You needed to know all of this, right?

I then traced the outside of the framelit onto a piece of Strawberry Slush Card Stock, allowing for the bump outs.  As for the bottom layer that is the Pool Party design from the Quatrefancy Specialty Designer Series Paper (130141), I free-handed it.

Notice the little flowers at the top right and bottom left of the Whisper White Card Stock.  They are from a stamp in the Hostess Morning Meadow Stamp Set.

I hope you enjoyed the card and my rambling.  You can leave a comment by clicking on the “chat bubble” at the right of the post’s title.  I love to get comments! 


God’s Blessings!
Stamping With Guneaux Designs
by
Beverly Polen

 PAPILLON POTPOURRI STAMP SET – STAMPIN’ UP!

Stampin’ Up! Best Of Butterflies

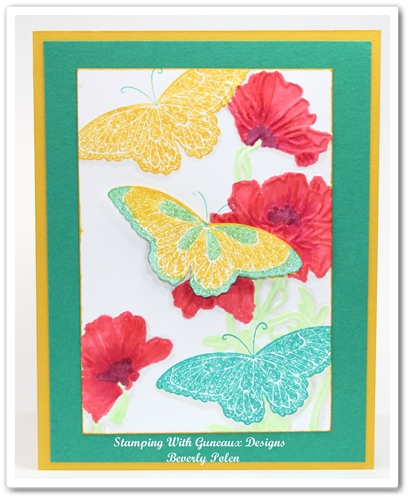
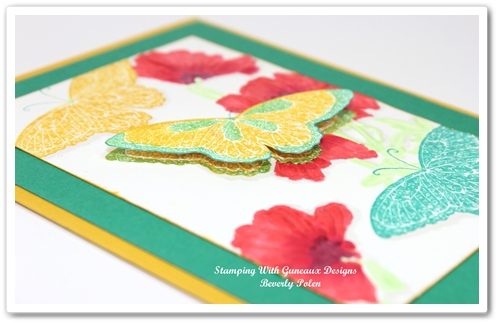
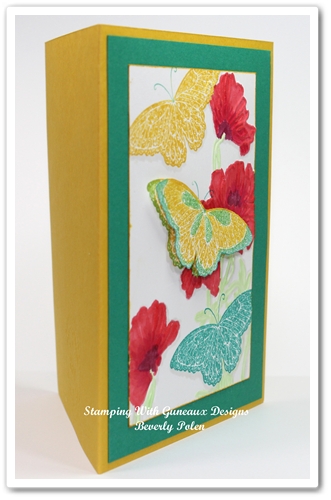
Today’s project share features the Stampin’ Up! Best of Butterflies stamp set, which is the April stamp set for the Stampin’ Up! Best of 25 Years celebration.  The three butterflies on this card is one of the stamp images from this stamp set.

This is a simple card to make, and it is made with two Stampin’ Up! card stock colors that are returning in June – the Bermuda Bay and Crushed Curry.  I love these two colors as they are bold and am excited about them returning.  I love bold colors, and I tend to lean toward using them more often.

Because the 2013 color is Emerald, I shared that I believed Stampin’ Up! would bring us a similar color.  I’m so happy that I was right as I  love Bermuda Bay.  As a matter of fact, I used it on a recent card before I knew about Stampin’ Up!’s decision.  I am lucky that I still had some of the card stock in both colors!  On with the card details!

On the card front you’ll also notice that I used the  Stampin’ Up! Flower Garden Textured Impressions Embossing Folder.  I decided to color the flowers in a reddish-orange shade.

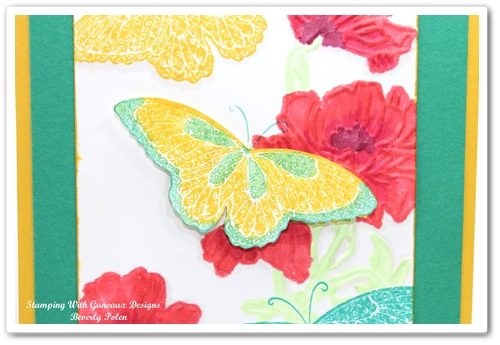
The center butterfly, shown here, is raised with foam circles.  The same image is stamped onto the card underneath the raised butterfly.  I used Bermuda Bay and Crushed Curry Classic Ink for the butterfly images.

The image to the left gives you a better view of the center butterfly, the raised one and the stamped image.

Actually, I first stamped the butterfly images onto the Whisper White Card Stock and then decided to emboss the card stock with the Flower Garden Embossing Folder.  It gives the appearance that I used the masking technique.


SUPPLIES USED FOR THE STAMPIN’ UP BEST OF BUTTERFLIES CARD:

Stamps:  Stampin’ Up! Best of Butterflies Stamp Set (133345)

Paper:  Stampin’ Up! Bermuda Bay, Crushed Curry, and Whisper White Card Stock (100730)

 Ink:  Bermuda Bay Classic Ink, Crushed Curry Classic Ink, and Alcohol Markers

Accessories:  Stampin’ Up! Flower Garden Embossing Folder (123113)

God’s Blessings!
Stamping With Guneaux Designs
by
Beverly Polen

STAMPIN’ UP! BEST OF BUTTERFLIES STAMP SET

Stampin Up Sale-a-bration 2013 and Latest MDS Downloads

Sale-a-bration

Stampin Up Sale-a-bration 2013 begins today!!  It’s the time of the year that Stampin Up crafters wait for to get FREE products!  That’s right, a FREE product for EVERY $50 spent on Stampin Up items. 

Stampin Up came up with several cool items for this Sale-a-bration season.  Two of those are the Sycamore Street Designer Series Paper and Madison Avenue Stamp Set, which are featured on my card share today.

  Stampin Up Sale-a-bration-2013

  Stampin Up Sale-a-bration 2013

The button in the following picture is from the Stampin Up Sycamore Street Ribbon and Button Pack (130812), which is part of the Stampin Up Sale-a-bration 2013.

 Sycamore Street Designer Buttons

 This ribbon is also from the Sycamore Street Ribbon and Button Pack.

Stampin Up Sale-a-bration 2013

Here are the latest download for My Digital Studio:

Designer Threads -- Digital Download

Designer Threads – 132668

Family History Photobook Template -- Digital Download

Family History Photobook Template – 132918


Label This Designer Template -- Digital Download

Label This Designer Template – 133264

Simply Serif Alphabet Stamp Brush Set -- Digital Download

Simply Serif Alphabet Stamp Brush Set – 133017


So Sorry Stamp Brush Set -- Digital Download

So Sorry Stamp Brush Set – 133013

 Further information on the digital downloads can be found here!


 Stampin Up Madison Avenue and Sycamore Street DSP

 Stamping With Guneaux Designs

  God’s Blessings!
Stamping With Guneaux Designs
by
Beverly Polen
Enjoy the Stampin Up Sale-a-bration 2013!

Labels Collection Framelits – Thoughts and Prayers

I could not do without the Stampin’ Up! Labels Collection Framelits, as well as all of the Stampin’ Up!’s framelits, as well as the Thoughts and Prayers stamp set.  To me, the Labels Collection Framelits and all of the other framelits are must-have tools for creating paper crafts. The Labels Collection Framelits may be designed to cut certain stamp cut images, but they certainly may be used for other purposes.

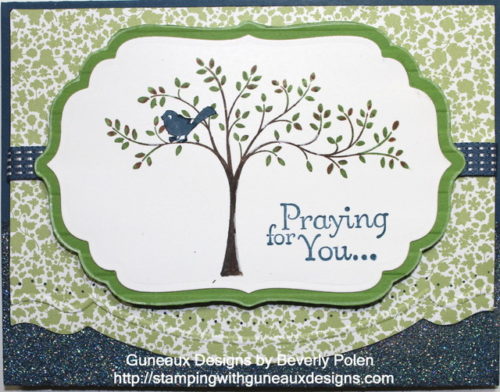
The card share for you today features the Labels Collection Framelits and Thoughts and Prayers Stamp Set.  To use the  Labels Collection Framelits, you will need the Big Shot, its multipurpose platform (Tab 1), and standard cutting pads.  Below are instructions for making this card.
 

STAMPIN UP PRODUCTS:

STAMPS:  Thoughts and Prayers (127805) ; PAPER:  Midnight Muse Card Stock (126843), Gumball Green Card Stock (126840), Whisper White Card Stock (100730), and Twitterpated Designer Series Paper (125406); INK: Soft Suede Stampin’ Write Marker (119703), Gumball Green Stampin’ Write Marker (126856), Midnight Muse Classic Stampin’ Pad (126860), and White Gel Pen (105021); ACCESSORIES: Labels Collection Framelits (125598), Strips Embossing Folder (123128), Adorning Accents Embossing Folders (125601), Adorning Accents Edgelits (125595), Essentials Paper Piercing Pack (126187), VersaMark Pad (102283), Dazzling Diamond Stampin’ Glitter(102023), Heat and Stick Powder (100625), Heat Tool (129053), Stampin’ Pierce Mat (126199), Paper-Piercing Tool (126189), and Midnight Muse 3/8″ Stitched Satin Ribbon (126847)

INSTRUCTIONS:

Card Base:

1.  Cut a 8-1/2″ x 5-1/2″ piece of Midnight Muse Card Stock and fold it in half.

2.  Stamp the VersaMark Pad onto the bottom 1″ of the front of the card base.

3.  Apply Heat and Stick Powder over the VersaMark Ink and heat set with the Heat Tool.

4.  Apply the Dazzling Diamond Stampin’ Glitter over the Heat and Stick Powder and heat set again.

First Layer:

5.  Cut a 4″ x 5-1/4″ piece of the green design (see picture) from the Twitterpated DSP.

6.  Assemble a sandwich to run through the Big Shot in this order:  a) multipurpose platform on Tab 1, b) Cutting Pad, c) DSP piece, d) Adorning Accents Edgelit, and e) Cutting Pad.  Run through  the Big Shot.

7. Place the piece of DSP inside the Adorning Accents Embossing Folder aligning it just above the cut created with the Adorning Accents Edgelit.  Create a Big Shot sandwich with the multipurpose platform on Tab 2 and run through the Big Shot.

8.  Place the DSP onto the Paper-Piercing Mat, lay the same design (i.e., that used with the embossing folder) from the Essentials Paper-Piercing Pack onto the DSP, and pierce the DSP with the Paper-Piercing Tool following the design grid.

Center Piece:

9.  Cover the tree stamp image from the Thoughts and Prayers with ink:  trunk and branches – Soft Suede; leaves – Gumball Green.  Stamp the tree image onto Whisper White Card Stock.

10.  Place the 3rd largest frame from the Frames Collection Framelits onto the Whisper White Card Stock ensuring it is centered over the tree image.  Create a Big Shot sandwich with these items and cut out the image.

11.  Using the Midnight Muse Classic Stampin’ Pad, stamp the sentiment, Praying for You, onto the bottom-right corner.

Center Piece Mat:

12.  Place a piece of Gumball Green Card Stock into the Strips Embossing Folder and run through the Big Shot (on Tab 2).

13.  Place the same frame from the Frames Collection Framelits onto the Gumball Green Card Stock.  Trace around the frame with a pencil.  Cut out the frame and use the White Gel Pen around the edge.  Adhere the Whisper White Card Stock with image onto the mat.

Assemble Card:

14.  Adhere a piece of the Midnight Muse Ribbon across the DSP.

15.  Adhere the DSP onto the card base front.

16.  Adhere the matted centerpiece to the DSP and enjoy your card.


God’s Blessings!

Stamping With Guneaux Designs

Beverly Polen