Beyond the Garden Designer Series Paper Purse

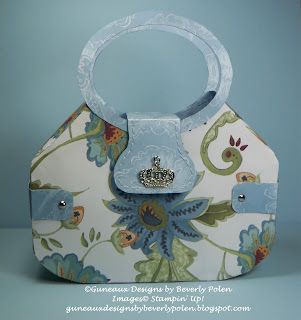
Hello, and thanks for stopping by to see my Stampin’ Up! Beyond the Garden Designer Series Paper Purse. The Beyond the Garden Designer Series Paper (DSP) is so beautiful and it becomes available this Sunday, May 1.

I personally designed the pattern for this purse, and it is different from the others I’ve designed. This purse was designed to hold approximately five 5-1/2″ by 4″ cards, depending on the cards’ embellishments.

Beyond the Garden Designer Series Paper Purse

I used Pacific Point Card Stock to create the purse closure and the blossom on the front, which is decorated with a Beyond the Garden DSP flower. I used two Simply Adorned 8″ Bracelets that are connected by a piece of old Wild Wasabi ribbon to create the purse handle. As an added touch, on one side of the handle I attached a Simply Adorned 5/8″ Square Charm that features “Guneaux Designs” inside, and on the other side, a Simply Adorned Clear Crystal Bauble.
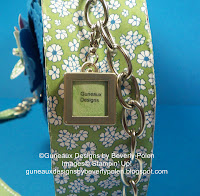
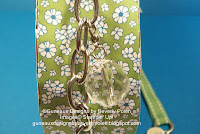
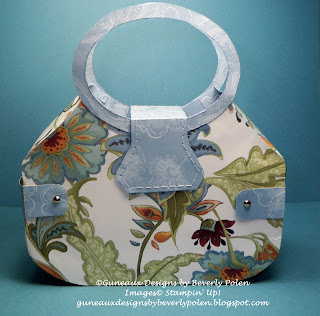
 These pictures are side views of the Beyond the Garden Designer Series Paper Purse:
Beyond the Garden Designer Series Paper Purse

Beyond the Garden Designer Series Paper Purse

Leave a comment with your thoughts regarding the purse.
Purchase Stampin’ Up! products by clicking here. If you want products used in this project, click on the links within this page.
God’s Blessings!
Guneaux Designs by Beverly Polen
Stampin’ Up! Demonstrator in Florida
GuneauxDesignsbyBeverlyPolen.blogspot.com
GuneauxDesignsbyBeverlyPolen.stampinup.net (my 24/7 SU store)
BeverlyPolen@GuneauxDesigns.com
FIRM RELIANCE ON DIVINE PROVIDENCE!

BEYOND THE GARDEN DESIGNER SERIES PAPER PURSE

SU Paisley Petals Purse and Greeting Cards

My friends, I have another Stampin’ Up! Paisley Petals Purse and Greeting Cards personally-designed for you.  I am so enjoying my new line of creations using the Paisley Petals Designer Series Paper (DSP).  It has been great fun creating purses lately.  Today I’ll discuss the purse and show closeups of it, and the rest of the week I’ll discuss the greeting cards.

This purse measures 8″ x 7-1/2″ x 1″, and it easily holds the three matching cards.  Actually, it will hold at least five, depending upon the embellishments added to the cards.

The handle of the purse was made by braiding two strands of Baja Breeze Seam Binding and one strand of Very Vanilla Seam Binding.  The purse front is made with Baja Breeze Card Stock, Paisley Petals DSP, and Baja Breeze DSP Patterns (unavailable).  The center piece of the purse is embellished with three Baja Breeze Vintage Flowers and several Basic Pearls Jewel Accents.


On the side of the purse are a Trinket Key and Vanilla Pearl Simply Adorned Bauble that are attached with Baja Breeze Seam Binding and part of the handle that was made with one of the Lots of Tags Stampin’ Up! Sizzlits.

The last picture shows the inside of the purse that is designed with the reverse side of the Baja Breeze DSP Patterns that is on the front and sides of the purse.  I hope you’ve enjoyed my personally-designed purse!

I am looking forward to my next purse design!
 If you would like to purchase any Stampin’ Up! Products, click HERE.
 TODAY AND TOMORROW ARE THE LAST TWO DAYS OF SALE-A-BRATION!
God’s Blessings!
Guneaux Designs by Beverly Polen
Stampin’ Up! Demonstrator in Florida
FIRM RELIANCE ON DIVINE PROVIDENCE

Paisley Petals DSP Purse

I’m excited to share with you today my personally-designed Stampin’ Up! Paisley Petals DSP Purse.  As I said yesterday, I’m so in love with the Stampin’ Up! Paisley Petals Designer Series Paper that becomes available April 1-30, and then again with the rollout of the big summer catalog.
I personally designed the pattern for this purse, and I am very happy with the design.  I hope you like it too.

Front of the Paisley Petals DSP Purse

Paisley Petals DSP Purse
SEE ALL THE WONDERFUL COMMENTS REGARDING THIS PAPER PURSE BY RIGHT CLICKING ON THE TITLE OF THIS POST.  THE COMMENTS ARE AT THE BOTTOM OF THE PAGE.

 Back of Paisley Petals DSP Purse

Paisley Petals DSP Purse

Side of Paisley Petals DSP Purse

Paisley Petals Purse

Close Up of Paisley Petals DSP Purse Front

Paisley Petals DSP Purse

I decorated the purse’s closure with one of the elegant Trinket Crowns (love the crowns). I hand stitched around the closure piece and added Velcro for the fastener. I would love to know what you think of it, so please leave a comment. Thanks!

Come back tomorrow for more Paisley Petals paper crafts!
God’s Blessings!
Guneaux Designs by Beverly Polen
Stampin Up Demonstrator in Florida
FIRM RELIANCE ON DIVINE PROVIDENCE!

Candy Cane Christmas Wreath

Here is a Candy Cane Christmas Wreath, which is my last creation using the beautiful Candy Cane Christmas Designer Series Paper (DSP).

Do you ever reach back to your teenage years and think of the art that you created then? No matter how simple it was, I still remember a piece of art that I created in my high school “shorthand” class. (Art and shorthand….[scratching head]…somehow they went together then – LOL.) Well, this Candy Cane Christmas Wreath is a re-creation of that piece of art that I created in high school. Wow! Such a long time ago, but pleasant memories!

Candy Cane Christmas Wreath
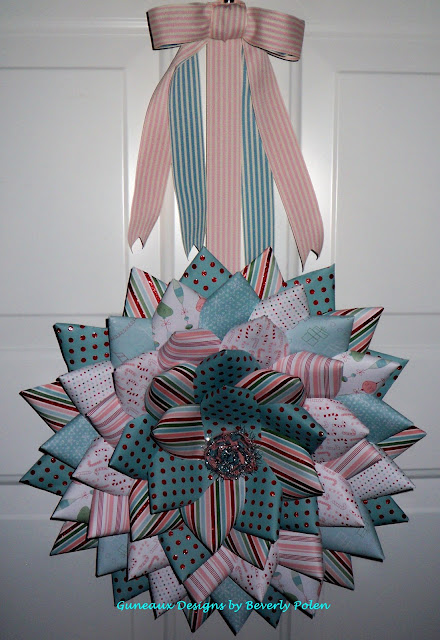
The Candy Cane Christmas Wreath looks more difficult to create than it is. I cut strips of the Candy Cane Christmas DSP at approximately 5″ x 2-3/4″, glued together one of the long ends on each strip (creating a triangle), and began developing the wreath by adhering the first row to the outer edge of a piece of cardboard in the shape of a 12″ circle. I repeated the pattern until I had adhered all of the pieces that I needed to fill in the wreath. I cut the paper strips to about 4″ for the last two rows. I think the Candy Cane Christmas DSP makes the Candy Cane Christmas Wreath beautiful! What do you think?
I used the fabulous Pretty in Pink and Marina Mist Stampin’ Up! 1-1/4″ Striped Grosgrain Ribbon to form a bow. I used a strip of the Pretty in Pink Stampin’ Up! 1-1/4″ Striped Grosgrain Ribbon to create my “hanger”, adhered it to the back of the wreath and attached the bow at the top. You must buy this ribbon if you haven’t already. It is super to work with and so beautiful. You will not be disappointed!
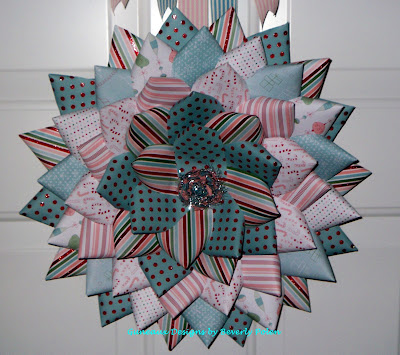
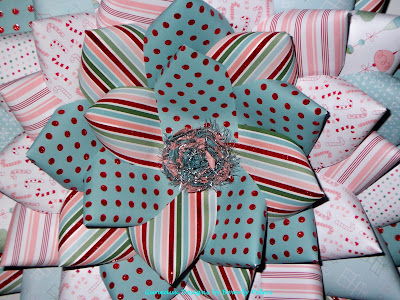
The center of the Candy Cane Christmas Wreath is an eight-layer flower that I created using the Stampin’ Up! Fancy Flower Punch. I wove Stampin’ Up! Silver Tinsel Trim within the flower to give it a little glitz.
Candy Cane Christmas Wreath

 This is a closeup of the center of the Candy Cane Christmas Wreath.

Candy Cane Christmas Wreath

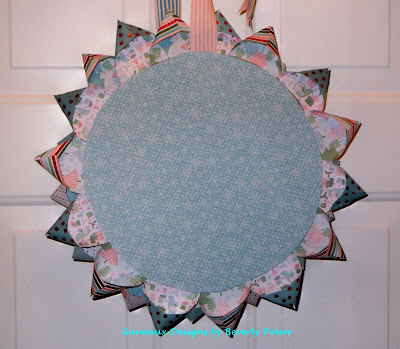
 This is the back side of the Candy Cane Christmas Wreath.


Candy Cane Christmas Wreath
Now it’s your turn. Make this easy wreath (using DSP of your choice) and send me pictures of your creation!  Don’t disappoint me! I want to see your creations; you still have time before Christmas arrives!
Jesus Christ is the reason for the Season!
Merry Christmas to All who believe in Him!

God’s Blessings!

Stamping With Guneaux Designs

by

Beverly Polen