
♥TUTORIAL FOR A POP UP VALENTINE♥
Hello, friends!! Today I have for you a tutorial for a pop up valentine. I made this valentine card in response to a Splitcoastampers’ challenge to create a pop up card. I rarely make such a card, and I had to do a lot of experimenting to make this one as I did not have, or could not find, a tutorial that I liked when making mine. I knew what I wanted to create, so I set out to accomplish a pop up card using Hero Arts Nesting Hearts Infinity Dies. Here is the front of my card.

John 17:22-23
Jesus Prays for All Believers: “I have given them the glory that you [God] gave me, that they may be one as we are one: I in them and you in me. May they be brought to complete unity to let the world know that you sent me and have loved them even as you have loved me.”
To create the card front, I die cut all of the hearts in the Hero Arts die set using pink pirouette and real red card stock from Stampin’ Up! I glued them to the card front according to size, alternating colors. Then I die cut the LOVE sentiment from Hero Arts Love Stamps and Silver Foil Card Stock and attached that to the center of the hearts. I used Hero Arts Sun Showers Cutting Dies to cut the miniature hearts from Silver Glimmer Paper and Real Red card stock. I attached them to the card front. To finish the sentiment, I used Hero Arts Love Stamps to stamp and emboss “YOU SO MUCH” at the bottom of the hearts.
The following photo is of the inside of the card that features a pop up valentine.

TUTORIAL FOR A POP UP VALENTINE (above picture)
♥ Cut a piece of card stock at an appropriate size to fit inside your card (size depends on the size of your card base). Score at the center line and fold.
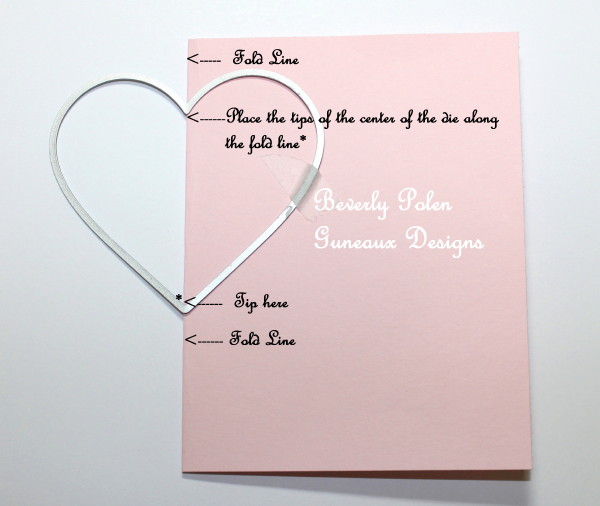
♥ Select two dies from the Hero Arts Nesting Hearts dies.

♥ Place the largest heart onto the card stock with the center of the heart at the fold line.
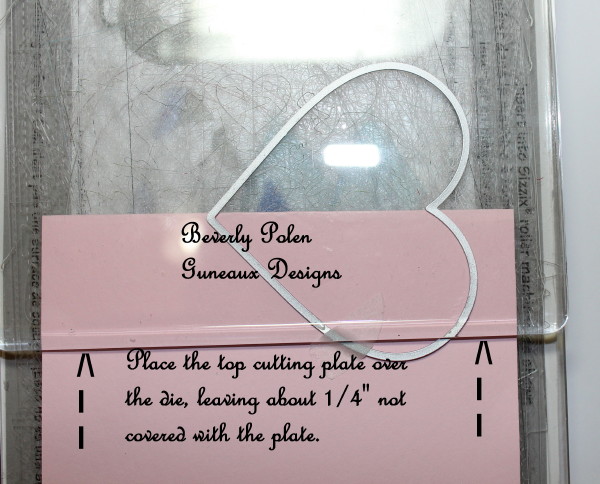
 ♥ Place the heart and card stock onto the first cutting board of the die cutting machine. Then place the second cutting board in the position as shown in the below picture (i.e. place the plate over the die and card stock, leaving approximately 1/4″ of the die uncovered by the plate).
♥ Run this through the die cutting machine. The photo below shows the results.
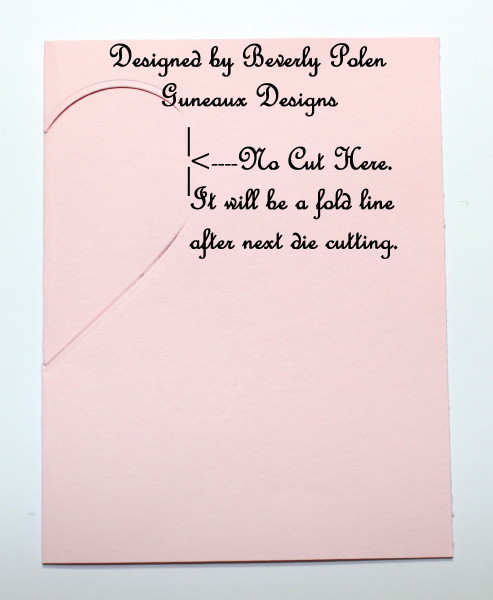
♥ Place the second heart die onto the card stock inside the first die cut.

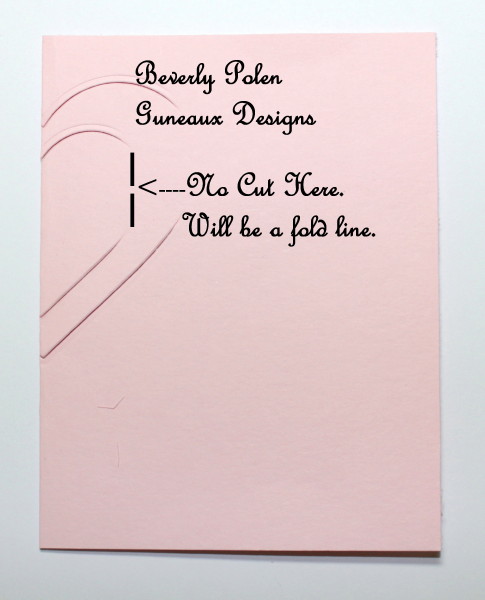
♥ Run this through the die cutting machine in the same manner that the first was placed and cut. The photo below shows the results.
♥ Open the card stock and fold along the fold lines as shown in the below picture. The first fold from the left is a valley fold, second a mountain fold, third a mountain fold, fourth a mountain fold, and fifth a valley fold.

♥ The following is a photo of the card looking downward.
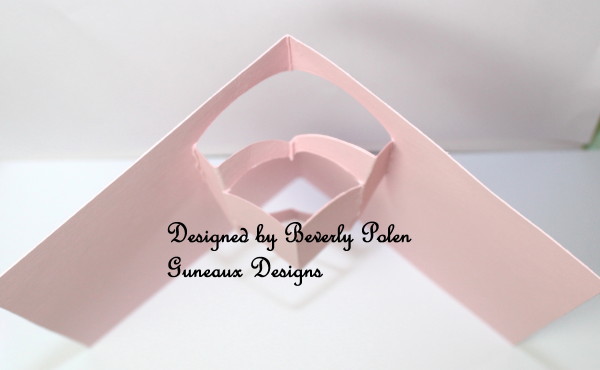
♥ Add adhesive to the left side and place it into the main card base and fold the card closed to adhere the two together.
♥ Repeat to adhere the two right sides together.
♥ Decorate the card inside to your desire.
If you have questions, please feel free to leave them in the comments section. Thank you for stopping by, and a special thanks to those who leave a comment.
Stamps: Hero Arts Love Stamps
Paper: Neenah Solar White, SU Pink Pirouette, SU Real Red, SU Silver Glimmer, SU Silver Foil
Ink: VersaMark Ink
Accessories: Die Cutting Machine, Hero Arts (HA) Nesting Hearts Dies, HA Love Die, HA Sun Showers Dies, Adhesive
 God’s Blessings!
Such beautiful layered hearts, Bev!!